MySql to jedna z najpopularniejszych baz danych.
Właśnie opublikowaliśmy kurs MySQL Database na kanale YouTube freeCodeCamp.org.
Bharath Ram Manoharan z Execute on Command stworzył ten kurs. Jest starszym inżynierem baz danych i świetnym nauczycielem.
Ten kurs rozpoczyna się od podstaw SQL. Następnie przechodzi również do kluczowych koncepcji baz danych, takich jak modelowanie danych, blokady, indeksy, wyjaśnianie SQL i inne.
Oto tematy poruszane w tym kursie:
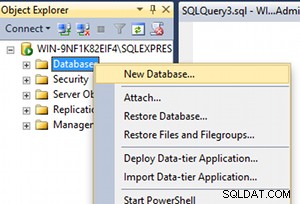
- Jak utworzyć instancję AWS EC2
- Jak zainstalować bazę danych MySQL
- Modelowanie danych
- Podstawy SQL — tworzenie tabeli
- Podstawy SQL — wstawianie danych
- Podstawy SQL — aktualizowanie i usuwanie danych
- Podstawy SQL - Odczyt danych (wyciągi Select)
- Połączenia SQL
- Poziomy izolacji transakcji
- Blokady poziomu stołu
- Blokady poziomu rzędu
- Zakleszczenia bazy danych
- Indeksy klastrowe
- Wyjaśnienie SQL
Obejrzyj pełny kurs poniżej lub na kanale YouTube freeCodeCamp.org (2 godziny oglądania).
Transkrypcja
(generowane automatycznie)
MySQL jest jedną z najpopularniejszych baz danych. Naucz się z niej korzystać podczas tego kursu od starszego inżyniera baz danych.
Witamy w tym podstawowym kursie MySQL, który chcę rozpocząć od docenienia Cię za próbę nauczenia się nowych umiejętności.
Pozwól, że się przedstawię.
Nazywam się Barbara i pracuję dla Salesforce jako starszy inżynier baz danych, mam ponad 12-letnie doświadczenie z różnymi bazami danych Oracle jako głównym, mam doświadczenie w pracy z firmami takimi jak Chase, PayPal, Wells, Fargo, StubHub, itp.
Pozwól, że najpierw odpowiem na kilka podstawowych pytań, czyli kto, co i dlaczego.
Więc kto powinien wziąć udział w tym kursie, ten kurs jest przeznaczony dla specjalistów od baz danych, którzy chcą poszerzyć swój zestaw umiejętności.
Jeśli jesteś inżynierem oprogramowania lub programistą full stack i chcesz uzyskać dogłębne zrozumienie bazy danych MySQL, ten kurs jest dla Ciebie.
A jeśli jesteś studentem, studentem informatyki lub świeżo upieczonym absolwentem, ten kurs da ci trochę wiedzy na temat wewnętrznych baz danych.
Po co więc uczyć się MySQL, MySQL to najpopularniejsza baza danych typu open source i oczywiście Postgres.
SQL na pewno tam jest.
Gdy firmy przenoszą swoje dane z lokalizacji lokalnej do chmury, zazwyczaj lubią migrować do natywnej bazy danych w chmurze lub bazy danych typu open source, takiej jak MySQL lub sequel Postgres, aby zaoszczędzić koszty.
Załóżmy więc, że jesteś ekspertem Oracle Database.
Jeśli zdobędziesz wiedzę na temat bazy danych takiej jak MySQL, możesz pomóc firmom w migracji ich danych z Oracle do MySQL, a to może być naprawdę cenne.
Przyjrzyjmy się teraz, co jest omawiane w tym kursie.
Teraz, po pierwsze, przez MySQL mam na myśli silnik pamięci masowej MySQL InnoDB w tym kursie, który jest używany za każdą witryną handlową, bankiem lub instytucją finansową i tak dalej.
MySQL oferuje różne silniki pamięci masowej, mój I Sam, w silniku pamięci masowej lub niektóre popularne silniki pamięci masowej, które są dostępne, dowiemy się o MySQL InnoDB, nie omawiam żadnego innego typu silników pamięci masowej.
Oto tematy, które zamierzam poruszyć w tym kursie.
Pamiętaj, że jest to kurs administrowania bazami danych.
Więc jest to 80% administracji bazami danych.
A dla osób, które są zupełnie nowe w bazach danych, zamieściłem podstawy SQL.
Dowiesz się więc o instalacji bazy danych, MySQL Workbench, indeksach baz danych, dziennikach baz danych, a także nauczysz się trochę dostrajania wydajności, czyli wyjaśniania SQL.
Oto kilka interesujących tematów, które zamierzam poruszyć.
Więc czego dokładnie potrzebujesz, aby rozpocząć ten kurs, potrzebujesz komputera PC lub Mac.
Więc jeśli używasz komputera, radzę zajrzeć do arkuszy roboczych lub materiałów uzupełniających, które są dołączone do opisu.
Jeśli masz laptopa Mac, jesteś w najlepszej sytuacji, aby nauczyć się tego kursu.
Ponieważ wtedy możesz po prostu zobaczyć, co piszę.
Możesz po prostu wpisać te same polecenia i po prostu podążać za nimi od końca do końca.
A przede wszystkim jest to główny wymóg, chcę, abyś utworzył konto AWS, które jest poprawne i zadziwiające na koncie Web Services.
Więc jeśli nie wiesz o czym mówię to zajrzyj do mojego arkusza roboczego, który znajduje się w opisie, załączam kilka zasobów, które pokażą Ci jak założyć konto AWS, z którego będę korzystał AWS EC dwie instancje w trakcie kursu.
Pokażę ci, jak je stworzyć.
Ale jedną główną rzeczą, o której chcę, abyś pamiętał, jest to, że po każdej sesji badawczej możesz wyłączyć dwie instancje EC.
W ten sposób nie musisz ponosić żadnych niepotrzebnych kosztów.
I pamiętaj, że nie musisz utrzymywać swojej EC 2 działającej 24 godziny na dobę.
Więc po utworzeniu konta AWS i zalogowaniu się, wylądujesz na tym panelu lub na tej stronie.
I możesz przejść do menu usług właśnie tutaj.
A następnie w obszarze obliczeń możesz wybrać łatwe, więc tutaj po lewej stronie możesz wybrać instancje.
A potem tutaj utworzymy instancję, która będzie naszym środowiskiem laboratoryjnym.
Więc kliknij na uruchomienie instancji.
A potem wybierzmy obraz dla naszego przykładu.
Więc wybiorę Red Hat Enterprise Linux w wersji 864-bitowej, a mój typ instancji to T two micro, który kwalifikuje się do darmowego poziomu.
Musisz wybrać odpowiednią podsieć.
Jeśli właśnie utworzyłeś konto AWS, możesz po prostu odejść.
Pozostaw dowolną podsieć domyślną, która się dla Ciebie wyświetla.
Dla mnie wybiorę mnie Bądź konkretny.
A następnie upewnij się, że włączyłeś opcję automatycznego przypisywania publicznego adresu IP.
Ponieważ spowoduje to przypisanie publicznego adresu IP do Twojej instancji, za pomocą którego możesz SSH do swojej instancji, z laptopa i pozostawić wszystkie inne ustawienia bez zmian.
I przydzielmy jak 25 gigabajtów na bazę danych lub na całą instancję.
I możesz po prostu zostawić resztę ISIS, przejść do przeczytanej następnej strony, możesz utworzyć tag dla swojej instancji.
Nazwę to więc moją instancją SQL.
Po pierwsze, przejdź do strony grupy bezpieczeństwa.
I tutaj ważne jest to, że musisz mieć możliwość SSH do instancji.
I musisz, musisz stworzyć odpowiednie reguły zapory, aby każdy, w zasadzie każdy na świecie, mógł zalogować się do tej instancji przez Port 22.
A to wcale nie jest bezpieczne.
I zajmę się tą instancją.
Ponieważ po zakończeniu nagrywania zwykle go usuwam.
Więc wiem, jak sobie z tym poradzić.
Ale kiedy tworzysz reguły, pamiętaj, aby umieścić tam adres IP laptopa, aby był bezpieczniejszy, teraz możesz sprawdzić konfigurację, a następnie kliknąć uruchom.
Ale jeśli chcesz, możesz utworzyć nową parę kluczy, a następnie po prostu nadać jej nazwę.
A następnie pobierz go, zanim utworzysz instancję.
Dla mnie wybiorę tylko istniejącą parę kluczy.
Może ten, a mówię wiedza, może inny.
W porządku, ten.
I uruchom instancję.
Teraz Twoja instancja jest tworzona, prawdopodobnie utworzenie tej instancji zajmie kilka minut.
OK, tak tworzysz instancję EC two.
A teraz, gdy moja instancja działa i widzę publiczny adres IP.
Później zainstaluję MySQL na tej instancji.
Właśnie to chciałem pokazać w tej lekcji.
Więc to, co widzisz, to w zasadzie moja dokumentacja dotycząca kontynuacji, pokazująca wszystkie te różne przewodniki instalacji, takie jak Windows i Mac i tak dalej.
Więc jesteśmy zainteresowani instalacją Linuksa, to w zasadzie instalacja MySQL na Linuksie.
Właściwie jest kilka przewodników.
Więc ten w zasadzie instaluje plik binarny jannettek, pominiemy to i przejdziemy tutaj.
A nawet podczas instalacji MySQL w Linuksie jest mnóstwo przewodników.
Dlatego zalecaną metodą instalacji jest użycie pakietów RPM firmy Oracle.
Ale zamierzamy użyć tej instalacji opartej na repozytorium MySQL yum.
I jest to całkiem proste.
Więc do tej instalacji musimy przejść do komunikacji MySQL i pobrać.
Pobieramy wersję Community i przechodzimy do repozytorium yum.
Jak wiecie, na utworzonej przez nas instancji działają Archie l 8, Red Hat, Enterprise Linux 8.
Dlatego musimy pobrać ten rpm.
Ale potem musimy pobrać RPM na samą instancję, tę, którą utworzyliśmy.
Zalogujmy się więc do instancji.
Więc zamierzam użyć SSH i użyjemy mojego klucza prywatnego.
Logowanie jest łatwe dla użytkownika, wybierz domyślnego użytkownika i po prostu uzyskaj publiczny adres IP mojego logowania do instancji, a my przełączymy się na root, dobrze.
Tak więc jedną rzeczą, której potrzebujemy do pobrania tego RPM na tę instancję Linuksa, jest pakiet W get.
Więc zainstalujmy to najpierw.
W porządku, więc teraz, gdy bramka w jest zainstalowana, musimy pobrać RPM, który właśnie widzieliśmy.
Aby uzyskać link do tego RPM, musimy przejść do tego pobierania.
I musimy kliknąć tutaj prawym przyciskiem myszy i skopiować link.
A jeśli instalujesz na innym OSS, musisz kliknąć odpowiedni przycisk.
OK, więc mamy link, i po prostu wklejmy go tutaj, tak jak my get i link.
I to polecenie pobiera ten pakiet, teraz użyjemy polecenia RPM, aby zainstalować ten pakiet.
Tak więc ten pakiet, jak wspomniałem wcześniej, doda to repozytorium MySQL yum do listy repozytoriów systemu lokalnego.
Wraz z instalacją Red Hat Enterprise Linux domyślnie stajesz się jak moduł MySQL.
Więc wyłączmy to.
Jeśli go nie wyłączysz, zakłóci to instalację MySQL.
Więc chodźmy dalej i wyłączmy to za pomocą tego polecenia.
I nie martw się pisaniem tych poleceń, umieszczę link do mojego repozytorium Git ze wszystkimi tymi komentarzami w opisie.
Więc wszystko to zostało wyłączone.
Teraz zainstalujmy MySQL Community Server Edition używając yum install MySQL community server.
I umieśćmy tam minus y, aby kontynuować i zaakceptować wszystkie monity.
I to jest instalacja wszystkich tych pakietów.
W porządku, więc mój SQL został zainstalowany.
Przejdźmy dalej i uruchom bazę danych MySQL za pomocą systemowego CTL.
Polecenie.
Sprawdźmy status.
Więc teraz moja baza danych SQL działa.
OK, więc plik dziennika tego oprogramowania bazy danych MySQL znajduje się w dzienniku var.
A potem, jeśli zdobędziesz temp z tego pliku dziennika, otrzymasz tymczasowe hasło dla użytkownika root.
Możesz go użyć do zalogowania się do bazy danych MySQL.
A jak się zalogować, użyj tego polecenia my sequel minus u, to będzie root, a minus P to logowanie oparte na haśle.
A potem logujemy się do bazy danych MySQL.
Użyjmy więc tego hasła i zobaczmy, czy się loguje.
I jesteśmy w środku.
A jeśli w tym momencie uruchomisz jakiekolwiek polecenie, moja kontynuacja poprosi Cię o zresetowanie hasła za pomocą instrukcji alter user.
Możemy to zrobić w inny sposób.
Jest więc plik wykonywalny o nazwie admin MySQL.
I to jest odpowiednie polecenie.
Administrator MySQL, bez nazwy użytkownika i bez hasła p.
Zamierzamy zresetować hasło użytkownika root.
Najpierw podajmy aktualne hasło, które jest tym tymczasowym hasłem.
I podajmy nowe hasło nr.
W porządku, hasło zostało zaakceptowane.
Teraz spróbuję zalogować się przy użyciu tego nowego hasła, używając poprzedniego polecenia:mój SQL minus u udowodniony i minus p MySQL.
Pozwól, że wprowadzę hasło, które powiedziałem przed chwilą.
Przejdźmy więc dalej i uruchom proste polecenie show databases, które pokazuje wszystkie domyślne bazy danych, które są częścią instalacji.
Więc jeszcze jedną rzeczą, którą musimy zrobić, aby zakończyć instalację, jest załadowanie pliku strefy czasowej lub tabeli stref czasowych, jak pokazano tutaj.
Więc jeśli zrobię gwiazdkę wyboru, która jest w zasadzie zapytaniem SQL do odczytania z tej tabeli, widać, że tabela jest teraz pusta.
Wyjdźmy więc i uruchom kolejne polecenie.
Aby załadować dane związane ze strefą czasową.
Więc to jest polecenie.
I chodźmy dalej i uruchom go.
I zamierzam wprowadzić moje hasło, a to ładuje mnóstwo danych, możesz zignorować wszystkie te ostrzeżenia.
Wróćmy do naszej bazy danych MySQL.
Więc jeśli zrobisz jako select star, ze strefy czasowej MySQL dot, ponownie, pokaże mnóstwo danych.
Więc teraz jesteś dobry.
I to kończy instalację bazy danych MySQL.
W porządku, w tej sekcji omówimy modelowanie danych.
Okej, więc projektowanie bazy danych, modelowanie danych, projektowanie schematów, to wszystko są wymienne słowa, terminy projektowania bazy danych to ciągły proces.
Więc wymyślasz podstawowy projekt, kiedy tworzysz swoją aplikację.
A potem, jak wiesz, aplikacja otrzymuje nowe funkcje, ulepszenia, ulepszenia, w zasadzie iterujesz ten projekt, tak, dodajesz nowe rzeczy do swojego projektu i tak dalej.
Więc pierwszą rzeczą, którą robisz podczas projektowania bazy danych lub modelowania danych, jest zrozumienie danych biznesowych.
A kiedy już zrozumiesz dane biznesowe, musisz wymyślić logiczny projekt swojej bazy danych.
Co mam przez to na myśli? Cóż, w zasadzie, musisz zaprojektować swoje tabele, kolumny, które trafiają do tych tabel, indeksy, ograniczenia, takie jak ograniczenie klucza głównego, ograniczenie unikatowego klucza, ograniczenia niezerowe, wartości domyślne, klucze obce, to wszystko są różne rzeczy, które trzeba stworzyć.
Kiedy wymyślasz logiczny projekt swojego schematu, kiedy już masz ten podstawowy projekt tabeli lub projekt schematu, możesz poszukać nadmiarowości danych, czyli po prostu zobaczyć, gdzie twoje dane się powtarzają.
A potem zaczynasz go eliminować, właściwie normalizując swoje tabele.
A to dlatego, że nadmiarowość danych powoduje anomalie danych.
Mam na myśli to, że kiedy masz wiele wystąpień tych samych danych, kiedy, powiedzmy, aktualizujesz pewne dane, musisz zaktualizować je w wielu miejscach.
A jeśli zapomnisz zaktualizować choćby jedno miejsce, teraz masz w bazie danych dwie wersje tych samych danych.
A to powoduje, że niespójność danych jest taka sama.
A wszystko to dzieje się dzięki nadmiarowości danych.
Więc to, na co patrzymy, to w zasadzie arkusz kalkulacyjny, a arkusz kalkulacyjny to w zasadzie ogromny stół, który jest dużym stołem, prawda? I to, co zamierzamy zrobić, to w zasadzie zaprojektować tabelę dla witryny e-commerce, witryna e-commerce jest w zasadzie niesamowitą strefą, lub E Bay, lub cokolwiek, jak biznes online, jak witryna e-commerce online, jak Alibaba , czy cokolwiek, prawda? Powiedzmy, że masz tylko jedną tabelę w tej bazie danych, prawda? I zaczynasz, kiedy przychodzą zamówienia, przez tę stronę, zaczynasz umieszczać dane w tej tabeli, prawda? No wiesz, spójrzmy na niektóre rzeczy, które zapiszesz w tej tabeli, prawda, oczywiście potrzebujesz liczby swoich zamówień.
Więc może chcesz ponumerować swoje zamówienia, a potem jak to idzie, wiesz, czy to komputer stacjonarny czy mobilny? Albo jaki to produkt? No wiesz, mam tutaj kilka książek, tytuły książek, a potem ceny produktów.
A następnie kim są dane klientów klienta, szczegóły płatności, szczegóły dostawy i tak dalej.
Więc to wszystko jest w zasadzie częścią słowa e-commerce.
Dobrze? I masz jeden wielki stół.
A jeśli spojrzysz na dane tutaj, prawda? Więc wiesz, tutaj mam jak kilku klientów kupujących wiesz, coś w rodzaju dwóch różnych produktów, prawda.
Tak więc widać, że dane były powtarzalne.
Mam na myśli to, że za każdym razem, gdy kupuję ten sam produkt, muszę powtarzać te dane, tak jak pierwsze zamówienie, które przyszło przez witrynę internetową na komputery, które zostało przyniesione przez narodziny, a następnie możesz zobaczyć wszystkie szczegóły tego klient i wszystkie szczegóły dotyczące produktu i płatności, a także szczegóły płatności.
Potem drugie zamówienie, które przyszło, pochodziło od innej osoby, ale wtedy było, wiesz, zamówienie dotyczyło tego samego produktu i trzeba było powtórzyć informacje o produkcie.
Dobrze.
Trzeci był od poprzedniego klienta.
Ale tym razem kupił inny produkt, jego informacje, informacje o kliencie faktycznie się powtórzyły.
Tak więc istnieje wiele danych dotyczących nadmiarowości danych, które się powtarzają.
Jest to więc w zasadzie zdenormalizowana baza danych, w której masz tylko jedną tabelę lub kilka tabel, wszystkie informacje z Twojej witryny lub firmy umieszczamy w tych kilku tabelach.
Właściwie jest to zdenormalizowana wersja Twojej bazy danych, zobaczmy, co jeszcze możesz zrobić.
Więc możesz zacząć od tej podstawowej tabeli denormalizacji, a następnie możesz zacząć usuwać wszystkie nadmiarowe informacje z bazy danych lub akcji tabeli. Pierwszą rzeczą, którą zrobiłem, było usunięcie informacji o kliencie , umieścili to w osobnej tabeli, tak.
A tutaj mam tylko dane klienta.
Zacząłem umieszczać numer identyfikacyjny dla każdego identyfikatora klienta lub numeru klienta, jakkolwiek to nazwiesz.
Kiedy wyjmę informacje o kliencie, mam tabelę Zamówienia, początkową tabelę, nazywam tabelę Zamówienia, która wygląda teraz tak, prawda? I widać, że mam tutaj kolumnę z identyfikatorem klienta.
A co to za kolumna ID klienta? Twoje domysły? Dobrze? Tak więc ta kolumna identyfikatora klienta jest taka sama jak ta, którą widzisz tutaj.
Dobrze? Więc i dlaczego to mam, ponieważ potrzebuję sposobu na powiązanie tych wierszy.
Jak możesz powiedzieć, wiesz, to są kolumny, to są wiersze, te wiersze, muszę być w stanie odnieść się do klienta, prawda? Jeśli usunę informacje o kliencie, w jaki sposób mogę się odnieść? Wiesz, ten stół i tamten stół? Przechodzi przez wspólną kolumnę lub kilka kolumn.
Właściwie w tym przypadku jest to tylko jedna kolumna.
Więc identyfikator klienta, prawda? Po prostu umieszczam tutaj numer identyfikacyjny.
I co jeszcze możemy wyciągnąć z tego stołu.
To jest jeden poziom normalizacji.
Dobrze? Więc kontynuujmy normalizację, co jest jak usuwanie szczegółów produktu.
Dobrze? Tak więc szczegóły produktu również się powtarzają.
Więc tutaj nie czujesz tak wiele bólu, ponieważ w tej tabeli są tylko trzy rekordy.
A co, jeśli tabela ma milion rekordów, prawda? Dlatego musimy znormalizować tabelę.
Teraz wyjmujesz informacje o produkcie i przenosisz je do innej tabeli.
A potem mam kolumnę identyfikatora produktu tylko do ponumerowania, na przykład identyfikator produktów, a twoja tabela Zamówienia będzie wyglądać tak, a następnie przeniesiesz informacje o płatności do innej tabeli.
Twoja tabela Zamówienia będzie wtedy wyglądać tak.
Jest to w zasadzie proces przechodzenia ze zdenormalizowanego schematu lub bazy danych do znormalizowanej bazy danych.
Kiedy masz swoje dane w jednej tabeli, nie musisz robić żadnych połączeń.
Więc możesz zapytać, czym właściwie są połączenia, kiedy wykonujesz zapytania, takie jak używanie SQL, SQL jest językiem, prawda? Strukturalny język zapytań, kiedy uruchamiasz polecenia w swojej bazie danych, możesz uzyskać wszystkie dane z tej jednej tabeli, jeśli baza danych tabeli jest całkowicie zdenormalizowana.
Natomiast jeśli masz wiele stołów, musisz połączyć lub dołączyć do stajni, a następnie musisz wydobyć dane.
Nazywa się to dołączaniem do stołów.
Więc kiedy masz denormalizowaną bazę danych, nie musisz robić wielu połączeń.
I w pewnym sensie jest to dobre, ponieważ Twoja baza danych nie musi tak dużo myśleć, aby uzyskać dane.
Mówisz, że chcę te dane, a te dane są dostępne w tej tabeli.
Więc to jest po prostu bardzo proste.
Podczas gdy jak w znormalizowanej bazie danych, kiedy łączysz wiele tabel, wtedy twój silnik bazy danych, z którym wywołują optymalizator, w Oracle lub na większości taśm, większość baz danych.
Więc ten silnik bazy danych musi myśleć bardziej jak wtedy, w porządku, którą tabelę powinienem najpierw przeskanować? I jak powinienem filtrować dane w tej tabeli.
A potem OK, biorę zestaw wyników z tego stołu i muszę dołączyć do tych innych tabel.
Więc jest o wiele więcej myślenia, o wiele więcej przetwarzania musi się odbywać na dowolnym serwerze, na którym działa ta baza danych.
Dobrze.
Z tego powodu wydajność będzie dość elastyczna.
Na dole po prawej, a to zużyje dużo zasobów, a wszystko to dzieje się na dużą skalę, ponieważ wiele operacji dzieje się w tym samym czasie, wtedy zasadniczo masz niską wydajność lub przynajmniej niższą niż byłaby w denormalizować bazę danych, ale jednocześnie usuwamy tak wiele powtórzeń danych lub redundancja danych jest bardzo niska, przez co pamięć potrzebna w znormalizowanej bazie danych jest znacznie mniejsza.
Tak więc nie można tak naprawdę lubić uogólniać i mówić, że znormalizowana baza danych będzie zawsze wolna, a denormalizacja bazy danych będzie szybka, to wszystko zależy od tego, czy faktycznie musisz spojrzeć na dane i zobaczyć, ile powtórzeń się dzieje, itd., itd.
Więc, ale generalnie tak to wygląda, kiedy przechodzisz przez ten proces projektowania, no wiesz, zobacz, co właściwie zrobiliśmy, prawda.
Tak więc zdecydowaliśmy, które tabele są nam potrzebne, tak jak wiesz, mamy zamówienia, produkty tabelowe mają klientów i płatności, a my decydujemy o nazwach kolumn.
I to nie tylko dla każdej tabeli, musisz zdecydować, jaki będzie klucz podstawowy.
To, co mam na myśli jako klucz podstawowy, to unikalny klucz, który w rzeczywistości nie może być pusty, co jest bardzo ważne.
Używając tego klucza podstawowego, powinieneś być w stanie zidentyfikować dowolny rekord w tej tabeli, dowolny wiersz w tej tabeli.
Na przykład, jeśli powiem tutaj, kluczem podstawowym jest numer zamówienia, wtedy mogę, w każdej chwili, jeśli mam numer zamówienia, mogę sprawdzić tę tabelę, powiedzmy, że numer zamówienia jest równy dwa, mogę po prostu wyciągnąć ten rekord z moja baza danych.
A potem musisz mieć też jakieś unikalne klucze, prawda.
Unikalne klucze są więc prawie jak klucz podstawowy.
Unikalny klucz może być teraz kluczem podstawowym, który nie może być pusty, jak wspomniałem.
I wtedy możesz również mieć indeksy na swoim stole.
Indeksy są więc sposobem na szybsze wybieranie danych dziennych.
Powiedzmy, że często przeszukuję tę tabelę na podstawie adresu e-mail klienta, a potem potrzebuję indeksu w kolumnie e-mail klienta, tak, musisz to zdecydować.
Musisz zdecydować, które kolumny mogą być puste.
Dobrze? Tutaj żadna z kolumn nie może być pusta.
Załóżmy, że masz inną kolumnę o nazwie preferencje i preferencje klienta dotyczące rodzaju wysyłki, rodzaju lub preferowanego numeru telefonu lub coś w tym rodzaju.
Więc to może być pusta kolumna, prawda? Więc nie możesz mieć żadnych kolumn.
W przeciwnym razie zdefiniujesz swoje kolumny jako nie zerowe.
Załóżmy, że w tabeli Zamówienia masz tę kolumnę z dostawą, gdy zamówienie jest zasadniczo tworzone, gdy klient kupuje produkt w Twojej witrynie.
Oczywiście nie jest ona dostarczana od razu, w momencie tworzenia zamówienia dostarczona kolumna zawsze będzie miała wartość zero lub n, n, prawda? Wszystkie te rzeczy, wszystkie te decyzje, o których mówimy, są częścią projektu schematu.
A kiedy już to wszystko rozwiążesz, możesz umieścić informacje w swoim narzędziu projektowym, narzędziu do projektowania relacji z jednostkami.
A w następnej sekcji pokażę ci, jak to robię w sequel workbench, moim sequel world workbench, w zasadzie możesz wtedy mieć graficzną reprezentację twojego logicznego projektu twojej bazy danych, tak.
I to jest w zasadzie to, co nazywasz diagramem ER.
I oczywiście możesz porozmawiać o relacji między dwoma tabelami, powiedzmy, że możesz powiedzieć, że ta tabela w tej tabeli ma związek jeden do wielu, na przykład każdy klient może złożyć wiele zamówień.
Więc to właściwie jest relacja jeden do wielu, prawda.
Ale jedno, wiesz, jedno zamówienie może wykonać tylko jeden klient.
Dobrze? A więc takie rzeczy.
Masz więc relację jeden do jednego, relację jeden do wielu lub relację wiele do wielu między tabelami.
Właściwie to wszystko jest częścią modelowania danych.
Ale nie musisz się tym tak bardzo martwić, o ile masz jasne pojęcie o tym, jakie dane trafiają do Twojej bazy danych.
A po drodze musisz zdefiniować typ danych swoich kolumn.
Właściwie to bardzo ważne.
Twoje imiona będą dzikimi znakami.
Wiesz, numery telefonów mogą być numerami, a poczta e-mail jest znowu jak wykres zegarka.
A twoja kolumna identyfikatora lub kolumny liczbowe będą miały wartość int lub number.
To wszystko są niektóre decyzje, które byś podjął w zadaniu modelowania danych, właściwie to właśnie chcę powiedzieć o modelowaniu danych, a potem możemy o tym opowiedzieć o wiele więcej.
I podobnie jak atomowość, tak jak ty, masz cały adres, coś w rodzaju atrybutów upakowanych w jednej kolumnie, my, musimy to również podzielić.
Nazywa się to atomowością.
Możesz mieć adres osobno, miasto osobno, stany osobno i, wiesz, kod pocztowy osobno, tak.
Więc tego rodzaju rzeczy, są niuanse, które sprawiają, że Twoja baza danych jest coraz bardziej wydajna.
I oczywiście nie będziemy tam wchodzić w wiele szczegółów.
Ale to jest podstawowe modelowanie danych, które musisz zrozumieć.
I jak powiedziałem wcześniej, w następnej sekcji pokażę ci, jak to zrobić, a następnie wprowadzić to w moim sequel workbench.
szybkie podsumowanie tego, co zrobiłem w ostatniej sekcji, zasadniczo stworzyłem logiczny projekt witryny e-commerce.
Więc to, na co patrzysz, to stół, od którego zacząłem.
Jest to tabela denormalizacji i w zasadzie wzięliśmy tę zdenormalizowaną tabelę i znormalizowaliśmy ją.
Jak widać, istnieją cztery wersje tej tabeli, nazywam ją tabelą Zamówienia.
Istnieją więc cztery różne wersje.
I z każdą iteracją usuwałem powtarzające się dane.
W końcu wylądowaliśmy z czterema stołami, oprócz oryginalnej tabeli Zamówienia.
Więc teraz mamy również produkty klientów i płatności.
W tym filmie zajmę się teraz wszystkimi stajniami, a potem zabiorę się za strukturę i stworzę logiczny projekt.
OK, więc przejdźmy do MySQL Workbench i jestem już podłączony do bazy danych, zamierzam przejść do Pliku i przejść do nowych modeli.
więc tutaj możemy dodać nowy diagram ER, diagram relacji encji.
I nazwijmy tę bazę danych eecom.
Sklep, coś takiego.
Więc śmiało zacznijmy tworzyć nasze stoły.
Teraz nie zamierzam tworzyć wszystkich czterech stołów, które zajęłyby prawdopodobnie więcej czasu lub więcej czasu, a zamierzam stworzyć kilka stołów.
I to powinno wystarczyć, aby zrozumieć, jak to robimy.
Zacznijmy więc od tabeli Klienci.
Tak więc tabela klienta ma pięć kolumn, to jest ikona do tworzenia nowej tabeli, możesz przeciągnąć i upuścić lub spróbować narysować teraz dwukrotnie, a następnie utworzyć tabelę o nazwie klient i tutaj możemy zacząć umieszczać w tabeli kolumnę nazywa identyfikator klienta, a następnie zostanie on wypełniony przez twoją sekwencję.
Tak więc sekwencja jest obiektem bazy danych.
I będzie to liczba całkowita.
Więc możemy zostawić to tak, jak jest.
I możemy mieć go jako klucz podstawowy, to w porządku, a klucz podstawowy musi być wypełniony, teraz nie może być.
To jest wybierane automatycznie.
Kolejna to nazwa klienta, możemy podzielić to na imię, a potem możemy wybrać oglądaj nasze i może dać trochę więcej miejsca, jak w długości imienia i nazwiska, mogę obejrzeć 100, a potem wszystkie te nie może być teraz, więc możemy wybrać ograniczenie nie zerowe.
Są to więc różne dostępne ograniczenia.
Przejdźmy do następnego adresu ponownie.
A jeśli pamiętasz, mówiłem o atomizacji.
Więc chcesz, aby Twoje kolumny były atomowe, w tym sensie, że tutaj w zasadzie cały adres jest upakowany w jednej kolumnie.
dobrą praktyką jest dzielenie tego na niepodzielne kolumny jako adres osobno, miasto osobno podawaj osobno, a następnie osobno kod pocztowy.
Więc mamy to wszystko, oczywiście, żaden z nich nie może być teraz i co tam jeszcze jest? Więc numer telefonu klienta, numer telefonu to wszystkie numery.
Ale potem chcę uzyskać 10 numerów, oczywiście nie null, i adres e-mail klienta.
Więc mogę po prostu powiedzieć, że identyfikator e-mail 100 OK, nie null.
Tak więc, ponieważ Id jest tutaj kluczem podstawowym lub identyfikatorem klienta, chcę się upewnić, że mamy ograniczenie, aby uniknąć powtarzania informacji o kliencie.
Na przykład, jeśli masz dane jednego klienta dla pierwszego identyfikatora, nie chcę, aby ten sam klient, dane klientów powtarzały się dla innego identyfikatora, na przykład identyfikator drugi.
Więc zamierzam stworzyć unikalny identyfikator e-mail dla każdego rekordu tutaj.
A potem może lub może być również numerem telefonu.
Więc to wszystko są unikalne kluczowe ograniczenia lub unikalne ograniczenia.
To wszystko.
Utworzyliśmy więc tabelę Klienci.
Wróćmy więc i zobaczmy, co jeszcze mamy.
Więc stwórzmy teraz, powiedziałbym produkt.
A potem w zasadzie robisz to samo, wybierz to, aby utworzyć nową tabelę.
A teraz tutaj, możesz po prostu narysować ten, mam zamiar nazwać go produktem.
I chcemy przejść przez ten sam proces, a następnie umieścić tam nazwy kolumn produktów.
Jeśli się zastanawiasz, jest to ta sama kolumna identyfikatora klienta, którą dodaliśmy tutaj.
Za chwilę uczynimy z tego klucz obcy.
Więc przejdźmy dalej i podzielmy to na wiele kolumn.
Ponieważ znowu wszystko jest zapakowane w jedną kolumnę, co nie jest dobrą praktyką.
Powiedzmy, że nazwijmy to numerem karty kredytowej.
Jeśli klient korzysta z PayPal, potrzebujemy tego e-maila.
Więc możesz użyć identyfikatora e-mail tutaj.
Może to być null lub nie null w zależności od używanego typu płatności.
W porządku, więc data ważności będzie kolumną daty.
Więc zmieńmy to.
Więc jeśli nie masz pewności, możesz kliknąć to menu, a następnie wybrać odpowiedni typ danych dla każdego.
Inna rzecz, o której wspomniałem, a która zasadniczo dotyczy klucza obcego, ten identyfikator klienta jest taki sam, jak ten, który dodaliśmy tutaj.
Dlatego ustawmy ten identyfikator klienta jako klucz obcy.
Możemy więc po prostu nazwać to kluczem obcym identyfikatora klienta jeden.
A potem tabela, do której będzie się odnosić, to klienci.
Kolumna będzie zawierać identyfikator klienta.
I to wszystko.
Jak widać teraz mamy połączenie lub relację między tymi dwiema tabelami, zamierzam po prostu dodać również tabelę Orders.
Stworzyłem również tabelę Orders, która jest główną tabelą i zamierzam teraz utworzyć kilka kluczy obcych dla zamówień.
Wszystko gotowe.
Jeśli chcesz utworzyć jakiekolwiek indeksy w tym momencie, możesz to zrobić.
Więc chyba skończyliśmy.
Do naszego logicznego projektu dodaliśmy więc cztery tabele, a następnie utworzyliśmy kolumny i zdefiniowaliśmy ich typy danych.
Stworzyliśmy również klucze obce i oczywiście klucz podstawowy oraz klucz unikalny dla każdej z tabel.
And you can see the foreign key relationship you know clearly showing here and that You know, that's what you would do to create a data model.
Alright, so now actually, let's just go ahead and create a SQL script for this data model.
So you go to database, and then do forward engineer.
And then basically, you provide the database details where you want to create this, these tables are the schema.
So this is, these are my details continue, go to the next one, provide the password.
Right now we are connected, I had to try the password two, three times.
And this has basically created SQL script for us to create the schema and the tables with all the primary key unique key and foreign key constraints.
So what we can do is we can just continue and then now the database or the schema is created as it goes through and then executes that script.
And close.
And now you can see the stables are actually created.
So you can even go to your SQL editor, and then you can start reading your can start querying your tables.
There you go.
So you ready came back, of course, there is no data in it.
And you can now start using your database.
So we actually successfully created the basic schema, or designed the data model for this e commerce website.
Table creation or a CREATE TABLE command starts with CREATE TABLE keyword followed by the name of the table and followed by parenthesis.
So within the parenthesis, this pair of parentheses, you have all these column names, followed by the column data types, and followed by the constraints.
And you can also use this auto increment keyword, if you want your column value to be incremented.
Automatically, as you load values to the as you load records to this table, and after the column definition, you have the option of specifying the keys like primary keys, unique keys, foreign keys, and so on, you can also specify the storage engine type as part of your table creation.
And this is a very simple table.
You can also have partition tables or partition tables that have compressed tables, encrypted tables, and all these things require special keywords to be used in your table definition.
And please check my sequel documentation.
If you want more details about the syntax.
As mentioned, I'm using just integer watch char data types, the MySQL documentation shows like all these different data types like numeric, date, and time data types, string data types, like the ones I'm using, and JSON spatial.
So these are all available in MySQL for you to use.
So let's go ahead and create this table.
And before creating the table, I want to run this drop command just to make sure the table doesn't exist.
And I'm going to be creating that table and see if the table has been created.
Yes, the table has been created successfully, I'm going to be running a select star from the table name to see if I can successfully query from this table as well.
And then it returns.
Basically, it doesn't return anything that means no data exists in the stable.
And that's how you create a table using CREATE TABLE syntax.
Finally, there is actually a default keyword which helps you specify default values for a certain or for your columns.
So if you don't specify a value for this quantity column in your insert statements, or when you're loading through procedures, loading data through procedures, it will automatically take this default value.
That's pretty much it.
And I'll see you guys in my next MySQL SQL session.
So I just did a describe on the table that I created and it has product ID product name, product type, price and quantity.
And you can see that product ID is also an auto incrementing column right now there is no data in it a typical insert Statement looks like this, let's go to insert into keyword and the table name a bunch of columns within parenthesis, the ones that you want to populate, followed by the values keyword.
And followed by the actual column values.
If you can realize I haven't actually specified the product ID value because it's an auto incrementing column.
So let's go ahead and execute this and insert statement goes through.
So let me also run the select statement.
As you can see, the product ID table has taken the value one, and that's happened automatically ident supply the value one, so I'll go ahead and commit the change.
And then let's actually move on to the second variation.
So this time, I'm going to specify a value for product ID, nothing else is different.
So just want to show you that it is possible.
So it goes through and then a commit.
And then let's do a select to make sure the value has been inserted.
So let's go to this third variation of this insert statement.
So it's going to be pretty much the same, except Actually, I'm going to just jump some values and then insert the value 10.
For this product ID column, I'll go ahead and do that.
It goes through a comment and select again, then you can see that that is also fine.
So yeah, so that worked.
So you can actually jump a few values.
let's actually look at the next variation.
Again, I'm going to insert a record into the stable, with no product ID specified exclusively.
Or explicitly, the product ID column is missing over here, and I'm going to run the insert statement and commit.
And then I'm going to run the select statement.
So just wanted to show you that wherever the latest value is for this auto incrementing column, I inserted the value 10 for product ID last time, and then the next time I do an insert is auto increment kicks in and then you know increases, increases this value from 10 to 11, right picks up from the value that was inserted last time.
And I'm gonna just take another insert statement, and this time, it's actually insert into the table name.
And instead of the values keyword, specifying the column names, values, etc, we actually select from a different table.
Basically, if the products three table is exactly matching the structure of products, one table, then we can do even a select star from if the columns don't match exactly as in like products, one has a different set of columns, and product three has a different set of columns, then we need to make sure that we actually select the columns.
And then, for example, this product ID from products, three maps to this product ID and products one, and product name from products, three maps to product one in I'm sorry, Product Name and product one, and so on.
Let's go ahead and run this and see what happens.
And then that goes through.
And then if I now select the products, one table, you can see like take all these rows are inserted properly.
And basically the products one table is populated.
And then we got all the data from products three table.
So this time I want to show you the insert statement.
Again, this is kind of like a bulk insert or multiple insert just combined into one statement, you can see the insert into clause is specified only once but in the values spark in this clause, actually, we have two rows specified at the same time.
So we can even use such as syntax and a commit, and then do a select all good.
So these are a few variations of insert statement.
I hope you understood how this works.
I will see you guys in the next session.
Hey, my sequel learners.
So in this session, actually, I'm going to be talking about update and delete statements.
So as usual, I'm going to be using my eecom store schema.
And I will be using my products table to do this demo.
So just quickly, if we select products table, there's two rows right now.
So the first update is just to show you the syntax of update.
So you have the update keyword followed by the table name followed by set keyword.
And then you can have as many columns as your table contains, but in this case, I've got only one column and I can just run this update.
So let's actually add one more clause to it, which is the where clause and this is to just update the rows that Do you really want to update so we will be updating only the rows with product ID equals one.
So let's go ahead and do that.
And then I'll just come in and do a SELECT FROM products quantity has gone up by 50, it went from 299 to 349.
Now one more thing to realize is actually like you can, you know, you can specify literal values, when you are updating, you know, that happens all the time.
Or you can also like specify a formula, or you can have SQL functions like replace substring, length, and so on, you know, you can look at my SQL documentation to see what kind of functions are available in this update, like, I just wanted to show you the syntax, basically, to let you know that like you can have multiple, you can update multiple rows at once.
In this case, I put like, values one, two, and three, you know, you don't have to do one row at a time or anything.
So when you use the end keyword, and you can say product ID or whatever, call them in and then a bunch of values to select the rows that you want.
And there are other ways to do it.
But the point being, you can update multiple records at once.
And another interesting usage is using the case statement, you know, you can let's say you have a bunch of update statements, one for product ID equals one another for product ID equals two and another for the other product ID values.
And you can combine all that into one UPDATE statement using a case when then and clause or keyword basically, in this case, actually, for product ID equals one, I want to increment the quantity by 50.
And product ID equals two, I want to increment the quantity by 100, and so on.
So then I've got this similar WHERE clause are similar to the one that I showed you before, I'm going to run this you can see the columns are getting incremental, I'm not going to go back and check I'm pretty sure that it's done the right thing.
So the next one is basically when you want to delete records from a table or purge data from a table, then you can just use a simple delete statement.
And if you are wanting to delete a particular row, again, similar to the update, you can use a where clause to actually like narrow down the data that you want to delete this particular statement, which is delete from a table name, and then where column name equals or the column value.
And you can have multiple filters in here.
So here I don't have the row number three, I think I deleted it already.
Alright, so let's keep going products three table, I just wanted to show you it contains a lot more data than my other table.
You can see it contains data about 5849 rows, I wanted to also show you this particular parameter MySQL configuration parameter to basically enable and disable safe updates.
So let's say like if your delete statement or UPDATE statement is not using a primary key column in the where clause, you know, then basically if you enable this particular parameter, let's say by setting this one, and then if you run your delete, you will get like an error code 1175 it mean, and then it says you're using safe update mode, etc, etc.
It's not leading you to the run this kind of add delete statements, because it could be a good cause bad performance.
So if I disable the same thing, and then if I run the Delete statement, and then just run a select again, then it should go through because now the parameter is disabled.
And two more things.
One is actually like if you have a huge table and you want to delete only a few rows at a time, then you can use the limit keyword to limit the number of records that are deleted by the statement, you know, in this case, because I wanted to delete only 10 rows, let's go ahead and do that.
And it should work just fine.
And then if I do a select, you'll see the difference in the row count actually, now it's like 5839, before it was fired four nights.
So that's how the LIMIT clause helps you also in the limit floors, you can also specify the ORDER BY clause.
It basically sorts the data by these columns, first by quantity, then by product ID, then it deletes the top and or 100 or whatever value you put here, actually.
So let's go ahead and do it and then select again.
Yeah, Kearney, seven D is gone.
So the top 10 rows are gone.
And yeah, that's pretty much it.
Actually, those are all a few variations of update and delete statements.
And of course, there's lots of tangents we can get into but I will leave that task to you.
And I hope it was useful.
And if you have any questions, let me know in the comments.
I'll see you guys in the next session.
MySQL learners.
So in this session, we'll look at SELECT statements, not just the syntax But also like some ways you can actually like improve the performance of your queries, I'm going to be using the schema called income store to explain about this SELECT statement in its most simple form will look like this.
So you have the Select and from keywords and then after the Select, you specify the Select list, which is the columns that you want to select.
If you specify a star, or asterik, that actually selects all the column columns from this table, and then after the from keyword, you specify the table names where you want to select the data from.
So if I do a select star from products underscore three, it's going to return all the data from products underscore three table.
But do remember that anytime you are using a star after the Select, or in the Select list, you're basically querying all the columns in this table, you don't need to query all the columns in the table in most of the cases, so you only like specify the columns that you need to query.
So in this next query, let's go line by line and see what changes that have done to this query to make it better.
So let's say I want to select only these columns.
That's why I specified only these columns in the Select list.
In the from clause, I have specified products underscore three table very often you will be selecting from multiple tables, you need to join the tables and then retrieve useful data out of it.
And in the where clause, you specify all the filters, or the conditions based on which your data will be filtered out.
So here I am, including only the data which have quantity less than 25.
So this way, I'm able to actually filter most of the data out of this table, this is very useful in minimizing the amount of data that you retrieve from the database.
And your queries are going to be fast as ordered by is basically going to sort the data that is retrieved based on the columns that we specify here.
So here, I'm just like ordering by product name.
And of course, like when you're sorting data, especially when you're sorting a lot of data, the operation can be expensive, unless your source buffer size, that is actually the memory area where the slots happen.
Unless it is sized properly, the operation can be really slow.
So you need to pay attention to that configuration as well.
And I have this other query, which just goes to show you that like this is a very simple SELECT statement.
Again, in this select, actually, I have only the Select keyword and a function, I'm using the now function.
But there are several other SQL functions that you can use in the script, for example, I can use the database function to return the database that I am actually connected to.
And as you can see, I am actually able to invoke multiple functions in the same query.
So that's pretty much it.
I'll see you guys in the next session.
In this session, I will be teaching about SQL joints, let's dive straight into the demo, I will be using a schema called eecom store.
And I'm creating a table first called T one with one column, the column name is C one, and I'm inserting these two values in this table.
One and two, I'm creating another table called T two with a column called C one and inserting these two values again, into table D two, one and three.
So it's one and two here and one and three, here, we're going to go ahead and run a commit to make my changes permanent.
So I'm going to be just creating these two tables just to show you the records, D one has one and two, D two as one and three.
Of course, a join is an operation that joins two tables.
And we have all these different types of joints, we'll go one by one and understand what they are.
So this is the syntax, so select an a column list that you're selecting.
So we're joining T one and T two.
And then we're specifying the kind of join that we are making.
And then we also have this on keyword.
And then comes the condition on which the table is joined.
So I'm going to go ahead and run this query and see what happens.
As you can see, this query, this inner join has returned the value one, so that means actually, so it returns the values that exist in both the tables that match.
So that's what INNER JOIN does.
So let's just change it to a left to join, go ahead and run it.
Now the left join is gonna return all the values from your left to table which is T one.
So T one has values one and two are the rows one and two, and then T two, it's going to return only the matching values.
And then for this value, which only exists in table T one, it's going to return and now and then I'm going to change it to right join and as you might have guessed it's going to return all the way Use from table t to in the places where there is no matching value, it's going to return a null.
So let's see if that happens.
That's what we expected.
So we got all the rows from T two, and then for three, there is no matching value and T one, you know, that position has no value.
Now we'll jump quickly to a union.
And then we'll come back to a full join, a union is basically going to look like this.
So two queries, and then in between, we have the union keyword, let's see what it returns, you can see that it's written one, two, and three.
So that's actually the rows from both the tables, but it's kind of like combined the data and then smashes them together.
And then you have one, two, and three, and then let's run the same query with a slight difference.
We'll put union all and then we'll see what happens.
That's written one, two, and one, three.
So that's returned all the data from both the tables, but except this time, we have duplicate values, Union gets rid of all the duplicate values, it's almost like a set where you have a unique set of data, a union all returns all the values, including duplicate data.
Jumping back to full join, we don't have a full join keyword.
So rather, we do full join this way in my sequel.
So basically, you have the similar query where you're joining T one and T two, a left join first on this, there's one column that we have, and then you have another query, again, joining T one and T two on this, just one column, but then we are doing a union of these two, and that's going to return the data from both the tables, we have one, two, these two are matching, then for two, there is no matching value.
So it returns and now for three, there is no matching value in T one, it returns a null over here.
So this is a full joint, that's basically all the joints, all different types of joints that you can do in MySQL, I hope this example was clear.
And I'll see you guys in my next session.
All right, my SQL learners.
In this section, we're going to learn about locks.
More specifically, I want to talk about the isolation level section.
So the first thing is just see what I have here, I have two terminal sessions.
One is in black.
The other one is in slight maroon color.
So I'm actually going to log into the database as the root user.
And I'm going to do the same thing over here.
There you go.
I am logged into my SQL database.
So I have a little script here to create a dummy table called T one.
Okay, so let me show you the SQL script.
At this point, actually, you might not understand the SQL syntax and so on.
But then let me explain.
Briefly, first thing I'm doing is setting auto commit to zero or commit is basically a command that you use to save your work.
Basically, the data changes that you're doing is permanently stored in the database.
When you issue a commit command, in my sequel, you have this variable called auto commit, which is turned on by default, meaning all your commands will be automatically committed.
If you don't turn this off, I want to have more control over what I'm doing here.
So basically, I am doing an auto commit, disable first, so and then I'm starting a transaction.
And just to be safe, I'm dropping this table if I had already created it.
So this table doesn't exist.
So it says unknown table.
And the next thing is I'm creating a table called T one in eecom store schema.
And then the column name is C one.
And the data type is int and its primary key.
So and then I'm actually inserting value, just one row into this table called p one, right, the one that we just created.
And I issue a commit command, alter or the alternative to commit is rollback command.
So which basically rolls back rewards the changes that you just done in that session.
So if I just do a select star from the stable, then I'm going to see this value, so which is fine so far.
So this is pretty straightforward.
So far, we haven't talked about the isolation levels.
So what I mean by isolation level is when multiple sessions are trying to modify or access the same data data, then you need locking mechanism to make sure the data is not corrupted, or the database is behaving in a way that you expect to see how you actually set isolation levels.
And this is the command.
So this is the other session I had opened show session variables like isolation.
So that shows like the transaction isolation level is set to read committed.
Right.
So this is one of the possible options action.
So this is read committed, and you have read uncommitted, and you have repetative read, or repeatable read.
And then you have a serializable value, actually, so let's go one by one, right.
In this session, I already started a transaction.
So I'm going to actually try to update this value using an update command.
So basically, I am updating the same table, and I'm updating this column to to where the column value is currently one, right.
So I'm going to do that the auto commit is turned off.
So it's not committed yet for the start a transaction over here.
And let me run a query against the same table and just copy and paste the table name, want to type it, okay, so we see the value one, which is the previous value.
And if I ran the same query over here, in this session, I see the value two, because this is the session where we are modifying the data, right? So and I can see the changes before committing in the same session here.
Actually, since the value of this transaction isolation, or the isolation level is set to read committed, it is possible only to read the committed data.
In other words, when multiple sessions are accessing the same data, in this case, this column right here from this table, apart from the session that is actually modifying the data, the other sessions can only see committed data, any data that is committed just before this select is executed.
So I'm going to go here and run a commit, and come back over here and run a select.
So now you see the latest data because that commit happened before I ran this query.
Now let's talk about read uncommitted isolation, setting actually freshly log in again, because these things can get tricky.
So every time I want to just recreate the tables to remove any confusion.
So let's actually log in again, okay, in here, and I'm actually going to execute the same script that I showed you before.
So just disabling auto command, starting a transaction, dropping the stable and recreating it, inserting this value, and then running the command.
So now here, what we could do is go ahead and update this value to two.
But remember, I haven't committed this data yet.
Let's go to this session.
And here, go ahead and change the setting to the isolation setting to read uncommitted, because by default, it is always set to read committed action.
Right.
So you can see that here.
So and this is a session level setting.
And you can also change it at global level.
But for the purpose of this demo, we just need to change it at the session level.
So session level isolation initially read committed, then I ran the set session transaction, isolation level, read uncommitted, and then checking the value again.
Now it's changed to read uncommitted, if I ran a select star from this table, then I get the value two, and if you remember that I I only updated the value from one to two.
And you can already see this beta even though it is not committed over here.
So that is how read uncommitted works.
So there is not much locking going on here.
Because database is now letting the sessions do dirty reads because one session is able to read and other sessions changes even before the commits happen actually, right.
So those are dirty reads.
Yes, actually.
So let's go on to the next one.
So we have seen read, committed and read Committed so far.
So now let's move on to repeatable reads action.
Dobrze? So exit.
So here I am going to just commit.
And I'm gonna re rerun my initial script just to clear the table.
So drop table and then recreated insert, value one again, and then commit.
So now, the table is back to how it looked before.
So here, let me log in again.
So this is repeatable read setting, right? So remember that the default value for this isolation setting is always read committed.
So if I change it to repeatable read, write, and then check the value again, then you can see this.
So and again, remember, or show variables is the command to check the current value.
And then set is the command to set the configuration right, so I will put all these commands in like a git GitHub repo file, then you can actually grab the commands from there, and then you can try them yourself.
Basically, I'm changing the I'm changing the setting from read committed to repeatable read, right, so I'm going to just start a new transaction over here in here, I'm going to update this value to two.
And over here, I'm going to run the Select query that we saw before just selecting everything from this table.
And you see that the value is currently one.
And that makes sense.
So let me go ahead and run commit.
And if I ran the same query, again, I see the value one.
And this is the same as the value that was read before, even though the data was changed by this other session.
And then committed within this transaction, the data that we are seeing is the same in in other terms, basically, we are, we are reading the same data, or the reads are being repeated.
Right.
So that is the third setting.
And the last one is the most strict locking configuration.
So which is called serializable.
So I'm going to, as usual, I'm going to drop the table and then just recreate them recreated, inserted value one again, they might come in.
So here, we're going to log in again.
And as usual, the default setting is read committed, right? So let's check that first, just to show you, and then I'm going to change it to serial serializable.
So what this means is, basically, I'm going to start a transaction.
So on the first session, I'm going to run an update, basically changing the value from one to two.
And here, I'm going to start a transaction, and I'm going to run a query on that table.
Right.
And now this query, even though it's just a select, select is just a read, it's not updating, it's not deleting or doing anything, it's just a read, it is waiting, because the update is basically updating this data.
And then it's not database, MySQL databases, not even letting this read or the Select query from the other session to see the data.
So this is the most strict setting action.
So if I do a commit over here, then on this other session, you will see that the Gradius return and it's seeing the latest value, right.
So if I go ahead and run another select, of course, it's returning the same thing.
But if I try to update this value from two to three, another update, that is basically going to wait on the Select, basically this transaction that is running right now because the Select again, select is just a read, it is just reading the data.
But still it is locking that row in the database, and it's not letting any updates or modifications to that data.
And then you can see that the update even failed because it waited for some time and then the timeout value exceeded so we don't have to go into those details.
But I'm going to try updating now.
And here.
I'm just going to exit out of this session, which will release all the locks.
And that will help the update to go through.
And then I can commit and exit as well, and how you hope it was clear to you guys.
And if you have any questions, please put it in the comments and reach out to me somehow I know you can figure it out, as you guys are next section.
Hey, MySQL learners.
So welcome back to this new section of my MySQL tutorial.
So in this video, or in this section, we're going to talk about locks.
So what are these locks? Dobrze? So let's actually approach this kind of like logically.
So if you have a database, and if you're the only person working in this database, then you basically need not worry about anything, right? You know what you're doing.
So you will insert data, delete, or update data the way you want.
And there is no one else trying to intervene or interrupt your work.
But unfortunately, that's not the case.
In today's world.
If you think of a busy ecommerce database like Amazon, then then there's like, a lot going on on the on those websites.
There's like multiple people browsing is like, a lot of people buying stuff.
There's the people who are selling stuff on on these websites, they're updating data relevant to their products.
So that is basically concurrency, right? So you have many users trying to do something on this website at the same time, so how do you manage this concurrency, that's why we need locks.
So if I let everyone work on the same data at the same time, then there's going to be a lot of confusion.
And we might end up losing some data.
So let me actually show you a simple example of how that happens.
So I have a table, a product table.
So if you've been following my tutorial, thus far, we talked about this table called products.
So where we store all the product information, right.
So now, there's a couple of records over here.
And let's say that we have a seller and a buyer who are working on these records, especially like this particular record, the first one, which is a book, and the books, prizes, this and the quantity, the thing we didn't have quantity when we talked about it in my previous sections.
But then I added quantity here.
So there's this quantity column.
And there's a there's a seller and buying buyer interested in this record, let's look at this, right, so we have sort of like a time sequence here.
So what the seller of this particular product is trying to do is he's trying to update the quantity of this product at nine one, he is adding 60 more quantity to that product, which is you know, 40 plus 60, which 100.
And that's what we have over here.
So then a buyer comes and he looks at the quantity.
And then he basically wants to order two or these books, that's 100 minus 90 100 minus two, it's 98 and then you have the quantity 98 over here.
So this happened in a sequence.
So but we are worried about concurrency, right? concurrency is like when things happen at the same time.
But what if Okay, first the seller comes and then he reads the quantity of this item.
Initially it was 40 and then buyer comes and he also sees that the quantity is 40.
Dobrze? And at 901.
So the first two operations happen at the same time at nine or one seller comes in he says I want to update I want to add 60 more quantity, like meaning I have 60 more books of this title, but then buyer comes and he says okay, I'm buying two items or two of these books.
So but while you that he saw before was 40.
So 40 minus two is 38.
So he updates the quantity 38.
So the seller updates at 200.
But then, because of this previous look up, the quantity is updated to 38.
due to which this whole thing, this whole operation is lost.
And we end up with sort of like corrupted data for this quantity column.
So this is a simple example of how concurrency when not managed well might cause issue data issues like this.
MySQL learners.
So in this video, we are going to look at basically how table locks works.
In the context of e commerce database, we created a simple database or schema called the column store.
And we created a bunch of tables or used another dummy table to explain our transaction isolation levels.
So if you haven't seen my previous material, go back and check it out.
And come back here.
But then yeah, you have four tables for main tables.
And the main table that we are interested in is products table here.
And in the products table, I inserted a couple of records.
These are dummy records.
So I don't have a front end or application running over here.
So we're just looking at database, right.
So what what's going to happen in this tutorial is, so we, we're going to basically simulate a situation where a seller is trying to update the quantity of the book that he is selling on this website, which is this first book actually, the common path to uncommon success.
And then the right now the quantity of this the quantity available.
You know, for this book is 40, right? So he wants to update this quantity 200.
And also, we'll have a couple of more users, or buyers, basically one buyer is trying to buy the same book, we'll have another buyer Hill, who tried to buy a different book, which is this book, tiny habits, and then the same buyer will also try to browse the website, like of course, like, we are going to have to imagine a little bit because I don't have a front end to show you everything.
So let's actually see how this goes.
So first of all, you know basics first, actually, let's actually turn off the auto commit.
Just so just so actually, we have more control over what's happening.
And let me do that in all the three sessions I have open and the first session is the seller session.
The second session is the buyer one session.
And the third session is the buyer to session, basically.
So I'm going to turn off the auto commit, which is basically a mechanism that commits automatically if it's enabled.
And I don't want that.
So I'm disabling it.
So next is I want to show you the transaction isolation level.
And we talked about it in my previous session.
So right now it's a repeatable read.
And it's the same for all.
So we are going to change that to read committed, because read committed is isolation is the right isolation level for OLTP databases.
So now let's actually start with the first seller session.
So three sessions.
So the first seller session is going to update the quantity of this book that he's interested in or his selling action.
But we are going to take this aggressive approach and log the whole table.
Right.
So let's say the application is returned in a way that it logs the whole product stable for right.
And then the other session, let's say by one second session, buyer one comes and he is going to try to buy two books and and how actually we're going To do that is by running an update.
So we are basically updating the products table and we are subtracting the quantity by two, which means actually the we are buying two books.
And which book is there in the book? Where are the record where product ID equals one, right? So if you remember the data, product ID one is this book, let's go ahead and run this update in the second session.
And it's going to obviously, wait, because the table itself has been locked for right by the seller session, the buyer, one session is waiting.
And let's go to the buyer to session the buyer to Australia trying to buy a different book, which book is it this other book, which is tiny habits book where product ID equals two.
And we're gonna do that.
Of course, even that is hanging or waiting.
And that is actually a little bit crazy, isn't it.
So just sellers trying to update the quantity of this one record with just one book.
And everything is tanking.
And the buyer, too, was trying to buy a different book, he kind of gives up.
So he moves to a different session.
And instead of buying or trying to buy a book, he just tries to browse the website, which is a select query or read query, read a select query, which is also hanging.
So the buyer too is getting frustrated right now.
So you can see how restricted this kind of sequences.
So if someone's using table logs, that's going to basically reduce the concurrency of the operations that can happen in this database.
So that's the main point here in this demo.
Hey, my sequel learners.
So in this session, we are going to take a brief look at row level locks.
In my sequel, I have three sessions, I'm already connected to my ecommerce database, MySQL database, and this is how the data looks now.
So we have a products table which holds you know, this data, only two books now, just dummy data that I created this, this is the price and you have the quantity column showing you how many, how much quantity is left for each of these books.
So the first session is seller session.
The second session is buyer session, we can call this buyer one session.
And the third session is a buyer to session.
So this is the data.
And just for clarity, actually, I wanted to show you the transaction isolation setting, which is read committed.
And the auto commit is turned to turned off basically, it's disabled.
So unless I commit explicitly, my transactions will not be permanent.
So let's actually start with a seller.
He's going on the website or a portal that he has available to update the inventory of, let's say the book one, it or the product one, which is this book.
And so he is going to click some buttons, which is going to translate to an update statement being executed in this database, right? So let's say he wants to increase the number of books available in the inventory.
So that will mean quantity is going to be increased incremented by 50.
So that's the UPDATE statement.
And he's going to run that update.
And we can look at the buyer one session, let's say buyer one is trying to buy the same book.
And and then, so he's going to go on the website and then click on buy now or whatever and then is going to translate into this UPDATE statement in the database, choose quantity equals quantity minus one.
So reducing the quantity by one, meaning he's buying a, buying a book.
And of course, there's going to be, you know, other statements updating other tables.
But then to keep it simple, I'm just showing you the product table changes section.
So as you can see, this is going to wait because seller is updating this particular row action.
And that can be seen using acquittee.
On data locks, so if you're under this greddy, of course, you can modify this query as per your needs.
But then if you query this, you will see that there's bunch of sessions and is, is the lock mode column.
And then the table on which the database on which the locks are happening the table, so it gives you a lot of details.
So, so if you want to understand what's going on here.
So we have products table, and then we have ix lock, which is intention, exclusive lock on the table itself, meaning like a transaction is about to get an exclusive lock.
And this is at the table level, but don't get tricked by that.
There is also another row indicating there is a record level or a row level lock.
And, and that is logging only this data equals one.
So if you remember that UPDATE statement, we are using product ID.
So and data for which is one, actually, so product ID equals one.
So that's what we are seeing over here.
And if you see here, this buyer session has actually timed out already, so he's going to attempt to buy again.
So that's how like, you can actually look at the locking details in this table.
Let's try, let's say like buyer two comes in at this point.
And then he just tries to browse the inventory on this ecommerce website.
So that would mean a select query or read query.
And he's, he's able to do this happy reaction.
Right.
So there is no problem.
So while the rollouts are happening, other sessions can read this table, they can even look at the data for the same product.
But they they just cannot buy this book, because that is being blocked by the seller.
So again, it timed out.
So at this point, buyer two wants to buy a different book, you know, I'm not able to buy this book, let me try buying a different book, that's going to translate to, you know, product ID ID equals two, which is not being locked by the seller.
And then that update goes through.
And at this point, let's say the seller has completed updating the inventory.
And, of course, if you look at the data, now, it's going to look different, because this has been updated to 150.
And of course, this hasn't gone down because buyer, buyer, one is still in the process of buying the book, because the commit has not happened yet in the application.
And then if we look at the data, again, the data has gone down, or the quantity has gone down, then via two, let's say wants to buy the first book that buyer one wanted to buy.
At this point, there are no no locks in this table.
Because everyone's committed, and let's say buyer, who is trying to buy this, this book, and then he goes through with that date, and then commits and look at data.
And then the data is changing actually.
So this is how row level log basically allows for high concurrency.
So only the rows which are logged by your transactions are not available for these other sessions to modify.
Right So the other records which are not touched by your transactions are available for updating, deleting, etc.
and all, of course, you can add new books, that means inserting new records in this table.
So I just wanted to show you the difference between table level logs and row level locks.
So this session and my previous session will, will be useful in understanding that difference.
Thank you, I'll see you in my next session.
In this session, we're going to be talking about deadlocks.
And I just want to show you how deadlocks happen, they do happen in in a busy ecommerce or B.
database often, so it's good to know what they are.
So it's going to be a very short and sweet session.
So here, we have a couple of sessions again, so connecting a connected to the same database has two sessions, two different sessions.
So let's say that we are working with products table, right.
So we have seen the stable before in my previous sessions.
Basically, this table has information about the products that are being sold on, you know, an e commerce website.
So we have a couple of records over here, you know, we're going to first let's say, you know, I seller comes to actually update the quantity of this product, basically, let's say if he wants to increase the quantity by 25.
For this first book, this is the command that he's, you know, that's going to be executed, you know, whatever buttons he is clicking, will be translated to an update command like this.
Right.
And let's say like a different person from the same company wants to update the price of this book, not this book, let's say we have it the other book, I'm just actually using the product ID to update the right product, right.
So we have one session where seller, one is updating the quantity of this item, we have another session where we are updating the price of this item.
And then if you see the prices incremented by two, let's say $2.
And this is fine, right? So now we have row level locks.
So this guy is holding a row level lock on this row.
And this guy is holding a row level lock on this row.
So this is fine, right? So we are operating on two different records, two different locks are independent of each other.
All good.
So now let's say the same seller, the second person who is updating with price, wants to update the price of this other book to actually like he is actually increasing the price.
Again, by $2 of this book, the product ID equals one, which book, this one right here, let's go ahead and try to increment the price.
By running this command, you know, he's waiting on waiting for the lock ECI exclusive lock.
And that's not available, because this seller has not committed actually is not committed.
So let's actually go back here and, and this seller at the same time price to update the price of or quantity of this book.
So two sessions are fighting for pretty much the same resource, you know, we ended up in a deadlock situation.
So my sequel was smart, smart enough to just kill the session.
Otherwise, we would have two sessions waiting for each other endlessly.
Dobrze? So here you can see the error code that is thrown, it says deadlock found when trying to get locks and try restarting that transaction.
So let's go ahead and query the products table and see how it looks.
You can see this, this whole transaction was rolled back.
Correct.
Both the transactions were rolled back.
There's even this one was rolled back.
So I think that Locke was also killed.
So that's why this this one went through.
If you can see the prices have increased by $2.
right because initially For 1699 and 2039, and here 8099 and 20 to 39.
Okay, so that's how it works.
This is a typical deadlock situation, I hope this explanation was clear.
And I will see you guys in my next session.
All right, my sequel learners.
So in this session, we're going to talk about clustered indexes.
So, so clustered index is not a different index type as in, like, you can, you know, directly create a create a clustered index yourself.
So it is a type of index that, that MySQL kind of maintains in the, you know, behind the scenes actually.
So, in also your table data, the data that you insert into your tables or load into your tables are maintained in these indexes.
indexes only what I mean by that is, so let's say this is a B tree index, right, so this is a B tree index.
So you have my sequel, creating this B tree index, as you load the data into these tables.
And then, you know, in the leaf nodes, what you have is actually the data, the data that you're loading into these tables, right? In the clustering, the sorting is based on the primary key that you define, or, you know, in this table, actually, so if you don't define a primary key, MySQL will automatically pick up a non nullable index key, what that means is, so let's say that, in fact, actually, let's jump straight into the example that I have prepared for you guys.
So so this is my MySQL Workbench.
And, you know, I'll show you this table definition.
So this is called products underscore one.
And it's basically a products table that is typically used in a ecommerce store.
And if you've been following my lessons, this is what I've been using, I just changed the name of the table for, you know, demonstrating this concept, this clustering, clustered index concept.
So you have all these like columns, and I'm defining a primary key.
Okay, so let's just start by, you know, I'm just going to switch to a database called eecom, store our schema called the econ store, I'm going to drop, you know, these tables if they exist already, by any chance.
So the table doesn't exist, which is okay, so I'm going to create this table, which I just talked about, called products.
And then this table has primary key in a primary key is product ID.
So product ID is sort of like an integer column.
So this is an auto increment, right? So you don't even have to provide value for this column, actually, when you load the data, so you can just put all this information and load it and then we are good, MySQL will automatically increment the value of this column action.
So and then, of course, like I said, like there is isbm column, which is over here, sort of leg book iasb.
And information if you are, you know, if you remember your school days like this, this is be a number attached with any book, so something like that.
So some kind of ISDN alphanumeric number.
So I'm going to call that like a unique key or a unique constraint.
And let's go ahead and create the stable and this constraint.
So that was successfully created.
And I'm going to create a procedure, which I can use to kind of like populate the stable, right, so don't worry about the details of this procedure.
This is something that I wrote to populate this table.
And then that is successfully created and change the delimiter back to a semi colon.
And then I'm going to call this procedure and which is going to throw some warnings, which is okay with me.
As long as as long as the data gets populated, I'm fine.
So it's going to probably generate some, you know, load some 6000 plus rows into this table.
So we'll see how much we get this awesome.
So it's actually loading a lot of data.
It seems to be done.
So let's go ahead and commit the data and Now Actually, I'm going to select the data in this table, right? Just select all the data, and you will see that the data by default, or the data is actually sorted based on the primary key, which is product ID.
And you can see, we know, I haven't like specified any ordering.
So this is, you know, this is the default ordering of data, right.
And so basically, your table data is sorted based on your clustered index, which is primary key over here, because you have the primary key in the table section.
Right.
So now the next thing is actually, I'm going to create a similar table, which is, you know, so I'm going to call it products too.
But in this case, I'm going to basically not define a primary key, I'm still going to have a unique key called, again, the same thing, you know, it's isbm, it's a unique key.
And let's just give it a different name, just so we have kind of like, we have different names for different constraints.
So let's actually go ahead and create this table.
And so this table is created, I'm going to copy the data from the first table that you know, where I loaded a lot of data.
So I'm going to copy the data from that table into this table, right.
So just very simple.
And then I'm going to commit, right, so that's a board 6455 6455 number of rows inserted into this table.
And I'm going to select all the rows from this table.
And you can see that now, the data is not sorted by product Id rather it is sorted by this iasb.
And it is sorting based on first character first, and then Initially, the first and second characters are the same, then 010 true.
And that keeps going 05 and then 090, a BCD of GE hedge and then having after the zeros, you know, see one, so it is basically sorting data based on iasb.
And and why is being because because of the absence of primary key, it's going to choose this iasb and column, as are the it's going to choose this non nullable unique index key, which is based on iasb and column, right.
So it's starting based on this, but this is actually a terrible, terrible idea.
Because if you're generating random, alphanumeric strings for iasb.
And, you know, then you're not going to be generating the string in sort of like an ascending order or in any type of order, actually.
So in that case, actually, you know, when you're, as you're inserting data into the stable, this B tree is going to be created behind the scenes.
And then my sequel, like whatever program is creating or maintaining this data structure behind the scenes has to work really, really hard to manage this Bre B tree index, actually, right.
That's why this is a terrible idea to have like a you UID or some kind of alphanumeric string as a primary key actually, or in the absence of primary key.
Well, my sequel is going to use this this key for clustering.
And again, it is very bad.
So keep that in mind when you're creating tables actually.
Right.
So finally, what I'm going to do is create another table called product three.
And before that, I'm going to show you the output of this query, which is basically going to come up empty or no, no, no road rows returned.
All I'm doing is actually checking whether this index the index with named Jen flushed index is there in this database, actually.
And then I'm checking the InnoDB tables and information schema I'm joining in odb tables and in odb indexes.
And I'm checking whether this index indeed exists, right? Saying it doesn't exist, which is where the this, this credit, return no rows, and I'm going to create this table and this time, I'm not even going to create the create a unique key.
And I'm going to make all these columns as nullable columns, you know.
So I just want to show you what happens when you have a scenario where you're creating a table with all nullable columns and no primary key index no unique, not nullable index and you know Then I'm going to insert data into this table.
Again, six, the 400 plus rows inserted, commit.
And then I'm going to select from this product three table right now.
And when the data comes up, you can see that there is still some ordering that's happening.
And, you know, we don't have any of these options primary key or a not nullable, unique key available, then how is MySQL able to sort data? What is it using, so it actually uses a hidden, hidden key actually, right, a hidden primary key.
So if you run the same query, again, is ready, you can see that this index has been created on products three table, which is maintained internally by my SQL, for just the purpose of clustering this table, actually.
Okay, so that's a lot of information.
I hope you found this useful.
And I will see you guys in my next video.
Hello, my SQL learners.
So in this session, I want to teach you the basics of using explain or explained plan in MySQL.
Alright, so now let's just let me just show you the table that I'm going to be working with, I'm going to be working with that table called products underscore one.
And it's got some net in a product name, product type price.
And if the product is a book, it will have an ISP a number attached with it.
And then there is a quantity column.
So these are some basic columns that you would see in an e commerce online store.
So let's get started by just looking at the indexes of this table.
So this basically has two indexes.
One is a primary key index, which is on the product ID.
And the other one is an index on the iasb and column.
And this is a unique index, actually.
So let's get started by picking a simple query that we are going to kind of like optimize using explain.
So the query that I'm going to be using is this.
So I'm going to be selecting iasb.
And from this products underscore one table where product name has cat in it.
So the product name is cat.
Okay, so And before I run this query, I'm going to look at the explained plan of it.
And I'm going to put a slash g at the end.
So I get that we'll put in there in a readable format.
So first of all, it gives this output, right, and selectors, just one straights, simple select.
That's what this is showing.
But the main thing is we are working with our this particular row is referring to this table.
And apart from that, actually, you have all these columns, and then they are all null right now, like they don't make much sense apart from this.
So this is a tight column and all means that it is doing a full table scan.
Basically, MySQL is doing a full table scan, it's scanning the whole table.
And how many rows is that it's these many rows.
And we are using a filter over here, it gets all those rows and then it filters the output.
And basically a you know, there's about 600 rows with product name equals cat, right, so the filtered person ages like 10%, basically, and then there is some extra information.
Let's go ahead and create an index on this table.
Create index called, you know, we can give an arbitrary name.
And, and I'm going to create add on products, one table and the column is product name, of course.
This is the column on which I'm creating the index.
Actually, let's just go ahead and run the explain again.
So this is the explained plan.
And that's how it looks.
So basically, you can see that the Again, it's pretty much the same kind of output, but this time, it is also showing some data for all these columns.
So first of all possible keys column shows like all the indexes that this query can use.
And, and out of which, like this is the key or index that it is, you know, it is going to use this particular execution is going to use, and this is the key length in bytes actually write the number of rows that is being scanned in this key, which is 589.
And, you know, since this is index based, we're not really filtering data, rather, we're just going to the index and getting the data.
So there is no filtering over there.
Let's actually create another index, which also includes iasb.
And, and see, like, what happens, actually, we're gonna create the other index and give it a different name.
So let's go ahead and run the explain plan again.
So now, again, the possible keys are these two indexes, but it still chooses to go with this particular index, and the index, key length is the same, and then grows, and etc, etc.
So there's no filtering that happened, right? Because we're choosing an index.
So you might be wondering, like, you know, why it's not using the covering index, right.
So this is supposed to be the covering index and covering indexes are supposed to be better than normal, non clustered index or a secondary index.
So you can actually like, use a format like JSON format to get more information.
So how you can do that is by just specifying like format equals JSON, and use the use that.
And so that's going to give you the output in JSON format.
And you can see that the you know, it gives you a little bit more information as then like the query cost, you know, this is how much it's going to cost for my sequel to execute this query.
And this is a representation of the amount of work MySQL has to do to run this query actually.
So the cost for this one is 7690, right.
And then again, it says these are the possible keys.
And used key is used key parts is product name, which was not given over here.
And then there is a cost and for which is a split of where the cost is going.
So you can read my SQL documentation on all these fields.
You know, you might be wondering why the covering index is not being used.
And we can actually force that index by using this use index.
Syntax or use index keyword.
And then I'm going to put the index name that I want to force which is this one.
And when I ran it, this ran the explained plan this time, it shows the cost of this one is going to be 109 point two seven, you know in comparison to the previous explain plan, where the cost is only 76.
And this is why my sequel is going with this particular plan instead of this guy.
Okay, I hope this session was useful.