W tym samouczku dowiesz się, jak używać Pythona z Redis (wymawiane RED-iss, może REE-diss lub Red-DEES, w zależności od tego, kogo zapytasz), który jest błyskawicznym magazynem wartości klucza w pamięci, który może być używany do wszystkiego od A do Z. Oto, co Siedem baz danych w siedem tygodni , popularna książka o bazach danych, mówi o Redis:
Nie jest po prostu łatwy w użyciu; to radość. Jeśli API jest UX dla programistów, Redis powinien znajdować się w Museum of Modern Art obok Mac Cube.
…
A jeśli chodzi o szybkość, Redis jest trudny do pokonania. Odczyty są szybkie, a zapisy są jeszcze szybsze, obsługując ponad 100 000 SET operacji na sekundę według niektórych wskaźników. (Źródło)
Zaintrygowany? Ten samouczek jest przeznaczony dla programistów Pythona, którzy mogą mieć od zera do niewielkiego doświadczenia w zakresie Redis. Zajmiemy się dwoma narzędziami naraz i przedstawimy zarówno samego Redisa, jak i jedną z jego bibliotek klienckich Pythona, redis-py .
redis-py (które importujesz jako po prostu redis ) jest jednym z wielu klientów Pythona dla Redis, ale wyróżnia się tym, że sami programiści Redis określają go jako „obecnie droga do Pythona”. Pozwala wywoływać polecenia Redis z Pythona i w zamian odzyskać znane obiekty Pythona.
W tym samouczku omówisz :
- Instalacja Redisa ze źródła i zrozumienie celu wynikowych plików binarnych
- Nauczenie się niewielkiego kawałka samego Redis, w tym jego składni, protokołu i projektu
- Opanowanie
redis-pyjednocześnie widząc przebłyski tego, jak implementuje protokół Redis - Konfigurowanie i komunikowanie się z instancją serwera Amazon ElastiCache Redis
Bezpłatne pobieranie: Pobierz przykładowy rozdział ze sztuczek Pythona:książki, która pokazuje najlepsze praktyki Pythona z prostymi przykładami, które możesz zastosować natychmiast, aby napisać piękniejszy + Pythonic kod.
Instalowanie Redisa ze źródła
Jak powiedział mój prapradziadek, nic tak nie buduje jak instalowanie ze źródeł. Ta sekcja przeprowadzi Cię przez proces pobierania, tworzenia i instalowania Redis. Obiecuję, że ani trochę nie zaszkodzi!
Uwaga :Ta sekcja dotyczy instalacji w systemie Mac OS X lub Linux. Jeśli używasz systemu Windows, istnieje widelec Microsoft Redis, który można zainstalować jako usługę systemu Windows. Wystarczy powiedzieć, że Redis jako program żyje najwygodniej na komputerze z systemem Linux, a konfiguracja i używanie w systemie Windows może być trudne.
Najpierw pobierz kod źródłowy Redisa jako archiwum:
$ redisurl="https://download.redis.io/redis-stable.tar.gz"
$ curl -s -o redis-stable.tar.gz $redisurl
Następnie przełącz się na root i rozpakuj kod źródłowy archiwum do /usr/local/lib/ :
$ sudo su root
$ mkdir -p /usr/local/lib/
$ chmod a+w /usr/local/lib/
$ tar -C /usr/local/lib/ -xzf redis-stable.tar.gz
Opcjonalnie możesz teraz usunąć samo archiwum:
$ rm redis-stable.tar.gz
Dzięki temu pozostaniesz z repozytorium kodu źródłowego w /usr/local/lib/redis-stable/ . Redis jest napisany w C, więc musisz skompilować, połączyć i zainstalować za pomocą make narzędzie:
$ cd /usr/local/lib/redis-stable/
$ make && make install
Korzystanie z make install wykonuje dwie akcje:
-
Pierwsza
makepolecenie kompiluje i łączy kod źródłowy. -
make installczęść pobiera binaria i kopiuje je do/usr/local/bin/aby można było je uruchamiać z dowolnego miejsca (zakładając, że/usr/local/bin/jest wPATH).
Oto wszystkie dotychczasowe kroki:
$ redisurl="https://download.redis.io/redis-stable.tar.gz"
$ curl -s -o redis-stable.tar.gz $redisurl
$ sudo su root
$ mkdir -p /usr/local/lib/
$ chmod a+w /usr/local/lib/
$ tar -C /usr/local/lib/ -xzf redis-stable.tar.gz
$ rm redis-stable.tar.gz
$ cd /usr/local/lib/redis-stable/
$ make && make install
W tym momencie poświęć chwilę, aby potwierdzić, że Redis znajduje się w Twojej PATH i sprawdź jego wersję:
$ redis-cli --version
redis-cli 5.0.3
Jeśli twoja powłoka nie może znaleźć redis-cli , upewnij się, że /usr/local/bin/ jest na Twojej PATH zmienną środowiskową i dodaj ją, jeśli nie.
Oprócz redis-cli , make install w rzeczywistości prowadzi do umieszczenia kilku różnych plików wykonywalnych (i jednego dowiązania symbolicznego) w /usr/local/bin/ :
$ # A snapshot of executables that come bundled with Redis
$ ls -hFG /usr/local/bin/redis-* | sort
/usr/local/bin/redis-benchmark*
/usr/local/bin/redis-check-aof*
/usr/local/bin/redis-check-rdb*
/usr/local/bin/redis-cli*
/usr/local/bin/redis-sentinel@
/usr/local/bin/redis-server*
Chociaż wszystkie z nich mają jakieś zamierzone zastosowanie, te dwa, na których prawdopodobnie najbardziej będziesz się interesować, to redis-cli i redis-server , który wkrótce opiszemy. Ale zanim do tego dojdziemy, konieczne jest skonfigurowanie podstawowej konfiguracji.
Konfigurowanie Redisa
Redis jest wysoce konfigurowalny. Chociaż działa dobrze po wyjęciu z pudełka, poświęćmy chwilę, aby ustawić kilka podstawowych opcji konfiguracyjnych, które odnoszą się do trwałości bazy danych i podstawowego bezpieczeństwa:
$ sudo su root
$ mkdir -p /etc/redis/
$ touch /etc/redis/6379.conf
Teraz napisz do /etc/redis/6379.conf . Omówimy, co większość z nich oznacza stopniowo w trakcie samouczka:
# /etc/redis/6379.conf

port              6379
daemonize         yes
save              60 1
bind              127.0.0.1
tcp-keepalive     300
dbfilename        dump.rdb
dir               ./
rdbcompression    yes
Konfiguracja Redisa jest samodokumentowana, z przykładowym redis.conf plik znajdujący się w źródle Redis dla przyjemności czytania. Jeśli używasz Redis w systemie produkcyjnym, opłaca się zablokować wszelkie elementy rozpraszające uwagę i poświęcić czas na pełne przeczytanie tego przykładowego pliku, aby zapoznać się z tajnikami Redis i dostroić konfigurację.
Niektóre samouczki, w tym części dokumentacji Redisa, mogą również sugerować uruchomienie skryptu powłoki install_server.sh znajduje się w redis/utils/install_server.sh . Zachęcamy do uruchomienia tego jako bardziej wszechstronnej alternatywy dla powyższego, ale zwróć uwagę na kilka drobniejszych punktów dotyczących install_server.sh :
- Nie będzie działać na Mac OS X — tylko na Debianie i Ubuntu Linux.
- Wprowadzi pełniejszy zestaw opcji konfiguracyjnych do
/etc/redis/6379.conf. - Zapisze
initSystemu V skrypt do/etc/init.d/redis_6379który pozwoli Ci wykonaćsudo service redis_6379 start.
Przewodnik szybkiego startu Redis zawiera również sekcję dotyczącą bardziej poprawnej konfiguracji Redis, ale powyższe opcje konfiguracji powinny być całkowicie wystarczające do tego samouczka i rozpoczęcia pracy.
Uwaga dotycząca bezpieczeństwa: Kilka lat temu autor Redis wskazał luki bezpieczeństwa we wcześniejszych wersjach Redis, jeśli nie ustawiono konfiguracji. Redis 3.2 (aktualna wersja 5.0.3 z marca 2019 r.) wykonał kroki, aby zapobiec temu włamaniom, ustawiając protected-mode opcja yes domyślnie.
Jawnie ustawiliśmy bind 127.0.0.1 aby Redis nasłuchiwał połączeń tylko z interfejsu localhost, chociaż trzeba by rozszerzyć tę białą listę na rzeczywistym serwerze produkcyjnym. Punkt protected-mode jest zabezpieczeniem, które będzie naśladować to zachowanie bind-to-localhost, jeśli w inny sposób nie określisz niczego w bind opcja.
Mając to na uwadze, możemy teraz zagłębić się w korzystanie z samego Redis.
Dziesięć minut do Redis
Ta sekcja zapewni ci wystarczającą wiedzę o Redis, aby była niebezpieczna, przedstawiając jej projekt i podstawowe użycie.
Pierwsze kroki
Redis ma architekturę klient-serwer i używa modelu żądanie-odpowiedź . Oznacza to, że Ty (klient) łączysz się z serwerem Redis przez połączenie TCP, domyślnie na porcie 6379. Żądasz jakiegoś działania (np. jakiejś formy czytania, pisania, pobierania, ustawiania lub aktualizowania), a serwer serwuje odpowiadasz na odpowiedź.
Może być wielu klientów rozmawiających z tym samym serwerem, o co tak naprawdę chodzi w Redis lub dowolnej aplikacji klient-serwer. Każdy klient wykonuje (zazwyczaj blokujący) odczyt w gnieździe, czekając na odpowiedź serwera.
cli w redis-cli oznacza interfejs wiersza poleceń i server w redis-server jest za, no cóż, prowadzeniem serwera. W ten sam sposób, w jaki uruchamiasz python w wierszu poleceń możesz uruchomić redis-cli aby przejść do interaktywnej pętli REPL (Read Eval Print Loop), w której możesz uruchamiać polecenia klienta bezpośrednio z powłoki.
Najpierw jednak musisz uruchomić redis-server dzięki czemu masz działający serwer Redis, z którym możesz rozmawiać. Typowym sposobem na zrobienie tego w rozwoju jest uruchomienie serwera na hoście lokalnym (adres IPv4 127.0.0.1 ), co jest ustawieniem domyślnym, chyba że poinformujesz Redis inaczej. Możesz także przekazać redis-server nazwa twojego pliku konfiguracyjnego, co jest podobne do określania wszystkich jego par klucz-wartość jako argumentów wiersza poleceń:
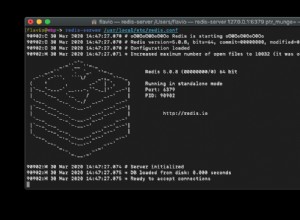
$ redis-server /etc/redis/6379.conf
31829:C 07 Mar 2019 08:45:04.030 # oO0OoO0OoO0Oo Redis is starting oO0OoO0OoO0Oo
31829:C 07 Mar 2019 08:45:04.030 # Redis version=5.0.3, bits=64, commit=00000000, modified=0, pid=31829, just started
31829:C 07 Mar 2019 08:45:04.030 # Configuration loaded
Ustawiamy daemonize opcja konfiguracji na yes , więc serwer działa w tle. (W przeciwnym razie użyj --daemonize yes jako opcja redis-server .)
Teraz jesteś gotowy do uruchomienia Redis REPL. Wpisz redis-cli w linii poleceń. Zobaczysz host:port serwera para, po której następuje > monit:
127.0.0.1:6379>
Oto jedno z najprostszych poleceń Redis, PING , który po prostu testuje łączność z serwerem i zwraca "PONG" jeśli wszystko jest w porządku:
127.0.0.1:6379> PING
PONG
Polecenia Redis nie rozróżniają wielkości liter, chociaż ich odpowiedniki w Pythonie zdecydowanie nie są.
Uwaga: Jako kolejne sprawdzenie poprawności, możesz wyszukać identyfikator procesu serwera Redis za pomocą pgrep :
$ pgrep redis-server
26983
Aby zabić serwer, użyj pkill redis-server z wiersza poleceń. W systemie Mac OS X możesz także użyć redis-cli shutdown .
Następnie użyjemy niektórych typowych poleceń Redis i porównamy je z tym, jak wyglądałyby w czystym Pythonie.
Redis jako słownik Pythona
Redis oznacza Zdalną usługę słownika .
„Masz na myśli, jak słownik Pythona?” możesz zapytać.
Tak. Ogólnie rzecz biorąc, istnieje wiele podobieństw, które można narysować między słownikiem Pythona (lub ogólną tabelą mieszającą) a tym, czym jest i co robi Redis:
-
Baza danych Redis zawiera klucz:wartość paruje i obsługuje polecenia, takie jak
GET,SETiDEL, a także kilkaset dodatkowych poleceń. -
Redis klawisze są zawsze ciągami.
-
Redis wartości może być kilka różnych typów danych. W tym samouczku omówimy niektóre z bardziej podstawowych typów danych wartości:
string,list,hashesisets. Niektóre zaawansowane typy obejmują elementy geoprzestrzenne i nowy typ strumienia. -
Wiele poleceń Redis działa w stałym czasie O(1), podobnie jak pobieranie wartości z
dictPythona lub dowolna tablica mieszająca.
Twórca Redis, Salvatore Sanfilippo, prawdopodobnie nie spodobałoby się porównanie bazy danych Redis ze zwykłym waniliowym dict Pythonem . Nazywa projekt „serwerem struktury danych” (a nie magazynem klucz-wartość, takim jak memcached), ponieważ Redis obsługuje przechowywanie dodatkowych typów klucz:wartość typy danych oprócz string:string . Ale dla naszych celów jest to przydatne porównanie, jeśli znasz obiekt słownikowy Pythona.
Wskoczmy i uczmy się na przykładzie. Nasza pierwsza baza danych zabawek (o identyfikatorze 0) będzie mapowaniem kraju:stolicy , gdzie używamy SET aby ustawić pary klucz-wartość:
127.0.0.1:6379> SET Bahamas Nassau
OK
127.0.0.1:6379> SET Croatia Zagreb
OK
127.0.0.1:6379> GET Croatia
"Zagreb"
127.0.0.1:6379> GET Japan
(nil)
Odpowiednia sekwencja instrukcji w czystym Pythonie wyglądałaby tak:
>>>>>> capitals = {}
>>> capitals["Bahamas"] = "Nassau"
>>> capitals["Croatia"] = "Zagreb"
>>> capitals.get("Croatia")
'Zagreb'
>>> capitals.get("Japan") # None
Używamy capitals.get("Japan") zamiast capitals["Japan"] ponieważ Redis zwróci nil zamiast błędu, gdy klucz nie zostanie znaleziony, co jest analogiczne do None w Pythonie .
Redis umożliwia również ustawienie i uzyskanie wielu par klucz-wartość w jednym poleceniu, MSET i MGET , odpowiednio:
127.0.0.1:6379> MSET Lebanon Beirut Norway Oslo France Paris
OK
127.0.0.1:6379> MGET Lebanon Norway Bahamas
1) "Beirut"
2) "Oslo"
3) "Nassau"
Najbliższą rzeczą w Pythonie jest dict.update() :
>>> capitals.update({
...     "Lebanon": "Beirut",
...     "Norway": "Oslo",
...     "France": "Paris",
... })
>>> [capitals.get(k) for k in ("Lebanon", "Norway", "Bahamas")]
['Beirut', 'Oslo', 'Nassau']
Używamy .get() zamiast .__getitem__() naśladować zachowanie Redisa polegające na zwracaniu wartości podobnej do null, gdy nie znaleziono klucza.
Jako trzeci przykład, EXISTS polecenie działa tak, jak brzmi, czyli sprawdza, czy klucz istnieje:
127.0.0.1:6379> EXISTS Norway
(integer) 1
127.0.0.1:6379> EXISTS Sweden
(integer) 0
Python ma in słowo kluczowe do testowania tego samego, które kieruje do dict.__contains__(key) :
>>> "Norway" in capitals
True
>>> "Sweden" in capitals
False
Te kilka przykładów ma na celu pokazanie, przy użyciu natywnego Pythona, co dzieje się na wysokim poziomie za pomocą kilku popularnych poleceń Redis. W przykładach Pythona nie ma komponentu klient-serwer, a redis-py jeszcze nie wszedł na obraz. Ma to na celu jedynie pokazanie funkcjonalności Redis na przykładzie.
Oto podsumowanie kilku widzianych poleceń Redis i ich funkcjonalnych odpowiedników w Pythonie:
capitals["Bahamas"] = "Nassau"
capitals.get("Croatia")
capitals.update(
    {
        "Lebanon": "Beirut",
        "Norway": "Oslo",
        "France": "Paris",
    }
)
[capitals[k] for k in ("Lebanon", "Norway", "Bahamas")]
"Norway" in capitals
Biblioteka klienta Python Redis, redis-py , o którym za chwilę zagłębisz się w tym artykule, działa inaczej. Hermetyzuje rzeczywiste połączenie TCP z serwerem Redis i wysyła nieprzetworzone polecenia jako bajty serializowane przy użyciu protokołu serializacji REdis (RESP) do serwera. Następnie pobiera surową odpowiedź i przetwarza ją z powrotem w obiekt Pythona, taki jak bytes , int , a nawet datetime.datetime .
Uwaga :Do tej pory rozmawiałeś z serwerem Redis za pośrednictwem interaktywnego redis-cli REPL. Możesz także wydawać polecenia bezpośrednio, w ten sam sposób, w jaki przekazujesz nazwę skryptu do python plik wykonywalny, taki jak python myscript.py .
Do tej pory widziałeś kilka podstawowych typów danych Redis, które są mapowaniem string:string . Chociaż ta para klucz-wartość jest powszechna w większości sklepów klucz-wartość, Redis oferuje wiele innych możliwych typów wartości, które zobaczysz dalej.
Więcej typów danych w Pythonie a Redis
Zanim uruchomisz redis-py Klient Pythona, pomaga również mieć podstawowe pojęcie o kilku innych typach danych Redis. Aby było jasne, wszystkie klucze Redis są ciągami. Jest to wartość, która może przyjmować typy danych (lub struktury) oprócz wartości łańcuchowych używanych do tej pory w przykładach.
hasz jest odwzorowaniem string:string , o nazwie wartość-pola pary, które znajdują się pod jednym kluczem najwyższego poziomu:
127.0.0.1:6379> HSET realpython url "https://realpython.com/"
(integer) 1
127.0.0.1:6379> HSET realpython github realpython
(integer) 1
127.0.0.1:6379> HSET realpython fullname "Real Python"
(integer) 1
Ustawia to trzy pary pole-wartość dla jednego klucza , "realpython" . Jeśli jesteś przyzwyczajony do terminologii i obiektów Pythona, może to być mylące. Hash Redis jest mniej więcej analogiczny do dict Pythona który jest zagnieżdżony o jeden poziom głęboko:
data = {
    "realpython": {
        "url": "https://realpython.com/",
        "github": "realpython",
        "fullname": "Real Python",
    }
}
Pola Redis są podobne do kluczy Pythona każdej zagnieżdżonej pary klucz-wartość w wewnętrznym słowniku powyżej. Redis zastrzega sobie termin klucz dla klucza bazy danych najwyższego poziomu, który przechowuje samą strukturę skrótu.
Tak jak jest MSET dla podstawowego ciąg:ciąg pary klucz-wartość, istnieje również HMSET dla skrótów, aby ustawić wiele par w obiekt wartości skrótu:
127.0.0.1:6379> HMSET pypa url "https://www.pypa.io/" github pypa fullname "Python Packaging Authority"
OK
127.0.0.1:6379> HGETALL pypa
1) "url"
2) "https://www.pypa.io/"
3) "github"
4) "pypa"
5) "fullname"
6) "Python Packaging Authority"
Używanie HMSET jest prawdopodobnie bliższym odpowiednikiem sposobu, w jaki przypisaliśmy data do zagnieżdżonego słownika powyżej, zamiast ustawiania każdej zagnieżdżonej pary, jak to ma miejsce w przypadku HSET .
Dwa dodatkowe typy wartości to listy i zestawy , który może zastąpić skrót lub ciąg znaków jako wartość Redis. Są w dużej mierze tak, jak brzmią, więc nie zajmę Ci czasu dodatkowymi przykładami. Skróty, listy i zestawy zawierają pewne polecenia, które są specyficzne dla danego typu danych, które w niektórych przypadkach są oznaczone ich początkową literą:
-
Hasze: Polecenia do operowania na hashach zaczynają się od
H, na przykładHSET,HGETlubHMSET. -
Zestawy: Polecenia do operowania na zestawach zaczynają się od
S, na przykładSCARD, który pobiera liczbę elementów przy ustawionej wartości odpowiadającej danemu kluczowi. -
Listy: Polecenia do operowania na listach zaczynają się od
LlubR. Przykłady obejmująLPOPiRPUSH.LlubRodnosi się do tego, po której stronie listy operuje się. Kilka poleceń list jest również poprzedzonych przedrostkiemB, co oznacza blokowanie . Operacja blokująca nie pozwala na przerwanie jej przez inne operacje podczas jej wykonywania. Na przykładBLPOPwykonuje blokujący lewy pop na strukturze listy.
Uwaga: Jedną z godnych uwagi cech typu listy Redis jest to, że jest to lista połączona, a nie tablica. Oznacza to, że dołączanie to O(1), podczas gdy indeksowanie pod dowolnym numerem indeksu to O(N).
Oto krótka lista poleceń, które są specyficzne dla typu danych typu string, hash, list i set w Redis:
| Typ | Polecenia |
|---|---|
| Zestawy | SADD , SCARD , SDIFF , SDIFFSTORE , SINTER , SINTERSTORE , SISMEMBER , SMEMBERS , SMOVE , SPOP , SRANDMEMBER , SREM , SSCAN , SUNION , SUNIONSTORE |
| Hasze | HDEL , HEXISTS , HGET , HGETALL , HINCRBY , HINCRBYFLOAT , HKEYS , HLEN , HMGET , HMSET , HSCAN , HSET , HSETNX , HSTRLEN , HVALS |
| Listy | BLPOP , BRPOP , BRPOPLPUSH , LINDEX , LINSERT , LLEN , LPOP , LPUSH , LPUSHX , LRANGE , LREM , LSET , LTRIM , RPOP , RPOPLPUSH , RPUSH , RPUSHX |
| Ciągi | APPEND , BITCOUNT , BITFIELD , BITOP , BITPOS , DECR , DECRBY , GET , GET , GETRANGE , GET , INCR , INCRBY , INCRBYFLOAT , MGET , MSET , MSETNX , PSETEX , SET , SETBIT , SETEX , SETNX , SETRANGE , STRLEN |
Ta tabela nie jest pełnym obrazem poleceń i typów Redis. Jest stół szwedzki z bardziej zaawansowanymi typami danych, takimi jak elementy geoprzestrzenne, posortowane zestawy i HyperLogLog. Na stronie poleceń Redis możesz filtrować według grupy struktury danych. Istnieje również podsumowanie typów danych i wprowadzenie do typów danych Redis.
Ponieważ zamierzamy przejść do robienia rzeczy w Pythonie, możesz teraz wyczyścić swoją bazę danych zabawek za pomocą FLUSHDB i zamknij redis-cli REPL:
127.0.0.1:6379> FLUSHDB
OK
127.0.0.1:6379> QUIT
Spowoduje to powrót do znaku zachęty powłoki. Możesz opuścić redis-server działa w tle, ponieważ będziesz go potrzebować również do końca samouczka.
Korzystanie z redis-py :Redis w Pythonie
Teraz, gdy opanowałeś już podstawy Redis, nadszedł czas, aby przejść do redis-py , klient Pythona, który pozwala rozmawiać z Redis z przyjaznego dla użytkownika interfejsu API Pythona.
Pierwsze kroki
redis-py to ugruntowana biblioteka kliencka Pythona, która pozwala komunikować się z serwerem Redis bezpośrednio za pomocą wywołań Pythona:
$ python -m pip install redis
Następnie upewnij się, że serwer Redis nadal działa i działa w tle. Możesz to sprawdzić za pomocą pgrep redis-server , a jeśli wyjdziesz z pustymi rękami, zrestartuj lokalny serwer za pomocą redis-server /etc/redis/6379.conf .
Przejdźmy teraz do części skoncentrowanej na Pythonie. Oto „witaj świecie” redis-py :
 1>>> import redis
 2>>> r = redis.Redis()
 3>>> r.mset({"Croatia": "Zagreb", "Bahamas": "Nassau"})
 4True
 5>>> r.get("Bahamas")
 6b'Nassau'
Redis , używany w wierszu 2, jest centralną klasą pakietu i koniem roboczym, za pomocą którego wykonujesz (prawie) dowolne polecenie Redis. Połączenie i ponowne użycie gniazda TCP odbywa się za kulisami, a polecenia Redis są wywoływane przy użyciu metod w instancji klasy r .
Zauważ również, że typ zwróconego obiektu, b'Nassau' w wierszu 6 to bytes Pythona wpisz, a nie str . To jest bytes zamiast str to jest najczęstszy typ zwracany w redis-py , więc może być konieczne wywołanie r.get("Bahamas").decode("utf-8") w zależności od tego, co faktycznie chcesz zrobić ze zwróconym ciągiem bajtowym.
Czy powyższy kod wygląda znajomo? Metody w prawie wszystkich przypadkach pasują do nazwy polecenia Redis, które robi to samo. Tutaj nazwałeś r.mset() i r.get() , które odpowiadają MSET i GET w natywnym Redis API.
Oznacza to również, że HGETALL staje się r.hgetall() , PING staje się r.ping() , i tak dalej. Jest kilka wyjątków, ale zasada obowiązuje dla większości poleceń.
Podczas gdy argumenty polecenia Redis zwykle przekładają się na podobnie wyglądającą sygnaturę metody, przyjmują one obiekty Pythona. Na przykład wywołanie r.mset() w powyższym przykładzie używa Pythona dict jako pierwszy argument, a nie sekwencję ciągów bajtowych.
Zbudowaliśmy Redis instancja r bez argumentów, ale jest dostarczany z wieloma parametrami, jeśli ich potrzebujesz:
# From redis/client.py
class Redis(object):
    def __init__(self, host='localhost', port=6379,
                 db=0, password=None, socket_timeout=None,
                 # ...
Widać, że domyślny nazwa hosta:port para to localhost:6379 , czyli dokładnie to, czego potrzebujemy w przypadku naszego lokalnie przechowywanego redis-server przykład.
db parametrem jest numer bazy danych. W Redis można jednocześnie zarządzać wieloma bazami danych, a każda z nich jest identyfikowana przez liczbę całkowitą. Maksymalna liczba baz danych to domyślnie 16.
Kiedy uruchamiasz tylko redis-cli z wiersza poleceń, to uruchomi cię w bazie danych 0. Użyj -n flaga do uruchomienia nowej bazy danych, jak w redis-cli -n 5 .
Dozwolone typy kluczy
Warto wiedzieć, że redis-py wymaga podania kluczy, które są bytes , str , int lub float . (Skonwertuje ostatnie 3 z tych typów na bytes przed wysłaniem ich na serwer).
Rozważ przypadek, w którym chcesz użyć dat kalendarzowych jako kluczy:
>>>>>> import datetime
>>> today = datetime.date.today()
>>> visitors = {"dan", "jon", "alex"}
>>> r.sadd(today, *visitors)
Traceback (most recent call last):
# ...
redis.exceptions.DataError: Invalid input of type: 'date'.
Convert to a byte, string or number first.
Będziesz musiał jawnie przekonwertować date Pythona obiekt do str , co można zrobić za pomocą .isoformat() :
>>> stoday = today.isoformat()  # Python 3.7+, or use str(today)
>>> stoday
'2019-03-10'
>>> r.sadd(stoday, *visitors)  # sadd: set-add
3
>>> r.smembers(stoday)
{b'dan', b'alex', b'jon'}
>>> r.scard(today.isoformat())
3
Podsumowując, sam Redis zezwala tylko na ciągi jako klucze. redis-py jest nieco bardziej liberalny w akceptowanych typach Pythona, chociaż ostatecznie konwertuje wszystko na bajty przed wysłaniem ich na serwer Redis.
Przykład:PyHats.com
Czas wydobyć pełniejszy przykład. Załóżmy, że zdecydowaliśmy się założyć lukratywną witrynę internetową PyHats.com, która sprzedaje strasznie drogie kapelusze każdemu, kto je kupi, i zatrudniliśmy Cię do zbudowania witryny.
Będziesz używać Redis do obsługi niektórych katalogów produktów, inwentaryzacji i wykrywania ruchu przez boty na PyHats.com.
To pierwszy dzień dla strony, a my zamierzamy sprzedawać trzy limitowane edycje kapeluszy. Każdy kapelusz jest przechowywany w hashu Redis par pole-wartość, a hash ma klucz, który jest losową liczbą całkowitą z prefiksem, taką jak hat:56854717 . Korzystanie z hat: prefiks to konwencja Redis dotycząca tworzenia pewnego rodzaju przestrzeni nazw w bazie danych Redis:
import random

random.seed(444)
hats = {f"hat:{random.getrandbits(32)}": i for i in (
    {
        "color": "black",
        "price": 49.99,
        "style": "fitted",
        "quantity": 1000,
        "npurchased": 0,
    },
    {
        "color": "maroon",
        "price": 59.99,
        "style": "hipster",
        "quantity": 500,
        "npurchased": 0,
    },
    {
        "color": "green",
        "price": 99.99,
        "style": "baseball",
        "quantity": 200,
        "npurchased": 0,
    })
}
Zacznijmy od bazy danych 1 ponieważ użyliśmy bazy danych 0 w poprzednim przykładzie:
>>> r = redis.Redis(db=1)
Aby wykonać pierwszy zapis tych danych w Redis, możemy użyć .hmset() (hash multi-set), wywołując go dla każdego słownika. „multi” jest odniesieniem do ustawiania wielu par pole-wartość, gdzie „pole” w tym przypadku odpowiada kluczowi dowolnego z zagnieżdżonych słowników w hats :
 1>>> with r.pipeline() as pipe:
 2...    for h_id, hat in hats.items():
 3...        pipe.hmset(h_id, hat)
 4...    pipe.execute()
 5Pipeline<ConnectionPool<Connection<host=localhost,port=6379,db=1>>>
 6Pipeline<ConnectionPool<Connection<host=localhost,port=6379,db=1>>>
 7Pipeline<ConnectionPool<Connection<host=localhost,port=6379,db=1>>>
 8[True, True, True]
 9
10>>> r.bgsave()
11True
Powyższy blok kodu wprowadza również koncepcję Redis potokowania , co jest sposobem na zmniejszenie liczby transakcji w obie strony potrzebnych do zapisywania lub odczytywania danych z serwera Redis. Gdybyś po prostu wywołał r.hmset() trzy razy, to wymagałoby to operacji w obie strony w obie strony dla każdego zapisanego wiersza.
W przypadku potoku wszystkie polecenia są buforowane po stronie klienta, a następnie wysyłane za jednym zamachem za pomocą pipe.hmset() w wierszu 3. Dlatego trzy True wszystkie odpowiedzi są zwracane jednocześnie, gdy wywołasz pipe.execute() w wierszu 4. Wkrótce zobaczysz bardziej zaawansowany przypadek użycia potoku.
Uwaga :Dokumentacja Redis stanowi przykład zrobienia tego samego z redis-cli , gdzie możesz potoku zawartość pliku lokalnego, aby wykonać masowe wstawianie.
Sprawdźmy szybko, czy wszystko jest w naszej bazie danych Redis:
>>>>>> pprint(r.hgetall("hat:56854717"))
{b'color': b'green',
b'npurchased': b'0',
b'price': b'99.99',
b'quantity': b'200',
b'style': b'baseball'}
>>> r.keys() # Careful on a big DB. keys() is O(N)
[b'56854717', b'1236154736', b'1326692461']
Pierwszą rzeczą, którą chcemy zasymulować, jest to, co dzieje się, gdy użytkownik kliknie Kup . Jeśli produkt jest w magazynie, zwiększ jego npurchased o 1 i zmniejsz jego quantity (inwentarz) o 1. Możesz użyć .hincrby() aby to zrobić:
>>> r.hincrby("hat:56854717", "quantity", -1)
199
>>> r.hget("hat:56854717", "quantity")
b'199'
>>> r.hincrby("hat:56854717", "npurchased", 1)
1
Uwaga :HINCRBY nadal działa na wartości skrótu, która jest ciągiem, ale próbuje zinterpretować ciąg jako 64-bitową liczbę całkowitą ze znakiem o podstawie 10, aby wykonać operację.
Dotyczy to innych poleceń związanych z inkrementacją i dekrementacją dla innych struktur danych, a mianowicie INCR , INCRBY , INCRBYFLOAT , ZINCRBY i HINCRBYFLOAT . Otrzymasz błąd, jeśli ciąg przy wartości nie może być reprezentowany jako liczba całkowita.
Jednak to naprawdę nie jest takie proste. Zmiana quantity i npurchased w dwóch linijkach kodu ukrywa fakt, że kliknięcie, zakup i płatność to coś więcej. We need to do a few more checks to make sure we don’t leave someone with a lighter wallet and no hat:
- Step 1: Check if the item is in stock, or otherwise raise an exception on the backend.
- Step 2: If it is in stock, then execute the transaction, decrease the
quantityfield, and increase thenpurchasedfield. - Step 3: Be alert for any changes that alter the inventory in between the first two steps (a race condition).
Step 1 is relatively straightforward:it consists of an .hget() to check the available quantity.
Step 2 is a little bit more involved. The pair of increase and decrease operations need to be executed atomically :either both should be completed successfully, or neither should be (in the case that at least one fails).
With client-server frameworks, it’s always crucial to pay attention to atomicity and look out for what could go wrong in instances where multiple clients are trying to talk to the server at once. The answer to this in Redis is to use a transaction block, meaning that either both or neither of the commands get through.
In redis-py , Pipeline is a transactional pipeline class by default. This means that, even though the class is actually named for something else (pipelining), it can be used to create a transaction block also.
In Redis, a transaction starts with MULTI and ends with EXEC :
 1127.0.0.1:6379> MULTI
 2127.0.0.1:6379> HINCRBY 56854717 quantity -1
 3127.0.0.1:6379> HINCRBY 56854717 npurchased 1
 4127.0.0.1:6379> EXEC
MULTI (Line 1) marks the start of the transaction, and EXEC (Line 4) marks the end. Everything in between is executed as one all-or-nothing buffered sequence of commands. This means that it will be impossible to decrement quantity (Line 2) but then have the balancing npurchased increment operation fail (Line 3).
Let’s circle back to Step 3:we need to be aware of any changes that alter the inventory in between the first two steps.
Step 3 is the trickiest. Let’s say that there is one lone hat remaining in our inventory. In between the time that User A checks the quantity of hats remaining and actually processes their transaction, User B also checks the inventory and finds likewise that there is one hat listed in stock. Both users will be allowed to purchase the hat, but we have 1 hat to sell, not 2, so we’re on the hook and one user is out of their money. Not good.
Redis has a clever answer for the dilemma in Step 3:it’s called optimistic locking , and is different than how typical locking works in an RDBMS such as PostgreSQL. Optimistic locking, in a nutshell, means that the calling function (client) does not acquire a lock, but rather monitors for changes in the data it is writing to during the time it would have held a lock . If there’s a conflict during that time, the calling function simply tries the whole process again.
You can effect optimistic locking by using the WATCH command (.watch() in redis-py ), which provides a check-and-set behavior.
Let’s introduce a big chunk of code and walk through it afterwards step by step. You can picture buyitem() as being called any time a user clicks on a Buy Now or Purchase przycisk. Its purpose is to confirm the item is in stock and take an action based on that result, all in a safe manner that looks out for race conditions and retries if one is detected:
 1import logging
 2import redis
 3
 4logging.basicConfig()
 5
 6class OutOfStockError(Exception):
 7    """Raised when PyHats.com is all out of today's hottest hat"""
 8
 9def buyitem(r: redis.Redis, itemid: int) -> None:
10    with r.pipeline() as pipe:
11        error_count = 0
12        while True:
13            try:
14                # Get available inventory, watching for changes
15                # related to this itemid before the transaction
16                pipe.watch(itemid)
17                nleft: bytes = r.hget(itemid, "quantity")
18                if nleft > b"0":
19                    pipe.multi()
20                    pipe.hincrby(itemid, "quantity", -1)
21                    pipe.hincrby(itemid, "npurchased", 1)
22                    pipe.execute()
23                    break
24                else:
25                    # Stop watching the itemid and raise to break out
26                    pipe.unwatch()
27                    raise OutOfStockError(
28                        f"Sorry, {itemid} is out of stock!"
29                    )
30            except redis.WatchError:
31                # Log total num. of errors by this user to buy this item,
32                # then try the same process again of WATCH/HGET/MULTI/EXEC
33                error_count += 1
34                logging.warning(
35                    "WatchError #%d: %s; retrying",
36                    error_count, itemid
37                )
38    return None
The critical line occurs at Line 16 with pipe.watch(itemid) , which tells Redis to monitor the given itemid for any changes to its value. The program checks the inventory through the call to r.hget(itemid, "quantity") , in Line 17:
16pipe.watch(itemid)
17nleft: bytes = r.hget(itemid, "quantity")
18if nleft > b"0":
19    # Item in stock. Proceed with transaction.
If the inventory gets touched during this short window between when the user checks the item stock and tries to purchase it, then Redis will return an error, and redis-py will raise a WatchError (Line 30). That is, if any of the hash pointed to by itemid changes after the .hget() call but before the subsequent .hincrby() calls in Lines 20 and 21, then we’ll re-run the whole process in another iteration of the while True loop as a result.
This is the “optimistic” part of the locking:rather than letting the client have a time-consuming total lock on the database through the getting and setting operations, we leave it up to Redis to notify the client and user only in the case that calls for a retry of the inventory check.
One key here is in understanding the difference between client-side and server-side operations:
nleft = r.hget(itemid, "quantity")
This Python assignment brings the result of r.hget() client-side. Conversely, methods that you call on pipe effectively buffer all of the commands into one, and then send them to the server in a single request:
16pipe.multi()
17pipe.hincrby(itemid, "quantity", -1)
18pipe.hincrby(itemid, "npurchased", 1)
19pipe.execute()
No data comes back to the client side in the middle of the transactional pipeline. You need to call .execute() (Line 19) to get the sequence of results back all at once.
Even though this block contains two commands, it consists of exactly one round-trip operation from client to server and back.
This means that the client can’t immediately use the result of pipe.hincrby(itemid, "quantity", -1) , from Line 20, because methods on a Pipeline return just the pipe instance itself. We haven’t asked anything from the server at this point. While normally .hincrby() returns the resulting value, you can’t immediately reference it on the client side until the entire transaction is completed.
There’s a catch-22:this is also why you can’t put the call to .hget() into the transaction block. If you did this, then you’d be unable to know if you want to increment the npurchased field yet, since you can’t get real-time results from commands that are inserted into a transactional pipeline.
Finally, if the inventory sits at zero, then we UNWATCH the item ID and raise an OutOfStockError (Line 27), ultimately displaying that coveted Sold Out page that will make our hat buyers desperately want to buy even more of our hats at ever more outlandish prices:
24else:
25    # Stop watching the itemid and raise to break out
26    pipe.unwatch()
27    raise OutOfStockError(
28        f"Sorry, {itemid} is out of stock!"
29    )
Here’s an illustration. Keep in mind that our starting quantity is 199 for hat 56854717 since we called .hincrby() above. Let’s mimic 3 purchases, which should modify the quantity and npurchased pola:
>>> buyitem(r, "hat:56854717")
>>> buyitem(r, "hat:56854717")
>>> buyitem(r, "hat:56854717")
>>> r.hmget("hat:56854717", "quantity", "npurchased")  # Hash multi-get
[b'196', b'4']
Now, we can fast-forward through more purchases, mimicking a stream of purchases until the stock depletes to zero. Again, picture these coming from a whole bunch of different clients rather than just one Redis instance:
>>> # Buy remaining 196 hats for item 56854717 and deplete stock to 0
>>> for _ in range(196):
...     buyitem(r, "hat:56854717")
>>> r.hmget("hat:56854717", "quantity", "npurchased")
[b'0', b'200']
Now, when some poor user is late to the game, they should be met with an OutOfStockError that tells our application to render an error message page on the frontend:
>>> buyitem(r, "hat:56854717")
Traceback (most recent call last):
  File "<stdin>", line 1, in <module>
  File "<stdin>", line 20, in buyitem
__main__.OutOfStockError: Sorry, hat:56854717 is out of stock!
Looks like it’s time to restock.
Using Key Expiry
Let’s introduce key expiry , which is another distinguishing feature in Redis. When you expire a key, that key and its corresponding value will be automatically deleted from the database after a certain number of seconds or at a certain timestamp.
In redis-py , one way that you can accomplish this is through .setex() , which lets you set a basic string:string key-value pair with an expiration:
 1>>> from datetime import timedelta
 2
 3>>> # setex: "SET" with expiration
 4>>> r.setex(
 5...     "runner",
 6...     timedelta(minutes=1),
 7...     value="now you see me, now you don't"
 8... )
 9True
You can specify the second argument as a number in seconds or a timedelta object, as in Line 6 above. I like the latter because it seems less ambiguous and more deliberate.
There are also methods (and corresponding Redis commands, of course) to get the remaining lifetime (time-to-live ) of a key that you’ve set to expire:
>>>>>> r.ttl("runner") # "Time To Live", in seconds
58
>>> r.pttl("runner") # Like ttl, but milliseconds
54368
Below, you can accelerate the window until expiration, and then watch the key expire, after which r.get() will return None and .exists() will return 0 :
>>> r.get("runner")  # Not expired yet
b"now you see me, now you don't"

>>> r.expire("runner", timedelta(seconds=3))  # Set new expire window
True
>>> # Pause for a few seconds
>>> r.get("runner")
>>> r.exists("runner")  # Key & value are both gone (expired)
0
The table below summarizes commands related to key-value expiration, including the ones covered above. The explanations are taken directly from redis-py method docstrings:
| Signature | Purpose |
|---|---|
r.setex(name, time, value) | Sets the value of key name to value that expires in time seconds, where time can be represented by an int or a Python timedelta object |
r.psetex(name, time_ms, value) | Sets the value of key name to value that expires in time_ms milliseconds, where time_ms can be represented by an int or a Python timedelta object |
r.expire(name, time) | Sets an expire flag on key name for time seconds, where time can be represented by an int or a Python timedelta object |
r.expireat(name, when) | Sets an expire flag on key name , where when can be represented as an int indicating Unix time or a Python datetime object |
r.persist(name) | Removes an expiration on name |
r.pexpire(name, time) | Sets an expire flag on key name for time milliseconds, and time can be represented by an int or a Python timedelta object |
r.pexpireat(name, when) | Sets an expire flag on key name , where when can be represented as an int representing Unix time in milliseconds (Unix time * 1000) or a Python datetime object |
r.pttl(name) | Returns the number of milliseconds until the key name will expire |
r.ttl(name) | Returns the number of seconds until the key name will expire |
PyHats.com, Part 2
A few days after its debut, PyHats.com has attracted so much hype that some enterprising users are creating bots to buy hundreds of items within seconds, which you’ve decided isn’t good for the long-term health of your hat business.
Now that you’ve seen how to expire keys, let’s put it to use on the backend of PyHats.com.
We’re going to create a new Redis client that acts as a consumer (or watcher) and processes a stream of incoming IP addresses, which in turn may come from multiple HTTPS connections to the website’s server.
The watcher’s goal is to monitor a stream of IP addresses from multiple sources, keeping an eye out for a flood of requests from a single address within a suspiciously short amount of time.
Some middleware on the website server pushes all incoming IP addresses into a Redis list with .lpush() . Here’s a crude way of mimicking some incoming IPs, using a fresh Redis database:
>>> r = redis.Redis(db=5)
>>> r.lpush("ips", "51.218.112.236")
1
>>> r.lpush("ips", "90.213.45.98")
2
>>> r.lpush("ips", "115.215.230.176")
3
>>> r.lpush("ips", "51.218.112.236")
4
As you can see, .lpush() returns the length of the list after the push operation succeeds. Each call of .lpush() puts the IP at the beginning of the Redis list that is keyed by the string "ips" .
In this simplified simulation, the requests are all technically from the same client, but you can think of them as potentially coming from many different clients and all being pushed to the same database on the same Redis server.
Now, open up a new shell tab or window and launch a new Python REPL. In this shell, you’ll create a new client that serves a very different purpose than the rest, which sits in an endless while True loop and does a blocking left-pop BLPOP call on the ips list, processing each address:
 1# New shell window or tab
 2
 3import datetime
 4import ipaddress
 5
 6import redis
 7
 8# Where we put all the bad egg IP addresses
 9blacklist = set()
10MAXVISITS = 15
11
12ipwatcher = redis.Redis(db=5)
13
14while True:
15    _, addr = ipwatcher.blpop("ips")
16    addr = ipaddress.ip_address(addr.decode("utf-8"))
17    now = datetime.datetime.utcnow()
18    addrts = f"{addr}:{now.minute}"
19    n = ipwatcher.incrby(addrts, 1)
20    if n >= MAXVISITS:
21        print(f"Hat bot detected!:  {addr}")
22        blacklist.add(addr)
23    else:
24        print(f"{now}:  saw {addr}")
25    _ = ipwatcher.expire(addrts, 60)
Let’s walk through a few important concepts.
The ipwatcher acts like a consumer, sitting around and waiting for new IPs to be pushed on the "ips" Redis list. It receives them as bytes , such as b”51.218.112.236”, and makes them into a more proper address object with the ipaddress moduł:
15_, addr = ipwatcher.blpop("ips")
16addr = ipaddress.ip_address(addr.decode("utf-8"))
Then you form a Redis string key using the address and minute of the hour at which the ipwatcher saw the address, incrementing the corresponding count by 1 and getting the new count in the process:
17now = datetime.datetime.utcnow()
18addrts = f"{addr}:{now.minute}"
19n = ipwatcher.incrby(addrts, 1)
If the address has been seen more than MAXVISITS , then it looks as if we have a PyHats.com web scraper on our hands trying to create the next tulip bubble. Alas, we have no choice but to give this user back something like a dreaded 403 status code.
We use ipwatcher.expire(addrts, 60) to expire the (address minute) combination 60 seconds from when it was last seen. This is to prevent our database from becoming clogged up with stale one-time page viewers.
If you execute this code block in a new shell, you should immediately see this output:
2019-03-11 15:10:41.489214:  saw 51.218.112.236
2019-03-11 15:10:41.490298:  saw 115.215.230.176
2019-03-11 15:10:41.490839:  saw 90.213.45.98
2019-03-11 15:10:41.491387:  saw 51.218.112.236
The output appears right away because those four IPs were sitting in the queue-like list keyed by "ips" , waiting to be pulled out by our ipwatcher . Using .blpop() (or the BLPOP command) will block until an item is available in the list, then pops it off. It behaves like Python’s Queue.get() , which also blocks until an item is available.
Besides just spitting out IP addresses, our ipwatcher has a second job. For a given minute of an hour (minute 1 through minute 60), ipwatcher will classify an IP address as a hat-bot if it sends 15 or more GET requests in that minute.
Switch back to your first shell and mimic a page scraper that blasts the site with 20 requests in a few milliseconds:
for _ in range(20):
    r.lpush("ips", "104.174.118.18")
Finally, toggle back to the second shell holding ipwatcher , and you should see an output like this:
2019-03-11 15:15:43.041363:  saw 104.174.118.18
2019-03-11 15:15:43.042027:  saw 104.174.118.18
2019-03-11 15:15:43.042598:  saw 104.174.118.18
2019-03-11 15:15:43.043143:  saw 104.174.118.18
2019-03-11 15:15:43.043725:  saw 104.174.118.18
2019-03-11 15:15:43.044244:  saw 104.174.118.18
2019-03-11 15:15:43.044760:  saw 104.174.118.18
2019-03-11 15:15:43.045288:  saw 104.174.118.18
2019-03-11 15:15:43.045806:  saw 104.174.118.18
2019-03-11 15:15:43.046318:  saw 104.174.118.18
2019-03-11 15:15:43.046829:  saw 104.174.118.18
2019-03-11 15:15:43.047392:  saw 104.174.118.18
2019-03-11 15:15:43.047966:  saw 104.174.118.18
2019-03-11 15:15:43.048479:  saw 104.174.118.18
Hat bot detected!:  104.174.118.18
Hat bot detected!:  104.174.118.18
Hat bot detected!:  104.174.118.18
Hat bot detected!:  104.174.118.18
Hat bot detected!:  104.174.118.18
Hat bot detected!:  104.174.118.18
Now, Ctrl +C out of the while True loop and you’ll see that the offending IP has been added to your blacklist:
>>> blacklist
{IPv4Address('104.174.118.18')}
Can you find the defect in this detection system? The filter checks the minute as .minute rather than the last 60 seconds (a rolling minute). Implementing a rolling check to monitor how many times a user has been seen in the last 60 seconds would be trickier. There’s a crafty solution using using Redis’ sorted sets at ClassDojo. Josiah Carlson’s Redis in Action also presents a more elaborate and general-purpose example of this section using an IP-to-location cache table.
Persistence and Snapshotting
One of the reasons that Redis is so fast in both read and write operations is that the database is held in memory (RAM) on the server. However, a Redis database can also be stored (persisted) to disk in a process called snapshotting. The point behind this is to keep a physical backup in binary format so that data can be reconstructed and put back into memory when needed, such as at server startup.
You already enabled snapshotting without knowing it when you set up basic configuration at the beginning of this tutorial with the save option:
# /etc/redis/6379.conf

port              6379
daemonize         yes
save              60 1
bind              127.0.0.1
tcp-keepalive     300
dbfilename        dump.rdb
dir               ./
rdbcompression    yes
The format is save <seconds> <changes> . This tells Redis to save the database to disk if both the given number of seconds and number of write operations against the database occurred. In this case, we’re telling Redis to save the database to disk every 60 seconds if at least one modifying write operation occurred in that 60-second timespan. This is a fairly aggressive setting versus the sample Redis config file, which uses these three save directives:
# Default redis/redis.conf
save 900 1
save 300 10
save 60 10000
An RDB snapshot is a full (rather than incremental) point-in-time capture of the database. (RDB refers to a Redis Database File.) We also specified the directory and file name of the resulting data file that gets written:
# /etc/redis/6379.conf

port              6379
daemonize         yes
save              60 1
bind              127.0.0.1
tcp-keepalive     300
dbfilename        dump.rdb
dir               ./
rdbcompression    yes
This instructs Redis to save to a binary data file called dump.rdb in the current working directory of wherever redis-server was executed from:
$ file -b dump.rdb
data
You can also manually invoke a save with the Redis command BGSAVE :
127.0.0.1:6379> BGSAVE
Background saving started
The “BG” in BGSAVE indicates that the save occurs in the background. This option is available in a redis-py method as well:
>>> r.lastsave()  # Redis command: LASTSAVE
datetime.datetime(2019, 3, 10, 21, 56, 50)
>>> r.bgsave()
True
>>> r.lastsave()
datetime.datetime(2019, 3, 10, 22, 4, 2)
This example introduces another new command and method, .lastsave() . In Redis, it returns the Unix timestamp of the last DB save, which Python gives back to you as a datetime obiekt. Above, you can see that the r.lastsave() result changes as a result of r.bgsave() .
r.lastsave() will also change if you enable automatic snapshotting with the save configuration option.
To rephrase all of this, there are two ways to enable snapshotting:
- Explicitly, through the Redis command
BGSAVEorredis-pymethod.bgsave() - Implicitly, through the
saveconfiguration option (which you can also set with.config_set()inredis-py)
RDB snapshotting is fast because the parent process uses the fork() system call to pass off the time-intensive write to disk to a child process, so that the parent process can continue on its way. This is what the background in BGSAVE refers to.
There’s also SAVE (.save() in redis-py ), but this does a synchronous (blocking) save rather than using fork() , so you shouldn’t use it without a specific reason.
Even though .bgsave() occurs in the background, it’s not without its costs. The time for fork() itself to occur can actually be substantial if the Redis database is large enough in the first place.
If this is a concern, or if you can’t afford to miss even a tiny slice of data lost due to the periodic nature of RDB snapshotting, then you should look into the append-only file (AOF) strategy that is an alternative to snapshotting. AOF copies Redis commands to disk in real time, allowing you to do a literal command-based reconstruction by replaying these commands.
Serialization Workarounds
Let’s get back to talking about Redis data structures. With its hash data structure, Redis in effect supports nesting one level deep:
127.0.0.1:6379> hset mykey field1 value1
The Python client equivalent would look like this:
r.hset("mykey", "field1", "value1")
Here, you can think of "field1": "value1" as being the key-value pair of a Python dict, {"field1": "value1"} , while mykey is the top-level key:
| Redis Command | Pure-Python Equivalent |
|---|---|
r.set("key", "value") | r = {"key": "value"} |
r.hset("key", "field", "value") | r = {"key": {"field": "value"}} |
But what if you want the value of this dictionary (the Redis hash) to contain something other than a string, such as a list or nested dictionary with strings as values?
Here’s an example using some JSON-like data to make the distinction clearer:
restaurant_484272 = {
    "name": "Ravagh",
    "type": "Persian",
    "address": {
        "street": {
            "line1": "11 E 30th St",
            "line2": "APT 1",
        },
        "city": "New York",
        "state": "NY",
        "zip": 10016,
    }
}
Say that we want to set a Redis hash with the key 484272 and field-value pairs corresponding to the key-value pairs from restaurant_484272 . Redis does not support this directly, because restaurant_484272 is nested:
>>> r.hmset(484272, restaurant_484272)
Traceback (most recent call last):
# ...
redis.exceptions.DataError: Invalid input of type: 'dict'.
Convert to a byte, string or number first.
You can in fact make this work with Redis. There are two different ways to mimic nested data in redis-py and Redis:
- Serialize the values into a string with something like
json.dumps() - Use a delimiter in the key strings to mimic nesting in the values
Let’s take a look at an example of each.
Option 1:Serialize the Values Into a String
You can use json.dumps() to serialize the dict into a JSON-formatted string:
>>> import json
>>> r.set(484272, json.dumps(restaurant_484272))
True
If you call .get() , the value you get back will be a bytes object, so don’t forget to deserialize it to get back the original object. json.dumps() and json.loads() are inverses of each other, for serializing and deserializing data, respectively:
>>> from pprint import pprint
>>> pprint(json.loads(r.get(484272)))
{'address': {'city': 'New York',
             'state': 'NY',
             'street': '11 E 30th St',
             'zip': 10016},
 'name': 'Ravagh',
 'type': 'Persian'}
This applies to any serialization protocol, with another common choice being yaml :
>>> import yaml  # python -m pip install PyYAML
>>> yaml.dump(restaurant_484272)
'address: {city: New York, state: NY, street: 11 E 30th St, zip: 10016}\nname: Ravagh\ntype: Persian\n'
No matter what serialization protocol you choose to go with, the concept is the same:you’re taking an object that is unique to Python and converting it to a bytestring that is recognized and exchangeable across multiple languages.
Option 2:Use a Delimiter in Key Strings
There’s a second option that involves mimicking “nestedness” by concatenating multiple levels of keys in a Python dict . This consists of flattening the nested dictionary through recursion, so that each key is a concatenated string of keys, and the values are the deepest-nested values from the original dictionary. Consider our dictionary object restaurant_484272 :
restaurant_484272 = {
    "name": "Ravagh",
    "type": "Persian",
    "address": {
        "street": {
            "line1": "11 E 30th St",
            "line2": "APT 1",
        },
        "city": "New York",
        "state": "NY",
        "zip": 10016,
    }
}
We want to get it into this form:
{
    "484272:name":                     "Ravagh",
    "484272:type":                     "Persian",
    "484272:address:street:line1":     "11 E 30th St",
    "484272:address:street:line2":     "APT 1",
    "484272:address:city":             "New York",
    "484272:address:state":            "NY",
    "484272:address:zip":              "10016",
}
That’s what setflat_skeys() below does, with the added feature that it does inplace .set() operations on the Redis instance itself rather than returning a copy of the input dictionary:
 1from collections.abc import MutableMapping
 2
 3def setflat_skeys(
 4    r: redis.Redis,
 5    obj: dict,
 6    prefix: str,
 7    delim: str = ":",
 8    *,
 9    _autopfix=""
10) -> None:
11    """Flatten `obj` and set resulting field-value pairs into `r`.
12
13    Calls `.set()` to write to Redis instance inplace and returns None.
14
15    `prefix` is an optional str that prefixes all keys.
16    `delim` is the delimiter that separates the joined, flattened keys.
17    `_autopfix` is used in recursive calls to created de-nested keys.
18
19    The deepest-nested keys must be str, bytes, float, or int.
20    Otherwise a TypeError is raised.
21    """
22    allowed_vtypes = (str, bytes, float, int)
23    for key, value in obj.items():
24        key = _autopfix + key
25        if isinstance(value, allowed_vtypes):
26            r.set(f"{prefix}{delim}{key}", value)
27        elif isinstance(value, MutableMapping):
28            setflat_skeys(
29                r, value, prefix, delim, _autopfix=f"{key}{delim}"
30            )
31        else:
32            raise TypeError(f"Unsupported value type: {type(value)}")
The function iterates over the key-value pairs of obj , first checking the type of the value (Line 25) to see if it looks like it should stop recursing further and set that key-value pair. Otherwise, if the value looks like a dict (Line 27), then it recurses into that mapping, adding the previously seen keys as a key prefix (Line 28).
Let’s see it at work:
>>>>>> r.flushdb() # Flush database: clear old entries
>>> setflat_skeys(r, restaurant_484272, 484272)
>>> for key in sorted(r.keys("484272*")): # Filter to this pattern
... print(f"{repr(key):35}{repr(r.get(key)):15}")
...
b'484272:address:city' b'New York'
b'484272:address:state' b'NY'
b'484272:address:street:line1' b'11 E 30th St'
b'484272:address:street:line2' b'APT 1'
b'484272:address:zip' b'10016'
b'484272:name' b'Ravagh'
b'484272:type' b'Persian'
>>> r.get("484272:address:street:line1")
b'11 E 30th St'
The final loop above uses r.keys("484272*") , where "484272*" is interpreted as a pattern and matches all keys in the database that begin with "484272" .
Notice also how setflat_skeys() calls just .set() rather than .hset() , because we’re working with plain string:string field-value pairs, and the 484272 ID key is prepended to each field string.
Encryption
Another trick to help you sleep well at night is to add symmetric encryption before sending anything to a Redis server. Consider this as an add-on to the security that you should make sure is in place by setting proper values in your Redis configuration. The example below uses the cryptography package:
$ python -m pip install cryptography
To illustrate, pretend that you have some sensitive cardholder data (CD) that you never want to have sitting around in plaintext on any server, no matter what. Before caching it in Redis, you can serialize the data and then encrypt the serialized string using Fernet:
>>>>>> import json
>>> from cryptography.fernet import Fernet
>>> cipher = Fernet(Fernet.generate_key())
>>> info = {
... "cardnum": 2211849528391929,
... "exp": [2020, 9],
... "cv2": 842,
... }
>>> r.set(
... "user:1000",
... cipher.encrypt(json.dumps(info).encode("utf-8"))
... )
>>> r.get("user:1000")
b'gAAAAABcg8-LfQw9TeFZ1eXbi' # ... [truncated]
>>> cipher.decrypt(r.get("user:1000"))
b'{"cardnum": 2211849528391929, "exp": [2020, 9], "cv2": 842}'
>>> json.loads(cipher.decrypt(r.get("user:1000")))
{'cardnum': 2211849528391929, 'exp': [2020, 9], 'cv2': 842}
Because info contains a value that is a list , you’ll need to serialize this into a string that’s acceptable by Redis. (You could use json , yaml , or any other serialization for this.) Next, you encrypt and decrypt that string using the cipher obiekt. You need to deserialize the decrypted bytes using json.loads() so that you can get the result back into the type of your initial input, a dict .
Note :Fernet uses AES 128 encryption in CBC mode. See the cryptography docs for an example of using AES 256. Whatever you choose to do, use cryptography , not pycrypto (imported as Crypto ), which is no longer actively maintained.
If security is paramount, encrypting strings before they make their way across a network connection is never a bad idea.
Compression
One last quick optimization is compression. If bandwidth is a concern or you’re cost-conscious, you can implement a lossless compression and decompression scheme when you send and receive data from Redis. Here’s an example using the bzip2 compression algorithm, which in this extreme case cuts down on the number of bytes sent across the connection by a factor of over 2,000:
>>> 1>>> import bz2
2
3>>> blob = "i have a lot to talk about" * 10000
4>>> len(blob.encode("utf-8"))
5260000
6
7>>> # Set the compressed string as value
8>>> r.set("msg:500", bz2.compress(blob.encode("utf-8")))
9>>> r.get("msg:500")
10b'BZh91AY&SY\xdaM\x1eu\x01\x11o\x91\x80@\x002l\x87\' # ... [truncated]
11>>> len(r.get("msg:500"))
12122
13>>> 260_000 / 122 # Magnitude of savings
142131.1475409836066
15
16>>> # Get and decompress the value, then confirm it's equal to the original
17>>> rblob = bz2.decompress(r.get("msg:500")).decode("utf-8")
18>>> rblob == blob
19True
The way that serialization, encryption, and compression are related here is that they all occur client-side. You do some operation on the original object on the client-side that ends up making more efficient use of Redis once you send the string over to the server. The inverse operation then happens again on the client side when you request whatever it was that you sent to the server in the first place.
Using Hiredis
It’s common for a client library such as redis-py to follow a protocol in how it is built. In this case, redis-py implements the REdis Serialization Protocol, or RESP.
Part of fulfilling this protocol consists of converting some Python object in a raw bytestring, sending it to the Redis server, and parsing the response back into an intelligible Python object.
For example, the string response “OK” would come back as "+OK\r\n" , while the integer response 1000 would come back as ":1000\r\n" . This can get more complex with other data types such as RESP arrays.
A parser is a tool in the request-response cycle that interprets this raw response and crafts it into something recognizable to the client. redis-py ships with its own parser class, PythonParser , which does the parsing in pure Python. (See .read_response() if you’re curious.)
However, there’s also a C library, Hiredis, that contains a fast parser that can offer significant speedups for some Redis commands such as LRANGE . You can think of Hiredis as an optional accelerator that it doesn’t hurt to have around in niche cases.
All that you have to do to enable redis-py to use the Hiredis parser is to install its Python bindings in the same environment as redis-py :
$ python -m pip install hiredis
What you’re actually installing here is hiredis-py , which is a Python wrapper for a portion of the hiredis C library.
The nice thing is that you don’t really need to call hiredis yourself. Just pip install it, and this will let redis-py see that it’s available and use its HiredisParser instead of PythonParser .
Internally, redis-py will attempt to import hiredis , and use a HiredisParser class to match it, but will fall back to its PythonParser instead, which may be slower in some cases:
# redis/utils.py
try:
    import hiredis
    HIREDIS_AVAILABLE = True
except ImportError:
    HIREDIS_AVAILABLE = False


# redis/connection.py
if HIREDIS_AVAILABLE:
    DefaultParser = HiredisParser
else:
    DefaultParser = PythonParser
Using Enterprise Redis Applications
While Redis itself is open-source and free, several managed services have sprung up that offer a data store with Redis as the core and some additional features built on top of the open-source Redis server:
-
Amazon ElastiCache for Redis : This is a web service that lets you host a Redis server in the cloud, which you can connect to from an Amazon EC2 instance. For full setup instructions, you can walk through Amazon’s ElastiCache for Redis launch page.
-
Microsoft’s Azure Cache for Redis : This is another capable enterprise-grade service that lets you set up a customizable, secure Redis instance in the cloud.
The designs of the two have some commonalities. You typically specify a custom name for your cache, which is embedded as part of a DNS name, such as demo.abcdef.xz.0009.use1.cache.amazonaws.com (AWS) or demo.redis.cache.windows.net (Azure).
Once you’re set up, here are a few quick tips on how to connect.
From the command line, it’s largely the same as in our earlier examples, but you’ll need to specify a host with the h flag rather than using the default localhost. For Amazon AWS , execute the following from your instance shell:
$ export REDIS_ENDPOINT="demo.abcdef.xz.0009.use1.cache.amazonaws.com"
$ redis-cli -h $REDIS_ENDPOINT
For Microsoft Azure , you can use a similar call. Azure Cache for Redis uses SSL (port 6380) by default rather than port 6379, allowing for encrypted communication to and from Redis, which can’t be said of TCP. All that you’ll need to supply in addition is a non-default port and access key:
$ export REDIS_ENDPOINT="demo.redis.cache.windows.net"
$ redis-cli -h $REDIS_ENDPOINT -p 6380 -a <primary-access-key>
The -h flag specifies a host, which as you’ve seen is 127.0.0.1 (localhost) by default.
When you’re using redis-py in Python, it’s always a good idea to keep sensitive variables out of Python scripts themselves, and to be careful about what read and write permissions you afford those files. The Python version would look like this:
>>> import os
>>> import redis

>>> # Specify a DNS endpoint instead of the default localhost
>>> os.environ["REDIS_ENDPOINT"]
'demo.abcdef.xz.0009.use1.cache.amazonaws.com'
>>> r = redis.Redis(host=os.environ["REDIS_ENDPOINT"])
That’s all there is to it. Besides specifying a different host , you can now call command-related methods such as r.get() as normal.
Note :If you want to use solely the combination of redis-py and an AWS or Azure Redis instance, then you don’t really need to install and make Redis itself locally on your machine, since you don’t need either redis-cli or redis-server .
If you’re deploying a medium- to large-scale production application where Redis plays a key role, then going with AWS or Azure’s service solutions can be a scalable, cost-effective, and security-conscious way to operate.
Wrapping Up
That concludes our whirlwind tour of accessing Redis through Python, including installing and using the Redis REPL connected to a Redis server and using redis-py in real-life examples. Here’s some of what you learned:
redis-pylets you do (almost) everything that you can do with the Redis CLI through an intuitive Python API.- Mastering topics such as persistence, serialization, encryption, and compression lets you use Redis to its full potential.
- Redis transactions and pipelines are essential parts of the library in more complex situations.
- Enterprise-level Redis services can help you smoothly use Redis in production.
Redis has an extensive set of features, some of which we didn’t really get to cover here, including server-side Lua scripting, sharding, and master-slave replication. If you think that Redis is up your alley, then make sure to follow developments as it implements an updated protocol, RESP3.
Further Reading
Here are some resources that you can check out to learn more.
Books:
- Josiah Carlson: Redis in Action
- Karl Seguin: The Little Redis Book
- Luc Perkins et. al.: Seven Databases in Seven Weeks
Redis in use:
- Twitter: Real-Time Delivery Architecture at Twitter
- Spool: Redis bitmaps – Fast, easy, realtime metrics
- 3scale: Having fun with Redis Replication between Amazon and Rackspace
- Instagram: Storing hundreds of millions of simple key-value pairs in Redis
- Craigslist: Redis Sharding at Craigslist
- Disqus: Redis at Disqus
Other:
- Digital Ocean: How To Secure Your Redis Installation
- AWS: ElastiCache for Redis User Guide
- Microsoft: Azure Cache for Redis
- Cheatography: Redis Cheat Sheet
- ClassDojo: Better Rate Limiting With Redis Sorted Sets
- antirez (Salvatore Sanfilippo): Redis persistence demystified
- Martin Kleppmann: How to do distributed locking
- HighScalability: 11 Common Web Use Cases Solved in Redis