Dzisiaj będziemy budować system newsletterów przy użyciu PHP z tłem MySQL. Samouczek obejmie budowę systemu, który pozwala na tworzenie wielu list biuletynów i wysyłanie wiadomości do określonych list.
Hej, więc zamierzamy zbudować dość złożony system biuletynów, więc zacznijmy! Do projektu będziesz potrzebować dwóch zasobów.
- Zestaw ikon Silk zostanie użyty do dodania wizualnego „szaleństwa” do aplikacji.
- Swift PHP Mailer będzie używany do wysyłania naszych e-maili.
Krok 1:Utwórz szkielet aplikacji
Kiedy zaczynam jakikolwiek projekt, lubię układać foldery przed rozpoczęciem kodowania, więc zróbmy to teraz. Najpierw utwórz ogólny katalog projektu. Następnie utwórz folder o nazwie admin w folderze projektu. Następnie w folderze administratora dodaj dwa foldery o nazwach media i swift. Na koniec utwórz folder o nazwie images w katalogu multimediów. Możesz także umieścić folder Swift lib w utworzonym przez nas folderze Swift. Możesz również skopiować sześć ikon jedwabiu, których będziemy używać:
- bullet_green.png
- bullet_red.png
- usuń.png
- email_go.png
- znajdź.png
- page_edit.png
Zamierzam ustrukturyzować resztę samouczka na temat tworzenia CRUD:tworzenie, odczytywanie, aktualizowanie i usuwanie dla czterech z naszych sześciu modeli. Jeden inny będzie edytowany przez inne akcje, a szósty nie będziemy tworzyć akcji CRUD.
Teraz stwórzmy najpierw naszą bazę danych, a nasze tabele będziemy tworzyć stopniowo później. Teraz zaczniemy kodować. Ponadto, jako uwaga, zakładam, że będziemy pracować z plikami w naszym folderze administratora, chyba że określę inaczej, ponieważ większość kodu znajduje się w tym folderze.
Krok 2:Konfiguracja aplikacji
Każda aplikacja będzie miała jakiś plik konfiguracyjny, a my teraz utworzymy nasz. Śmiało i utwórz plik o nazwie config.php i dodaj następujące:
# admin/config.php
	<?php
	// DB Settings
	define('DB_SERVER', 'localhost');
	define('DB_USER', 'root');
	define('DB_PASSWORD', '');
	define('DB_NAME', 'nettuts_ns_demo');

	define('FROM_EMAIL', 'no_reply@ohyeahemail.com');
	define('FROM_NAME', 'oh yeah email!');


	session_start();
	require_once 'classes.php';
	$mini = false;
	$nonav = false;
	error_reporting(0);
Tak więc pierwsza sekcja konfiguruje nasze zmienne bazy danych, więc upewnij się, że edytujesz ją tak, aby była najpierw konfiguracją lokalną. Nasza następna notatka przedstawia niektóre atrybuty wiadomości e-mail, których użyjemy później. Ostatnia sekcja uruchamia naszą sesję, abyśmy mogli uzyskać do niej dostęp, wymaga naszego pliku class.php (utworzymy go w ciągu sekundy), ustawia wartości domyślne niektórych opcji układu, a następnie ustawia raportowanie błędów na 0, aby zatrzymać irytujące ostrzeżenia . Jeśli jednak masz problemy, spróbuj skomentować ten wiersz.
Teraz śmiało utwórz nasz plik class.php i dodaj:
# admin/classes.php
	<?php
	// Authentication
	function validate_user($username, $pw) {
	    if (check_username_and_pw($username, $pw)) {
	        header('Location: index.php');
	    } else {
	        $_SESSION['error'] = "Login error.";
	        header('Location: login.php');
	    }
	}

	function logged_in() {
	    if ($_SESSION['authorized'] == true) {
	        return true;
	    } else {
	        return false;
	    }
	}

	function login_required() {
	    if(logged_in()) {
	        return true;
	    } else {
	        header('Location: login.php');
	    }
	}
	// mysql
	function query($sql) {
	  $link = new mysqli(DB_SERVER, DB_USER, DB_PASSWORD, DB_NAME) or die('There was a problem connecting to the database.');

	  $stmt = $link->prepare($sql) or die('error');
	  $stmt->execute();
	  $meta = $stmt->result_metadata();

	  while ($field = $meta->fetch_field()) {
	    $parameters[] = &$row[$field->name];
	  }

	  $results = array();
	  call_user_func_array(array($stmt, 'bind_result'), $parameters);

	  while ($stmt->fetch()) {
	    foreach($row as $key => $val) {
	      $x[$key] = $val;
	    }
	    $results[] = $x;
	  }

	  return $results;
	  $results->close();
	  $link->close();
	}

	function count_query($query) {
	  $link = new mysqli(DB_SERVER, DB_USER, DB_PASSWORD, DB_NAME) or die('There was a problem connecting to the database.');
	  if($stmt = $link->prepare($query)) {
	    $stmt->execute();
	    $stmt->bind_result($result);
	    $stmt->fetch();
	    return $result;
	    $stmt->close();
	  }
	  $link->close();
	}

	function check_username_and_pw($u, $pw) {
	  $link = new mysqli(DB_SERVER, DB_USER, DB_PASSWORD, DB_NAME) or die('There was a problem connecting to the database.');

	  $query = "SELECT * FROM users WHERE username = ? AND password = ? LIMIT 1";
	  if($stmt = $link->prepare($query)) {
	    $p = md5($pw);
	    $stmt->bind_param('ss', $u, $p);
	    $stmt->execute();
	    $stmt->bind_result($id, $username, $pw);
	    if($stmt->fetch()) {
	      $_SESSION['authorized'] = true;
	      $_SESSION['username'] = $username;
	      return true;
	    } else {
	      return false;
	    }
	    $stmt->close();
	  }
	  $link->close();
	}
To ogromny kawałek kodu i przejdę przez to. Nasza pierwsza funkcja obsługuje, gdy użytkownik opublikuje nasz login, a następnie wysyła dane do naszej funkcji check_username_and_pw. Nasza funkcja login_in po prostu zwraca, czy użytkownik jest zalogowany. Nasza funkcja login_required sprawdza, czy jesteśmy zalogowani, a jeśli nie, odsyła nas do strony logowania.
Następna funkcja, nazwana po prostu query(), tworzy zapytanie w naszej bazie danych i została stworzona przez Jeffreya Waya. Dodałem tworzenie linków i zamykanie funkcji, aby było to jeszcze łatwiejsze. Nasza następna funkcja, którą stworzyłem specjalnie po to, abyśmy mogli łatwo uruchomić COUNT zapytania SQL, a nasza funkcja check_username_and_pw sprawdza, czy możemy znaleźć użytkownika z tym samym adresem e-mail i haszowanym hasłem MD5, a jeśli tak, ustawia zmienne sesji.
Krok 3:Układ aplikacji
Naszym następnym plikiem, nad którym będziemy pracować, jest nasz plik layout.php, więc śmiało go utwórz. W sekcji head po prostu deklarujemy nasze zwykłe deklaracje XHTML. Jeśli zauważysz, automatycznie dodamy tytuł strony do innego ciągu dla naszego tytułu. Następnie mamy arkusz stylów (śmiało i utwórz go również w naszym folderze multimediów). Następnie otwieramy nasz tag body i sprawdzamy, czy chcemy mieć mini układ, a jeśli tak, dodajemy klasę. Następnie mamy nasz nagłówek, a następnie sprawdzamy, czy chcemy naszej nawigacji, a jeśli tak, pokazujemy nasze zakładki. Dodałem również sposób na dodanie aktualnej klasy dla każdej zakładki. Mamy wtedy również link do wylogowania, a następnie mamy nasz div kontenera. W tym celu dodajemy tag h3 z naszym tytułem, a następnie powtarzamy naszą treść.
# admin/layout.php
	<!DOCTYPE html PUBLIC "-//W3C//DTD XHTML 1.1//EN" "https://www.w3.org/TR/xhtml11/DTD/xhtml11.dtd">
	<html xmlns="https://www.w3.org/1999/xhtml" >
	    <head>
	        <meta http-equiv="Content-Type" content="text/html; charset=utf-8" />

	        <title><?php echo $title; ?> » my newsletter app</title>
	        <!-- Stylesheets -->
	        <!-- <link rel="stylesheet" href="media/style.css" type="text/css" media="all" /> -->
	    </head>
	    <body<?php if ($mini == true) { ?> class="mini"<?php } ?>>
	        <div id="header">
	            <h1><a href="index.php">my newsletter app</a></h1>
	        </div>
	        <?php if ($nonav == false) { ?>
	        <div id="nav">
	            <a href="messages.php"<?php if($tab == 'mess') {?>class="current"<?php } ?>>messages</a>
	            <a href="subscribers.php"<?php if($tab == 'sub') {?>class="current"<?php } ?>>subscribers</a>
	            <a href="newsletters.php"<?php if($tab == 'nl') {?>class="current"<?php } ?>>newsletters</a>
	            <a href="templates.php"<?php if($tab == 'temp') {?>class="current"<?php } ?>>templates</a>
	            <span class="right">
	                <a href="logout.php">log out</a>
	            </span>
	        </div>
	        <?php } ?>
	        <div id="container">
	            <h3><?php echo $title;?></h3>
	            <?php echo $content; ?>
	        </div>
	    </body>
	</html>
Teraz utworzymy naszą stronę index.php tylko po to, abyśmy mogli stylizować. Otwórz index.php i dodaj:
# admin/index.php
		<?php
		require_once 'config.php';
		$title = "Home!";
		$content = <<<EOF
		<h3>current stats</h3>
		Our home page!
		EOF;
		include 'layout.php'; ?>
Więc w tym przypadku potrzebujemy naszego pliku konfiguracyjnego, ustawimy nasz tytuł, a następnie ustawimy zmienną zawartości, a na końcu potrzebujemy naszego pliku układu. Po pierwszym otwarciu powinno wyglądać tak:


Teraz otwórz nasz arkusz stylów. Lubię używać stylów resetowania i typografii 960.gs, skompresowanych w TextMate. Więc górna część mojego pliku CSS wygląda tak:
# admin/media/style.css
	/* reset */
	html,body,div,span,applet,object,iframe,h1,h2,h3,h4,h5,h6,p,blockquote,pre,a,abbr,acronym,address,big,cite,code,del,dfn,em,font,img,ins,kbd,q,s,samp,strike,strong,sub,sup,tt,var,b,u,i,center,dl,dt,dd,ol,ul,li,fieldset,form,label,legend,table,caption,tbody,tfoot,thead,tr,th,td{margin:0;padding:0;border:0;outline:0;font-size:100%;vertical-align:baseline;background:transparent}body{line-height:1}ol,ul{list-style:none}blockquote,q{quotes:none}blockquote:before,blockquote:after,q:before,q:after{content:'';content:none}:focus{outline:0}ins{text-decoration:none}del{text-decoration:line-through}table{border-collapse:collapse;border-spacing:0}
	/* typography */
	body{font:13px/1.5 Helvetica,Arial,'Liberation Sans',FreeSans,sans-serif}a:focus{outline:1px dotted invert}hr{border:0 #ccc solid;border-top-width:1px;clear:both;height:0}h1{font-size:25px}h2{font-size:23px}h3{font-size:21px}h4{font-size:19px}h5{font-size:17px}h6{font-size:15px}ol{list-style:decimal}ul{list-style:square}li{margin-left:30px}p,dl,hr,h1,h2,h3,h4,h5,h6,ol,ul,pre,table,address,fieldset{margin:10px 0;}
Najpierw zaprojektujmy nasze główne elementy, więc dodaj następujące style:
# admin/media/style.css
	#header {width:85%; margin:0 auto;}
	#header h1 a {text-decoration:none; color:#000;}
	#container {width:85%; background: #111; margin:5px auto; color:#fff; padding:10px;}
Teraz Twoja strona powinna wyglądać tak:


Teraz, jeśli stylizujemy karty z tłem nawigacji, a następnie tłem najechania na każdy z linków, a powinieneś zobaczyć:
# admin/media/style.css
	/* tabs */
	#nav {margin:0 auto 2px;padding:10px;width:85%; background:#444;}
	#nav a { padding:12px 10px; margin:0; color:#fff; text-decoration:none; text-align:center;}
	#nav a.current, #nav a:hover {background:#111;}
#nav span.right {float:right;} 


Teraz, gdy pracujemy nad plikiem, dodaj następujące style do naszego mini układu, danych wejściowych formularzy, tabel, dużych linków oraz naszych komunikatów o błędach i sukcesach.
# admin/media/style.css
	body.mini #header {width:30%; text-align:center;}
	body.mini #container {width:30%;}

	/* form */
	form input.text {width:95%; font-size:16px;}
	form textarea {width:95%; height:100%;}
	/* table */
	table {width:98%; text-align:right; border:rgb(128,128,128); font-size:12px; margin:5px 10px; color:#000;background:#fff;}
	table th {background-color: rgb(229, 229, 229); border:1px solid rgb(187, 187, 187); padding:3px 6px; font-weight:normal; color:#000;}
	table tr td {border: 1px solid rgb(221, 221, 221); padding:3px 6px;}
	table tr:hover {background-color: rgb(240, 240, 240);color:#000;}
	/* a */
	a.large {padding: 5px; color:#000; background:#eee; text-decoration:none; margin:5px;}
	a.large.right {float:right;}
	a.large:hover, a.large.current {background:#444; color:#fff;}
	/* messages */
	#message {margin: 5px 10px; padding: 4px; display:block;text-align:center;}
	#message.error {background:#FFEBE8;border: 1px solid #CC0000;color:#CC0000;}
	#message.success {border:solid 1px #349534; background:#C9FFCA;color:#008000;}
Oto kilka stylów, które lubię stosować we wszystkich moich projektach. Teraz, gdy zakończyliśmy tworzenie układu, przejdziemy do uwierzytelniania.
Krok 4:Uwierzytelnianie
Będziemy pracować z bardzo prostym systemem uwierzytelniania. Utwórz login.php i umieść w nim:
# admin/login.php
	<?php
	require_once 'config.php';
	if(logged_in()) {header('Location: index.php');}
	$title = "login";
	$nonav = true;
	$mini = true;
	if($_POST && (!empty($_POST['username']) ) && (!empty($_POST['password']))) {
	    validate_user($_POST['username'], $_POST['password']);
	}
	$error = $_SESSION['error'];
	$content = <<<EOF
	$error
	<form action="login.php" method="post">
	    <p>
	        <label for="username">username:</label><br />
	        <input type="text" name="username" class="text" />
	    </p>
	    <p>
	        <label for="password">password:</label><br />
	        <input type="password" name="password" class="text" />
	    </p>
	    <p>
	        <input type="submit" value="login" />
	    </p>
	</form>
	EOF;
	include 'layout.php'; ?>
Wyjaśnię każdą część kodu. Najpierw potrzebujemy naszego pliku konfiguracyjnego. Następnie sprawdzamy, czy jesteśmy zalogowani, a jeśli tak, przekierowujemy do domu. Następnie ustawiamy tytuł i opcje układu. Następnie sprawdzamy, czy mamy POST i czy POST ma nazwę użytkownika i hasło, a jeśli tak, wywołujemy funkcję validate_user z naszego pliku klas. Następnie ustawiamy zmienną error na błędy naszej sesji, a następnie ustawiamy nasz formularz i wyświetlamy wszelkie błędy. Teraz utworzymy naszą stronę wylogowania, więc stwórz logout.php i umieść w nim:
# admin/logout.php
	<?php
	require_once 'config.php';
	$_SESSION = array();
	session_destroy();
	header('Location: login.php');
	?>
Ponownie wymagamy naszego pliku konfiguracyjnego, ustawiamy naszą sesję na pustą tablicę, a następnie niszczymy naszą sesję i przekierowujemy do naszej strony logowania. Teraz, gdy już to zrobiłeś, twoja strona logowania powinna wyglądać tak:


Zamierzamy również utworzyć rekord użytkownika (i naszą tabelę), abyśmy mogli dodać logikę uwierzytelniania i abyście mogli przeglądać strony z kodem z wyprzedzeniem. Aby utworzyć użytkownika z nazwą użytkownika admin i hasłem tajnym. Aby to dodać, uruchom ten SQL:
CREATE TABLE `users` (
	   `id` int(10) AUTO_INCREMENT,
	   `username` varchar(50),
	   `password` varchar(32),
	   PRIMARY KEY (`id`)
	) ENGINE=MyISAM DEFAULT CHARSET utf8;

	INSERT INTO `users` (`id`, `username`, `password`) VALUES
	('1', 'admin', '5ebe2294ecd0e0f08eab7690d2a6ee69');
Krok 5:Biuletyny
Zaprojektowałem tę aplikację tak, aby była bardzo elastyczna. Chciałem, abyś (użytkownik) mógł tworzyć i zarządzać dowolną liczbą biuletynów. Więc najpierw musimy stworzyć naszą tabelę bazy danych. Oto kod SQL z eksportu w mojej aplikacji demonstracyjnej:
	CREATE TABLE `newsletters` (
	   `id` int(10) AUTO_INCREMENT,
	   `name` varchar(50),
	   `description` varchar(255),
	   `visible` varchar(10),
	   PRIMARY KEY (`id`)
	) ENGINE=MyISAM DEFAULT CHARSET utf8;
Teraz, gdy mamy naszą tabelę biuletynów, utworzymy strony dla każdej akcji. Utwórz cztery pliki o nazwach:newsletters.php, newsletters_delete.php, newsletters_edit.php i newsletters_new.php. Najpierw otwórz newsletters.php:
# admin/newsletters.php
	<?php
	require_once 'config.php';
	login_required();
	$title = "newsletters";
	$newsletters = query("SELECT * FROM newsletters ORDER BY id ASC");
	$tab = 'nl';
	$table = "";
	foreach($newsletters as $row) {
	    $dlink = '<a href="newsletters_delete.php?id='.$row['id'].'" onclick="return confirm(\'Are you sure you want to delete this newsletter?\');" title="delete"><img src="media/images/delete.png" alt="delete"/></a>';
	    $elink = '<a href="newsletters_edit.php?id='.$row['id'].'" title="edit" ><img src="media/images/page_edit.png" alt="edit"/></a>';
	    if($row['visible'] == "1") {$visible = '<img src="media/images/bullet_green.png" />';} else {$visible = '<img src="media/images/bullet_red.png" />';}
	    $table .= "<tr><td>".$row['id']."</td><td>".$row['name']."</td><td>".$row['description']."</td><td>$visible</td><td>".$dlink." ".$elink."</td></tr>\n";
	}
	$message = error_messages();
	$content = <<<EOF
	<a href="newsletters_new.php" class="large">new newsletter »</a>
	$message
	<table>
	    <tr>
	        <th></th>
	        <th>name</th>
	        <th>description</th>
	        <th>visible</th>
	        <th></th>
	    </tr>
	    $table
	</table>
	EOF;
	include 'layout.php'; ?>
Tak więc ten plik ma ten sam podstawowy charakter naszej strony logowania. Wymagamy naszej konfiguracji, upewnij się, że jesteśmy zalogowani, ustaw tytuł. Następnie używamy naszej funkcji query(), aby wykonać zapytanie SELECT w celu znalezienia wszystkich naszych biuletynów. Następnie ustawiamy bieżącą kartę dla naszego układu. Po wykonaniu pętli przez tablicę zwróconą przez nasze zapytanie i utworzeniu układu tabeli. Następnie wywołujemy nieznaną jeszcze funkcję i tworzymy naszą stronę. Zanim będzie można wyświetlić tę stronę, należy dodać następujące elementy do pliku class.php, aby łatwo obsługiwać nasze komunikaty o błędach:
# admin/classes.php
	// Render error messages
	function error_messages() {
	    $message = '';
	    if($_SESSION['success'] != '') {
	        $message = '<span class="success" id="message">'.$_SESSION['success'].'</span>';
	        $_SESSION['success'] = '';
	    }
	    if($_SESSION['error'] != '') {
	        $message = '<span class="error" id="message">'.$_SESSION['error'].'</span>';
	        $_SESSION['error'] = '';
	    }
	    return $message;
	}
Chociaż prawdopodobnie nie będziesz mieć żadnych danych, gdy masz kilka rekordów, będzie to wyglądać tak:(choć nieco mniej zgniecione)


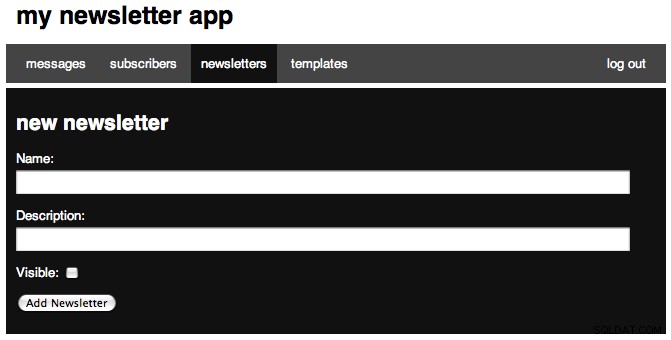
Teraz będziemy pracować nad naszą nową akcją, więc otwórz newsletters_new.php i dodaj:
# admin/newsletters_new.php
	<?php
	require_once 'config.php';
	login_required();
	$tab = 'nl';

	if(isset($_POST['submitted'])) {
	    $link = new mysqli(DB_SERVER, DB_USER, DB_PASSWORD, DB_NAME) or die('There was a problem connecting to the database.');
	    $sql = "INSERT INTO NEWSLETTERS (name, description) VALUES ( '".$_POST['name']."' , '".$_POST['description']."' )";
	    $stmt = $link->query($sql) or die($link->error);
	    $stmt->close;
	    $_SESSION['success'] = "Added newsletter.";
	    header('Location: newsletters.php');
	}
	$title = "new newsletter";
	$content = <<<EOF
	<form action="newsletters_new.php" method='POST'>
	    <p>
	        <label for="name">Name:</label><br />
	        <input type='text' name='name' class="text" />
	    </p>
	    <p>
	        <label for="description">Description:</label>
	        <input type="text" name="description" class="text" />
	    </p>
	    <p>
	        <input type='submit' value='Add Newsletter' />
	        <input type='hidden' value='1' name='submitted' />
	    </p>
	</form>
	EOF;
	include 'layout.php'; ?>
Mam więc nadzieję, że zauważyłeś wzór na górze każdego z naszych plików. Najpierw wymagamy naszego pliku config.php, następnie upewniamy się, że jesteśmy zalogowani, a następnie ustawiamy naszą aktualną kartę, a następnie dodajemy trochę dodatkowej logiki do obsługi POST, a następnie ustawiamy tytuł, treść i renderujemy stronę. Sekcja POST jest dość prosta do zrozumienia, więc szybko ją wyjaśnię.
Najpierw sprawdzamy, czy wysłano przedmiot o nazwie przesłanego. To jest ukryte pole, które mamy po przycisku przesyłania. Następnie tworzymy link do naszej bazy danych za pomocą zmiennych z naszego pliku konfiguracyjnego. Następnie tworzymy nasze zapytanie SQL wstawiające, używając naszych zmiennych POSTed. Następnie odpytujemy (nie naszą funkcję) bazę danych, a jeśli zostanie zgłoszony błąd, pokazujemy zwrócony błąd. Następnie zamykamy zapytanie, ustawiamy komunikat o sukcesie, a następnie przekierowujemy do strony z listą. Twoja strona powinna wyglądać tak:


Następnie będziemy pracować nad naszą stroną edycji i dodać następujące elementy:
# admin/newsletters_edit.php
	<?php
	require_once 'config.php';
	login_required();
	$tab = 'nl';

	if(isset($_POST['submitted'])) {
	    $link = new mysqli(DB_SERVER, DB_USER, DB_PASSWORD, DB_NAME) or die('There was a problem connecting to the database.');
	    if(isset($_POST['visible'])) {$visible = 1;}else{$visible = 0;}
	    $sql = "UPDATE NEWSLETTERS SET name='".$_POST['name']."', description='".$_POST['description']."', visible=".$visible." WHERE id=".$_POST['id']."";
	    $stmt = $link->query($sql) or die($link->error);
	    $stmt->close;
	    $_SESSION['success'] = "Edited newsletter.";
	    header('Location: newsletters.php');
	}
	$title = "edit newsletter";
	$id = (int) $_GET['id'];
	$results = query("SELECT * FROM newsletters WHERE id='".$id."' LIMIT 1");
	$name = $results[0]['name'];
	$description = $results[0]['description'];
	$visible = ($results[0]['visible'] == "1") ? 'checked="checked"' : '';
	$content = <<<EOF
	<form action="newsletters_edit.php" method='POST'>
	    <p>
	        <label for="name">Name:</label><br />
	        <input type='text' name='name' class="text" value="$name" />
	    </p>
	    <p>
	        <label for="description">Description:</label>
	        <input type="text" name="description" class="text" value="$description" />
	    </p>
	    <p>
	        <label for="visible">Visible:</label>
	        <input type="checkbox" name="visible" value="true" $visible/>
	    </p>
	    <p>
	        <input type='submit' value='Edit Newsletter' />
	        <input type='hidden' value='1' name='submitted' />
	        <input type='hidden' value='$id' name='id' />
	    </p>
	</form>
	EOF;
	include 'layout.php'; ?>
Podobnie jak wszystkie nasze pliki, zaczynamy od tego samego bloku. Po naszym bloku POST (o którym opowiem za sekundę), ustawiamy id na żądany identyfikator, upewniając się, że jest to liczba całkowita. Następnie używamy naszej funkcji zapytania, aby znaleźć biuletyn, z którym pracujemy, i ustawiamy kilka zmiennych w zwróconych wynikach. Możesz zapytać, dlaczego umieściliśmy [0] przed zażądaniem każdej wartości, a powodem jest to, że funkcja zapytania zwraca tablicę wszystkich rekordów, a każdy rekord jest tablicą, więc musimy uzyskać dostęp do pierwszej tablicy w naszej zmiennej wyników . Wiersz, w którym ustawiamy zmienną widoczną ifs, w rzeczywistości jest skompresowaną instrukcją if/else. część if to ==1, to jeśli to prawda, zmienna jest sprawdzana, w przeciwnym razie na nic. Następnie mamy nasz formularz.
Nasz blok POST jest bardzo podobny do naszej nowej strony i zawsze zaczyna się w ten sam sposób na pozostałych naszych stronach. Następnie sprawdzamy, czy pole wyboru było zaznaczone, i ponownie ustawiamy tutaj zmienną. Następnie mamy nasze zapytanie UPDATE, ponownie uruchamiamy zapytanie, ustawiamy wiadomość o sukcesie, a następnie przekierowujemy do domu. Tak wygląda formularz i wiadomość widoczna po edycji:


Ostatnia strona tej sekcji jest najłatwiejsza, ponieważ jest to strona usuwania. Otwórz plik i wklej do następujących:
# admin/newsletters_delete.php
	<?php
	require_once 'config.php';
	login_required();
	$id = (int) $_GET['id'];
	$link = new mysqli(DB_SERVER, DB_USER, DB_PASSWORD, DB_NAME) or die('There was a problem connecting to the database.');
	$sql = "DELETE FROM newsletters WHERE id=$id LIMIT 1";
	$stmt = $link->query($sql) or die($link->error);
	if($link->affected_rows) {
	    $_SESSION['success'] = "Newsletter deleted.";
	} else {
	    $_SESSION['error'] = 'Nothing deleted.';
	}
	header('Location: newsletters.php');
W tym bloku wymagamy naszej konfiguracji, upewnij się, że jesteśmy zalogowani, a następnie zapisz żądany identyfikator w zmiennej, utwórz połączenie MySQL, skonfiguruj nasze zapytanie SQL, a następnie wykonaj zapytanie. Następnie sprawdzamy, czy ma to wpływ na wiersz, i odpowiednio ustawiamy komunikat. Następnie przekierowujemy do strony z biuletynami. Gratulacje, ukończyłeś pierwszą z czterech części CRUD. Następnie będziemy pracować nad CRUD dla naszych szablonów.
Krok 6:Szablony
Nasza aplikacja pozwoli również na wiele szablonów, wszystkie przechowywane w bazie danych. Najpierw utwórzmy naszą tabelę bazy danych:
	CREATE TABLE `templates` (
	   `id` int(10) AUTO_INCREMENT,
	   `name` varchar(50),
	   `columns` tinyint(5),
	   `body` text,
	   PRIMARY KEY (`id`)
	) ENGINE=MyISAM DEFAULT CHARSET utf8;
Mamy autoinkrementującą kolumnę id, kolumnę nazwy, kolumnę kolumn, aby zapisać liczbę kolumn (aplikacja skaluje się tylko do 2 kolumn, co powinno wystarczyć, ale można je łatwo rozszerzyć. Można to również wykorzystać do różnych sekcji .) i nasze ciało. Tak jak ostatnim razem, musimy zrobić każdą z naszych stron i będziemy mieli stronę templates.php, a także templates_new.php, templates_edit.php, templates_delete.php i templates_preview.php. Najpierw będziemy pracować nad naszym plikiem templates.php, więc otwórz go i wklej:
# admin/templates.php
	<?php
	require_once 'config.php';
	login_required();
	$title = "templates";
	$tab = 'temp';
	$templates = query("SELECT id,name,columns FROM templates ORDER BY id ASC");
	$table = "";
	foreach($templates as $row) {
	    $plink = '<a href="" onClick="window.open(\'templates_preview.php?id='.$row['id'].'\',width=800,height=600)" title="preview"><img src="media/images/find.png" alt="preview"/></a>';
	    $dlink = '<a href="templates_delete.php?id='.$row['id'].'" onclick="return confirm(\'Are you sure you want to delete this template?\');" title="delete"><img src="media/images/delete.png" alt="delete"/></a>';
	    $elink = '<a href="templates_edit.php?id='.$row['id'].'" title="edit"><img src="media/images/page_edit.png" alt="edit"/></a>';
	    $table .= "<tr><td>".$row['id']."</td><td>".$row['name']."</td><td>".$row['columns']."</td><td>".$plink." ".$dlink." ".$elink."</td></tr>\n";
	}
	$message = error_messages();
	$content = <<<EOF
	<a href="templates_new.php" class="large">new template »</a>
	$message
	<table>
	    <tr>
	        <th></th>
	        <th>name</th>
	        <th>columns</th>
	        <th></th>
	    </tr>
	    $table
	</table>
	EOF;
	include 'layout.php'; ?>
Ponownie zaczynamy od podstaw. Następnie wykonujemy zapytanie, aby znaleźć wszystkie nasze szablony. Następnie przechodzimy pętlą przez każdą tablicę w szablonach i tworzymy tabelę. Następnie otrzymujemy komunikaty o błędach (i sukcesach), a następnie treść. Twoja strona powinna wyglądać mniej więcej tak:


Teraz, przechodząc do naszej nowej strony, wklej następujące informacje:
# admin/templates_new.php
	<?php
	require_once 'config.php';
	login_required();
	$tab = 'temp';
	if(isset($_POST['submitted'])) {
	    $link = new mysqli(DB_SERVER, DB_USER, DB_PASSWORD, DB_NAME) or die('There was a problem connecting to the database.');
	    $sql = "INSERT INTO templates (name, columns, body) VALUES ( '".$_POST['name']."' , ".$_POST['columns'].", '".mysql_real_escape_string($_POST['body'])."' )";
	    $stmt = $link->query($sql) or die($link->error);
	    $stmt->close;
	    $_SESSION['success'] = "Added template.";
	    header('Location: templates.php');
	}
	$title = "new template";
	$content = <<<EOF
	<form action="templates_new.php" method='POST'>
	    <p>
	        <label for="name">Name:</label><br />
	        <input type='text' name='name' class="text" />
	    </p>
	    <p>
	        <label for="columns">Columns</label>
	        <select name="columns">
	            <option value="1">Single Column Layout</option>
	            <option value="2">Two Column Layout</option>
	        </select>
	    </p>
	    <p>
	        <label for="description">Body: (raw html)</label><br />
	        Use %content% for a single column layout, %leftcol% and %rightcol% for a two column layout.<br />
	        <textarea name="body" rows="35"></textarea>
	    </p>
	    <p>
	        <input type='submit' value='Add Template' />
	        <input type='hidden' value='1' name='submitted' />
	    </p>
	</form>
	EOF;
	include 'layout.php'; ?>
Więc znowu mamy ten sam nagłówek. Nasz POST ponownie tworzy połączenie MySQL, następnie tworzymy nasze zapytanie i używając mysql_real_escape_string, aby dopuścić dowolne znaki do rekordu, a następnie wykonujemy nasze zapytanie, ustawiamy komunikat o sukcesie i przekierowujemy do listy szablonów. Jeśli spojrzysz na nasz formularz, proszę również o wstawienie zmiennych do naszej treści, a pokażę Ci, jak to działa później, gdy dopasujemy wiadomość do szablonu. Twoja strona powinna wyglądać tak:


Następnie będziemy pracować nad naszą stroną edycyjną. Jeśli zauważyłeś, znaczna część tego kodu to kopiowanie i wklejanie we wszystkich tych samych czynnościach, więc ułatw to sobie.
# admin/templates/edit.php
	<?php
	require_once 'config.php';
	login_required();
	$tab = 'temp';
	if(isset($_POST['submitted'])) {
	    $link = new mysqli(DB_SERVER, DB_USER, DB_PASSWORD, DB_NAME) or die('There was a problem connecting to the database.');
	    $sql = "UPDATE templates SET name='".$_POST['name']."', body='".mysql_real_escape_string($_POST['body'])."', columns=".$_POST['columns']." WHERE id=".$_POST['id']."";
	    $stmt = $link->query($sql) or die($link->error);
	    $stmt->close;
	    $_SESSION['success'] = "Edited template.";
	    header('Location: templates.php');
	}
	$title = "edit template";
	$id = (int) $_GET['id'];
	$results = query("SELECT * FROM templates WHERE id='".$id."' LIMIT 1");
	$name = $results[0]['name'];
	$templatedata = stripslashes(htmlspecialchars($results[0]['body']));
	$content = <<<EOF
	<form action="templates_edit.php" method='POST'>
	    <p>
	        <label for="name">Name:</label><br />
	        <input type='text' name='name' class="text" value="$name"/>
	    </p>
	    <p>
	        <label for="columns">Columns</label>
	        <select name="columns">
	            <option value="1">Single Column Layout</option>
	            <option value="2">Two Column Layout</option>
	        </select>
	    </p>
	    <p>
	        <label for="body">Body: (raw html)</label><br />
	        Use %content% for a single column layout, %leftcol% and %rightcol% for a two column layout.<br />
	        <textarea name="body" rows="35">$templatedata</textarea>
	    </p>
	    <p>
	        <input type='submit' value='Edit Template' />
	        <input type='hidden' value='1' name='submitted' />
	        <input type='hidden' value='$id' name='id' />
	    </p>
	</form>
	EOF;
	include 'layout.php'; ?>
We start with the same intro, then our POST block, our title, then our requested id. After, we try and find the template we are working with, then sets three variables so that we can inset them into our content block. We also convert all of the tags we stored to HTML characters so everything will display. When looking at our POST block, you will notice we create our link, then our query and again use mysql_real_escape_string to save everything, execute our query, and then set our message, and redirect to our templates list. Your edit page (with a sample record) should look like:


Now we will create another delete page, so open up our delete page and paste in:
# admin/templates_delete.php
	<?php
	require_once 'config.php';
	login_required();
	$id = (int) $_GET['id'];
	$link = new mysqli(DB_SERVER, DB_USER, DB_PASSWORD, DB_NAME) or die('There was a problem connecting to the database.');
	$sql = "DELETE FROM templates WHERE id=$id LIMIT 1";
	$stmt = $link->query($sql) or die($link->error);
	if($link->affected_rows) {
	    $_SESSION['success'] = "Template deleted.";
	} else {
	    $_SESSION['error'] = 'Nothing deleted.';
	}
	header('Location: templates.php');
I hope you have picked up the pattern here, this is a very simple page. Now we are going to work on an extra page that is not part of the CRUD spectrum; we are going to create a preview page. The binoculars in the action part on the table is the link for each one (in a new window). So open up our preview page. The page is very simple, we find our template and echo the data, and then append a javascript close button. The code looks like:
# admin/templates_preview.php
	<?php
	require_once 'config.php';
	login_required();
	$id = (int) $_GET['id'];
	$data = query("SELECT body FROM templates WHERE id=$id LIMIT 1");
	$template = $data[0]['body'];
	?>
	<?php echo $template; ?>
	<center><button type="button" onclick="self.close();">close window</button></center>
And an example preview looks like:


Now we have finished with our Templates, we are ready to move onto the next step!
Step 7:Subscribers
So now we are going to work with our subscribers! We are going to create two tables. The first:
CREATE TABLE `subscribers` (
	   `id` tinyint(10) AUTO_INCREMENT,
	   `name` varchar(50),
	   `email` varchar(50),
	   PRIMARY KEY (`id`)
	) ENGINE=MyISAM DEFAULT CHARSET utf8;
Refers to each subscriber, and the second:
CREATE TABLE `subscriptions` (
	   `id` tinyint(10) AUTO_INCREMENT,
	   `subscriber_id` tinyint(10),
	   `newsletter_id` tinyint(10),
	   PRIMARY KEY (`id`)
	) ENGINE=MyISAM DEFAULT CHARSET utf8;
Creates a table for our many-to-many relationship with our newsletters. A subscriber can have multiple subscription to newsletters, so they can subscribe to multiple ones, and each newsletter can have many subscribers. To create the most dynamic solution, we have a linking table.
Let's first create our files. The files we are going are going to have are subscribers.php, subscribers_delete.php, and subscribers_edit.php. Our create action will be created later for the front-end. First open up subscribers.php and paste in:
# admin/subscribers.php
	<?php
	require_once 'config.php';
	login_required();
	$title = "subscribers";
	$tab = 'sub';
	$table = "";
	$messages = query("SELECT * FROM subscribers ORDER BY id ASC");
	foreach($messages as $row) {
		$dlink = '<a href="subscribers_delete.php?id='.$row['id'].'" onclick="return confirm(\'Are you sure you want to delete this subscriber?\');" title="delete"><img src="media/images/delete.png" alt="delete"/></a>';
		$elink = '<a href="subscribers_edit.php?id='.$row['id'].'" title="edit"><img src="media/images/page_edit.png" alt="edit"/></a>';
		$table .= '<tr><td>'.$row['id'].'</td><td>'.$row['name'].'</td><td>'.$row['email'].'</td><td>'.$dlink.' '.$elink.'</td></tr>';
	}
	$message = error_messages();
	$content = <<<EOF
	$message
	<table>
		<tr>
			<th></th>
			<th>name</th>
			<th>email</th>
			<th></th>
		</tr>
		$table
	</table>
	EOF;
	include 'layout.php'; ?>
We have basically the same listing pages as before, except this time we will be finding our subscribers. Your page (with some sample data) should look like:


Now we will move on to our edit page:
# admin/subscribers_edit.php
	<?php
	require_once 'config.php';
	login_required();
	$tab = 'sub';

	if(isset($_POST['submitted'])) {
	    $id = (int) $_POST['id'];
	    $link = new mysqli(DB_SERVER, DB_USER, DB_PASSWORD, DB_NAME) or die('There was a problem connecting to the database.');
	    $sql = "UPDATE subscribers SET name='".$_POST['name']."', email='".$_POST['email']."' WHERE id=$id";
	    $stmt = $link->query($sql) or die($link->error);
	    $stmt->close;

	    foreach($_POST['newsletter'] as $n) {
	        if($n['exists'] != '1' && $n['subscribe'] == "true") { // If we want to subscribe but the record doesnt exist
	            $nlid = $n['nlid'];
	            $sql = "INSERT INTO subscriptions (subscriber_id, newsletter_id) VALUES ('$id', '$nlid')";
	            $stmt = $link->query($sql) or die($link->error);
	            $stmt->close;
	        } elseif ($n['exists'] == '1' && $n['subscribe'] != "true") {// Else if we had an exits but we want to unsubscribe
	            $subid = $n['subid'];
	            $sql = "DELETE FROM subscriptions WHERE id=$subid LIMIT 1";
	            $stmt = $link->query($sql) or die($link->error);
	            $stmt->close;
	        }
	    }
	    $_SESSION['success'] = "Edited subscriber.";
	    header('Location: subscribers.php');
	}
	$title = "edit newsletter";
	$id = (int) $_GET['id'];

	$subscriber = query("SELECT * FROM subscribers WHERE id='$id'");
	$name = $subscriber[0]['name'];
	$email = $subscriber[0]['email'];

	$newsletters = query("SELECT * FROM newsletters");
	$subs = query("SELECT * FROM subscriptions WHERE subscriber_id='".$id."'");
	$subscriptions = '';
	foreach($newsletters as $nl) {
	    $s = false;
	    $subid = '';
	    foreach($subs as $sub) {
	        if($sub['newsletter_id'] == $nl['id']) {$s = true; $subid = $sub['id'];}
	    }
	    $checked = ($s == true) ? 'checked="checked"' : '';
	    $subscriptions .= '
	    <input type="checkbox" name="newsletter['.$nl["id"].'][subscribe]" value="true" '.$checked.'/>
	    <label for="newsletter['.$nl["id"].']">'.$nl['name'].'</label>
	    <input type="hidden" name="newsletter['.$nl["id"].'][exists]" value="'.$s.'" />
	    <input type="hidden" name="newsletter['.$nl["id"].'][nlid]" value="'.$nl['id'].'" />
	    <input type="hidden" name="newsletter['.$nl["id"].'][subid]" value="'.$subid.'" /><br />
	    ';


	}
	$content = <<<EOF
	<form action="subscribers_edit.php" method='POST'>
	    <p>
	        <label for="name">Name:</label><br />
	        <input type='text' name='name' class="text" value="$name" />
	    </p>
	    <p>
	        <label for="email">Email</label><br />
	        <input type="text" name="email" class="text" value="$email" />
	    </p>
	    <p>
	        <strong>Newsletters:</strong><br />
	        $subscriptions
	    </p>
	    <p>
	        <input type='submit' value='Edit Subscriber' />
	        <input type='hidden' value='1' name='submitted' />
	        <input type='hidden' value='$id' name='id' />
	    </p>
	</form>
	EOF;
	include 'layout.php'; ?>
This page is fairly different so I will explain each part. The header is the same we have been using. I'll skip the POST block and come back to it. We then continue the same code. We next find our current subscriber. Next we find all newsletters (this includes ones that are not visible - visible mean visible to the public) and then all of the subscriber's subscriptions. We next loop through every newsletter record returned, we next reset some values. Next, we loop through every subscription the user has, and if the subscription's newsletter_id is equal to the current newsletter we are looping we set $s true, and $subid equal to the subscription id. We then set the variable $checked equal to either checked or nothing depending on whether a subscription was found for this subscriber and the current newsletter in the loop. Next we create the checkbox form area, with a lot of hidden fields. First, we have the actual checkbox with a name that will create an array for each checkbox. We then have our label, and next we output whether or not the subscription exists, the newsletter_id and then the subscription_id for when the subscription exists. After which we have our normal content.
Now, if we move on to our POST block. We first get the id posted from our hidden field at the bottom. We next create our MySQL link. Next we have our first SQL query where we update the subscriber record. Next we loop through every newsletter checkbox. The first conditional statement checks to see if the POSTed data says we do not have an existing subscription, and the user wants to subscribe to the newsletter. To handle this, we are going to perform a SQL INSERT into our subscriptions table where our subscriber_id is the same as the user_id we are editing, and newsletter_id equal to the 'nlid' value POSTed by one of our hidden fields. We then execute that SQL INSERT query. The elseif conditional statement says that if our subscription exists, but the checkbox was unchecked so we unsubscribe, we need to delete the subscription. We handle this with a SQL DELETE query. To form our query we set $subid equal to the posted value for our 'subid'. We then create our query by deleting the record where the subscription id equals our variable of $subid. Next we execute the query, set our session success message, and then redirect back to our subscribers page. Your final edit page should look like:(filled with sample data)


We have one last page to work on for the subscribers part of the backend:the delete page. Just like before, this page is very simple:
# admin/subscribers_delete.php
	<?php
	require_once 'config.php';
	login_required();
	$id = (int) $_GET['id'];
	$link = new mysqli(DB_SERVER, DB_USER, DB_PASSWORD, DB_NAME) or die('There was a problem connecting to the database.');
	$sql = "DELETE FROM subscribers WHERE id=$id LIMIT 1";
	$stmt = $link->query($sql) or die($link->error);
	if($link->affected_rows) {
	    $_SESSION['success'] = "Subscriber deleted.";
	} else {
	    $_SESSION['error'] = 'Nothing deleted.';
	}
	header('Location: subscribers.php');
Step 8:Messages
I will tell you upfront, this section has the most pages. We will be working with seven now, and creating one more in Step 10. First, we are going to create our messages table with this SQL:
CREATE TABLE `messages` (
	   `id` tinyint(10) AUTO_INCREMENT,
	   `subject` varchar(255),
	   `leftcol` text,
	   `rightcol` text,
	   `template_id` tinyint(10),
	   PRIMARY KEY (`id`)
	) ENGINE=MyISAM DEFAULT CHARSET utf8;
Next, we'll create the files for this step. Creates seven files, each named messages.php, messages_delete.php, messages_edit.php, messages_new.php, messages_new_step2.php, messages_new_step3.php, and messages_preview.php. Let's first open up messages.php and make it look like:
# admin/messages.php
	<?php
	require_once 'config.php';
	login_required();
	$title = "messages";
	$tab = 'mess';
	$table = "";
	$messages = query("SELECT * FROM messages ORDER BY id ASC");
	foreach($messages as $row) {
	    $slink = '<a href="messages_send.php?id='.$row['id'].'" title="send message"><img src="media/images/email_go.png" alt="send message"/></a>';
	    $plink = '<a href="messages_preview.php?id='.$row['id'].'" target="_new" title="preview"><img src="media/images/find.png" alt="preview"/></a>';
	    $dlink = '<a href="messages_delete.php?id='.$row['id'].'" onclick="return confirm(\'Are you sure you want to delete this message?\');" title="delete"><img src="media/images/delete.png" alt="delete"/></a>';
	    $elink = '<a href="messages_edit.php?id='.$row['id'].'" title="edit"><img src="media/images/page_edit.png" alt="edit"/></a>';
	    $table .= '<tr><td>'.$row['id'].'</td><td>'.$row['subject'].'</td><td><a href="" onClick="window.open(\'templates_preview.php?id='.$row['template_id'].'\',width=800,height=600)" title="preview"><img src="media/images/find.png" alt="preview"/></a></td><td>'.$slink.' '.$plink.' '.$dlink.' '.$elink.'</td></tr>';
	}
	$message = error_messages();
	$content = <<<EOF
	<a href="messages_new.php" class="large">new message »</a>
	$message
	<table>
	    <tr>
	        <th></th>
	        <th>subject</th>
	        <th>template</th>
	        <th></th>
	    </tr>
	    $table
	</table>
	EOF;
	include 'layout.php'; ?>
This is our routine table, except we now have 4 'extra' links now, one to send the message, one to preview, one to edit, and one to delete. Your page should look like:


Now we are going to start work on our new pages. The first page is where all messages start out, and then you can progress on and enter the actual message on the next page. The reason for this is because we first need to create the initial message in the DB and so we can find information about the template. The step2 page is basically the edit page (there are six line differences according to FileMerge). Open up our new file and paste the following:
# admin/messages_new.php
	<?php
	require_once 'config.php';
	login_required();
	$tab = 'mess';
	if(isset($_POST['subject'])) {
	    $link = new mysqli(DB_SERVER, DB_USER, DB_PASSWORD, DB_NAME) or die('There was a problem connecting to the database.');
	    $sql = "INSERT INTO messages (subject, template_id) VALUES ( '".$_POST['subject']."' , ".$_POST['template'].")";
	    $stmt = $link->query($sql) or die($link->error);
	    $i = query("SELECT id FROM messages WHERE subject='".$_POST['subject']."' AND template_id=".$_POST['template']." ");
	    $id = $i[0]['id'];
	    $stmt->close;
	    $_SESSION['success'] = "Added template.";
	    header('Location: messages_new_step2.php?id=' + $id);
	}
	$title = "new message";
	$templates = query("SELECT id,name,columns FROM templates");
	$tselect = '<select name="template">';
	foreach($templates as $row) {
	    $tselect .= '<option value="'.$row['id'].'">'.$row['name'].'</option>';
	}
	$tselect .= "</select>";
	$content = <<<EOF
	<form action="messages_new.php" method='POST'>
	    <p>
	        <label for="subject">Subject:</label><br />
	        <input type='text' name='subject' class="text" />
	    </p>
	    <p>
	        <label for="template">Template:</label>
	        $tselect
	    </p>
	    <p>
	        <button onclick="">Continue »</button>
	    </p>
	</form>
	EOF;
	include 'layout.php'; ?>
This page is very similar to what our other new pages look like, but this one was one change in the POST block. Right after we perform the SQL INSERT, we find the most recent insert id. Now this is not the perfect solution, but I prefer it to performing another SQL query to find a row using unindexed columns. This step should look like:


We then redirect to step2, so let's open up the file:
# admin/messages_new_step2.php
	<?php
	require_once 'config.php';
	login_required();
	$title = "new message - step 2";
	$tab = 'mess';
	$id = (int) $_GET['id'];

	$mess = query("SELECT * FROM messages WHERE id=$id");
	$message = $mess[0];
	$subject = $message['subject'];

	$templates = query("SELECT id,name,columns FROM templates");
	$tselect = '<select name="template">';
	foreach($templates as $row) {
	    if($message['template_id'] == $row['id']) {
	        $selected = ' selected="selected"';
	        if($row['columns'] == "1") {
	            $textareas = '<p><label for="body">Body: (raw html)</label><br /><textarea name="body" rows="35"></textarea></p>';
	        } else {
	            $textareas = '<p><label for="leftcol">Left column: (raw html)</label><br /><textarea name="leftcol" rows="35"></textarea></p>
	            <p><label for="rightcol">Right column: (raw html)</label><br /><textarea name="rightcol" rows="35"></textarea></p>';
	        }

	    } else {$selected = '';}
	    $tselect .= '<option value="'.$row['id'].'"'.$selected.'>'.$row['name'].'</option>';
	}
	$tselect .= '</select>';

	// Check for a POST
	if(isset($_POST['submitted'])) {
	    $link = new mysqli(DB_SERVER, DB_USER, DB_PASSWORD, DB_NAME) or die('There was a problem connecting to the database.');
		$template = query("SELECT columns FROM templates WHERE id=".$message['template_id']);
	    if($template[0]['columns'] == "1") {
	        $body = mysql_real_escape_string($_POST['body']);
	        $sql = "UPDATE messages SET subject='".$_POST['subject']."', leftcol='$body' WHERE id=$id";
	    } else {
	        $leftcol = mysql_real_escape_string($_POST['leftcol']);
	        $rightcol = htmlentities($_POST['rightcol']);
	        $sql = "UPDATE messages SET subject='".$_POST['subject']."', leftcol='$leftcol', rightcol='$rightcol' WHERE id=$id";
	    }
	    $stmt = $link->query($sql) or die($link->error);
	    $stmt->close;
	    header('Location: messages_new_step3.php?id='.$id);
	}

	$content = <<<EOF
	<form action="messages_new_step2.php?id=$id" method='POST'>
	    <p>
	        <label for="subject">Subject:</label><br />
	        <input type='text' name='subject' class="text" value="$subject"/>
	    </p>
	    <p>
	        <label for="template">Template:</label>
	        $tselect
	    </p>
	    $textareas
	    <p>
	        <input type='submit' value='Continue »' />
	        <input type='hidden' value='1' name='submitted' />
	    </p>
	</form>
	EOF;
	include 'layout.php'; ?>
Hopefully you have gotten the gist of all the pages and understand the page above. We have our normal heading. we then set our id from our GET request. Next we find the message we are working with, then we find all the templates and construct a drop down. We also use this look to define whether we will have one or two textareas. Next we have our POST block, which creates the link, then checks to see if we are working with one or two columns and creates the appropriate SQL query. After that we have our form. Your form should look like:


Now we will continue onto step 3, so open up the file and paste:
# admin/messages_new_step3.php
	<?php
	require_once 'config.php';
	login_required();
	$title = "new message - step 3";
	$id = (int) $_GET['id'];
	$tab = 'mess';

	$mess = query("SELECT * FROM messages WHERE id=$id");
	$message = $mess[0];
	$subject = $message['subject'];

	$content = <<<EOF
	<a href="messages_preview.php?id=$id" class="large" target="_new">preview »</a><br />
	<p>Do you want to <a href="messages.php" class="large">return to messages</a> or <a href="messages_send.php?id=$id" class="large">send the message</a>?</p>
	EOF;
	include 'layout.php';
	?>
The page is very simple and is the end of creating a message. It offers us a few links. The first is a link to preview the message. The next offers to take us back home. The third offers to take us to send the message (Step 10). The page looks like:


Now we are going to continue on to our edit page. I will not explain it as it is the same file as messages_new_step2.php, so you can refer there.
# admin/messages_edit.php
	<?php
	require_once 'config.php';
	login_required();
	$title = "edit message";
	$id = (int) $_GET['id'];
	$tab = 'mess';

	$mess = query("SELECT * FROM messages WHERE id=$id");
	$message = $mess[0];
	$subject = $message['subject'];

	$templates = query("SELECT id,name,columns FROM templates");
	$tselect = '<select name="template">';
	foreach($templates as $row) {
	    if($message['template_id'] == $row['id']) {
	        $selected = ' selected="selected"';
	    } else {$selected = '';}
	    $tselect .= '<option value="'.$row['id'].'"'.$selected.'>'.$row['name'].'</option>';
	}
	$tselect .= '</select>';

	$mid = $message['template_id'];
	$template = query("SELECT id,name,columns FROM templates WHERE id=$mid");
	if($template[0]['columns'] == "1") {
	    $textareas = '<p><label for="body">Body: (raw html)</label><br /><textarea name="body" rows="35">'.$message['leftcol'].'</textarea></p>';
	} else {
	    $textareas = '<p><label for="leftcol">Left column: (raw html)</label><br /><textarea name="leftcol" rows="35">'.$message['leftcol'].'</textarea></p>
	    <p><label for="rightcol">Right column: (raw html)</label><br /><textarea name="rightcol" rows="35">'.$message['rightcol'].'</textarea></p>';
	}

	// Check for a POST
	if(isset($_POST['submitted'])) {
	    $link = new mysqli(DB_SERVER, DB_USER, DB_PASSWORD, DB_NAME) or die('There was a problem connecting to the database.');
	    if($template[0]['columns'] == "1") {
	        $body = mysql_real_escape_string($_POST['body']);
	        $sql = "UPDATE messages SET subject='".$_POST['subject']."', leftcol='$body' WHERE id=$id";
	    } else {
	        $leftcol = mysql_real_escape_string($_POST['leftcol']);
	        $rightcol = htmlentities($_POST['rightcol']);
	        $sql = "UPDATE messages SET subject='".$_POST['subject']."', leftcol='$leftcol', rightcol='$rightcol' WHERE id=$id";
	    }
	    $stmt = $link->query($sql) or die($link->error);
	    $stmt->close;
	    $_SESSION['success'] = "Edited message.";
	    header('Location: messages.php');
	}

	$content = <<<EOF
	<form action="messages_edit.php?id=$id" method='POST'>
	    <p>
	        <label for="subject">Subject:</label><br />
	        <input type='text' name='subject' class="text" value="$subject"/>
	    </p>
	    <p>
	        <label for="template">Template:</label>
	        $tselect
	    </p>
	    $textareas
	    <p>
	        <input type='submit' value='Save »' />
	        <input type='hidden' value='1' name='submitted' />
	    </p>
	</form>
	EOF;
	include 'layout.php'; ?>
The page will look almost identical to our step 2, but the textarea will have content. Now we will create the delete page with:
# admin/messages_delete.php
	<?php
	require_once 'config.php';
	login_required();
	$id = (int) $_GET['id'];
	$link = new mysqli(DB_SERVER, DB_USER, DB_PASSWORD, DB_NAME) or die('There was a problem connecting to the database.');
	$sql = "DELETE FROM messages WHERE id=$id LIMIT 1";
	$stmt = $link->query($sql) or die($link->error);
	if($link->affected_rows) {
	    $_SESSION['success'] = "Message deleted.";
	} else {
	    $_SESSION['error'] = 'Nothing deleted.';
	}
	header('Location: messages.php'); ?>
That page should also look familiar. The final page we are going to work on in this step is our preview page, so open it up and place:
# admin/messages_preview.php
	<?php
	require_once 'config.php';
	login_required();
	$id = (int) $_GET['id'];

	$mess = query("SELECT * FROM messages WHERE id=$id");
	$message = $mess[0];
	$subject = $message['subject'];
	$tid = $message['template_id'];

	$data = query("SELECT body,columns FROM templates WHERE id=$tid LIMIT 1");
	$template = $data[0]['body'];

	if($data[0]['columns'] == "1") {
	    $leftcol = $message['leftcol'];
	    $body = str_replace('%content%', $leftcol, $template);
	} else {
	    $leftcol = $message['leftcol'];
	    $rightcol = $message['rightcol'];
	    $b = str_replace('%leftcol%', $leftcol, $template);
	    $body = str_replace('%rightcol%', $rightcol, $b);
	}
	?>
	<?php echo $body; ?>
	<button type="button" onclick="self.close();">close window</button>
This file is somewhat different than you have seen, so I'll walk you through it. First have have our normal heading. Next we find the current message we are working with, and set a few variables to the results. Next we find the template we are working with and set a variable equal to the body. Next, we have a conditional statement that checks to see the number of columns the template has. If it has we use the PHP function str_replace to replace the %content% tag we have with our actual content. Otherwise, we first perform a str_replace for the left column, and then on the result of that we perform str_replace again for the right column. Now we are ready to continue onto the front-end.
Step 9:The Front-End
We have finally reached the front-end! For this step and this step only, I will assume the files we are working with are in the root of the project (so not the admin folder, the one containing it). We are going to be working with four files here, so go ahead and create index.php, preferences.php, subscribe.php and a style.css file. First open up our index.php file and paste:
# index.php
	<?php
	require_once 'admin/config.php';
	$newsletters = query("SELECT * FROM newsletters WHERE visible=1");
	$subscriptions = '';
	foreach($newsletters as $nl) {
	    $subscriptions .= '
	    <input type="checkbox" name="newsletter['.$nl["id"].'][subscribe]" value="true" '.$checked.'/>
	    <label for="newsletter['.$nl["id"].']">'.$nl['name'].'</label>
	    <input type="hidden" name="newsletter['.$nl["id"].'][nlid]" value="'.$nl['id'].'" /><br />
	    '.$nl["description"].'<br />
	    ';
	}
	?>
	<!DOCTYPE html PUBLIC "-//W3C//DTD XHTML 1.1//EN" "https://www.w3.org/TR/xhtml11/DTD/xhtml11.dtd">
	<html xmlns="https://www.w3.org/1999/xhtml" >
	    <head>
	        <meta http-equiv="Content-Type" content="text/html; charset=utf-8" />

	        <title>my newsletters</title>
	        <!-- Stylesheets -->
	        <link rel="stylesheet" href="style.css" type="text/css" media="all" />
	    </head>
	    <body>
	        <div id="header">
	            <h1>my newsletters</h1>
	        </div>
	        <div id="container">
	            <h3>Subscribe to our newsletters!</h3>
	            <form action="subscribe.php" method="POST">
	                <p>
	                    <label for="name">Name:</label><br />
	                    <input type='text' name='name' class="text" />
	                </p>
	                <p>
	                    <label for="email">Email</label><br />
	                    <input type="text" name="email" class="text" />
	                </p>
	                <p>
	                    <strong>Newsletters:</strong><br />
	                    <?php echo $subscriptions; ?>
	                </p>
	                <p>
	                    <input type='submit' value='Subscribe »' />
	                    <input type='hidden' value='1' name='submitted' />
	                </p>
	            </form>
	        </div>
	    </body>
	</html>
I'll explain the page first and then we will get to the picture so-far and the page styling. In the PHP section at the top we require our config.php file (now in the admin directory), then find all of our publicly visible newsletters and create a check box array. You will notice that we are not handling the POSTed data here, and I chose to do that in our subscribe.php, and we will get to that, but first let's style the page. The page should currently look like:

First I added the 960.gs reset file like I did in our other stylesheet. Then I added the three following styles to make the design look like:
# style.css
	#header, #container {width:65%;margin:0 auto; padding:0.7%;}
	#container {background:#ccc;}
	form input.text {width:95%; font-size:16px;}
#message.success {border:solid 1px #349534; background:#C9FFCA;color:#008000;} 

So now that we have a clean and simple page, we are going to continue on and work on our subscribe.php file. Go ahead and open the file and paste:
# subscribe.php
	<?php
	require_once 'admin/config.php';

	if(isset($_POST['submitted'])) {
	    $link = new mysqli(DB_SERVER, DB_USER, DB_PASSWORD, DB_NAME) or die('There was a problem connecting to the database.');
	    $name = $_POST['name'];
	    $email = $_POST['email'];

	    $sql = "INSERT INTO subscribers (name, email) VALUES ('$name', '$email')";
	    $stmt = $link->query($sql) or die($link->error);
	    $stmt->close;

	    $sql = "SELECT id FROM subscribers WHERE name='$name' AND email='$email' LIMIT 1";
	    $subscriber = query($sql);
	    $id = $subscriber[0]['id'];

	    foreach($_POST['newsletter'] as $n) {
	        if($n['subscribe'] == "true") { // If we want to subscribe but the record doesnt exist
	            $nlid = $n['nlid'];
	            $sql = "INSERT INTO subscriptions (subscriber_id, newsletter_id) VALUES ('$id', '$nlid')";
	            $stmt = $link->query($sql) or die($link->error);
	            $stmt->close;
	        }
	    }
	} else {header('Location: index.php');}
	?>
	<!DOCTYPE html PUBLIC "-//W3C//DTD XHTML 1.1//EN" "https://www.w3.org/TR/xhtml11/DTD/xhtml11.dtd">
	<html xmlns="https://www.w3.org/1999/xhtml" >
	    <head>
	        <meta http-equiv="Content-Type" content="text/html; charset=utf-8" />

	        <title>my newsletters</title>
	        <!-- Stylesheets -->
	        <link rel="stylesheet" href="style.css" type="text/css" media="all" />
	    </head>
	    <body>
	        <div id="header">
	            <h1>my newsletters</h1>
	        </div>
	        <div id="container">
	            <h3>Thank you for subscribing!</h3>
	        </div>
	    </body>
	</html>
This page is very much like our edit subscribers page, but no DELETE SQL queries happen here. We simply check to make sure we have all POSTed data. We then set a few variables to our POSTed data, and then create and perform a SQL INSERT query to add the person to our subscribers table. After which we perform a SQL query to find that just created subscriber (insert_id was not working this time for me). We then loop through all of the POSTed newsletters and check to see if we want to subscribe to them, and perform SQL INSERTs when needed. If all goes to plan, you see a nice screen like the one below:


We have on last page here to work on, and that is the preferences.php file. This is where a user can edit their email subscription. I am going to split the page in two. First we have our PHP block:
# preferences.php
	<?php
	require_once 'admin/config.php';

	if(isset($_POST['submitted'])) {
	    $id = (int) $_POST['id'];
	    $link = new mysqli(DB_SERVER, DB_USER, DB_PASSWORD, DB_NAME) or die('There was a problem connecting to the database.');
	    $sql = "UPDATE subscribers SET name='".$_POST['name']."', email='".$_POST['email']."' WHERE id=$id";
	    $stmt = $link->query($sql) or die($link->error);
	    $stmt->close;

	    foreach($_POST['newsletter'] as $n) {
	        if($n['exists'] != '1' && $n['subscribe'] == "true") { // If we want to subscribe but the record doesnt exist
	            $nlid = $n['nlid'];
	            $sql = "INSERT INTO subscriptions (subscriber_id, newsletter_id) VALUES ('$id', '$nlid')";
	            $stmt = $link->query($sql) or die($link->error);
	            $stmt->close;
	        } elseif ($n['exists'] == '1' && $n['subscribe'] != "true") {// Else if we had an exits but we want to unsubscribe
	            $subid = $n['subid'];
	            $sql = "DELETE FROM subscriptions WHERE id=$subid LIMIT 1";
	            $stmt = $link->query($sql) or die($link->error);
	            $stmt->close;
	        }
	    }
	    $_SESSION['success'] = "Preferences saved.";
	}

	if(isset($_GET['email'])) {$email = $_GET['email']; $display = 'form';} else {$display = 'find';}

	$subscriber = query("SELECT * FROM subscribers WHERE email='$email'");
	if($subscriber || $display == 'find') {
	    $id = $subscriber[0]['id'];
	    $name = $subscriber[0]['name'];
	    $email = $subscriber[0]['email'];
	} else {header('Location: index.php');}

	$newsletters = query("SELECT * FROM newsletters WHERE visible=1");
	$subs = query("SELECT * FROM subscriptions WHERE subscriber_id='".$id."'");
	$subscriptions = '';
	foreach($newsletters as $nl) {
	    $s = false;
	    $subid = '';
	    foreach($subs as $sub) {
	        if($sub['newsletter_id'] == $nl['id']) {$s = true; $subid = $sub['id'];}
	    }
	    $checked = ($s == true) ? 'checked="checked"' : '';
	    $subscriptions .= '
	    <input type="checkbox" name="newsletter['.$nl["id"].'][subscribe]" value="true" '.$checked.'/>
	    <label for="newsletter['.$nl["id"].']">'.$nl['name'].'</label>
	    <input type="hidden" name="newsletter['.$nl["id"].'][exists]" value="'.$s.'" />
	    <input type="hidden" name="newsletter['.$nl["id"].'][nlid]" value="'.$nl['id'].'" />
	    <input type="hidden" name="newsletter['.$nl["id"].'][subid]" value="'.$subid.'" /><br />
	    ';
	}
	$message = error_messages();
	?>
In this block, a lot is going on. First, we include our config file. Next, we check for a POST, and if we have one, we update our database. This portion is copied exactly from our subscribers_edit.php file so you can look there for a bit more explanation. Next depending on if we have a get request, we set our variable (this variable is used in the HTML section of the page). We then look for a subscriber with that email, and if one exists or we are showing the find portion, we continue, otherwise we are redirected home. Next we find all of our newsletters, and all of the subscriber's subscriptions, and then create our checkbox form. The HTML portion looks like:
# preferences.php
	<!DOCTYPE html PUBLIC "-//W3C//DTD XHTML 1.1//EN" "https://www.w3.org/TR/xhtml11/DTD/xhtml11.dtd">
	<html xmlns="https://www.w3.org/1999/xhtml" >
	    <head>
	        <meta http-equiv="Content-Type" content="text/html; charset=utf-8" />

	        <title>my newsletters - my preferences</title>
	        <!-- Stylesheets -->
	        <link rel="stylesheet" href="style.css" type="text/css" media="all" />
	    </head>
	    <body>
	        <div id="header">
	            <h1>my newsletters</h1>
	        </div>
	        <div id="container">
	            <h3>my preferences</h3>
	            <?php if($display == 'form') {?>
	            <form action="preferences.php" method="POST">
	                <p>
	                    <label for="name">Name:</label><br />
	                    <input type='text' name='name' class="text" value="<?php echo $name; ?>"/>
	                </p>
	                <p>
	                    <label for="email">Email</label><br />
	                    <input type="text" name="email" class="text" value="<?php echo $email; ?>"/>
	                </p>
	                <p>
	                    <strong>Newsletters:</strong><br />
	                    <?php echo $subscriptions; ?>
	                </p>
	                <p>
	                    <input type='submit' value='Save my preferences »' />
	                    <input type='hidden' value='1' name='submitted' />
	                    <input type='hidden' value='<?php echo $id; ?>' name='id' />
	                </p>
	            </form>
	            <?php } else { ?>
	            <?php echo $message; ?>
	            <form action='preferences.php' method="get">
	                <p>
	                    <label for="email">Email</label><br />
	                    <input type="text" name="email" class="text" />
	                </p>
	                <p>
	                    <input type='submit' value='Find »' />
	                </p>

	            </form>
	            <?php } ?>
	        </div>
	    </body>
	</html>
In our HTML block we have two forms and some PHP to choose which one to display. The top form is the form the user sees if a record in the database has been found. The second form is for entering your email and having the system find it. The second form looks like:


And the first looks like:

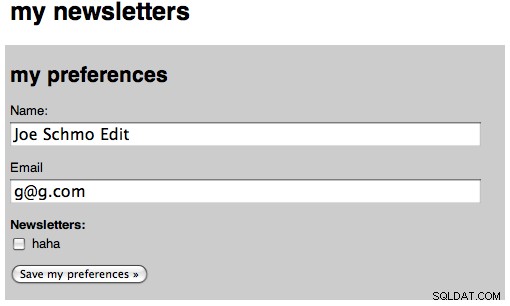
And the second form after we saved our preferences:


Now that we have finished the front-end, we have one last step:sending the emails!
Step 10:Sending Messages
Our last step is to work on the page to send our message. We will be working in the admin directory, and only one file will be created. Go ahead and create our messages_send.php file and place the following in it:
# admin/messages_send.php
	<?php
	require_once 'config.php';
	login_required();
	$title = "send message";
	$id = (int) $_GET['id'];
	$tab = 'mess';

	if(isset($_POST['submitted'])) {
	    $query = "SELECT * FROM subscribers WHERE id=0 ";
	    $emails = array();
	    foreach($_POST['newsletter'] as $n) {
	        if($n['send'] == "true") {
	            $nlid = $n['nlid'];
	            $e = query("SELECT subscriber_id FROM subscriptions WHERE newsletter_id=$nlid");
	            foreach($e as $s) {
	                $sqlids .= " OR id=".$s['subscriber_id'];
	            }
	            $query .= $sqlids;
	        }
	    }
	    $subscribers = query($query);
	    foreach($subscribers as $sub) {
	        $emails[$sub['email']] = $sub['name'];
	    }
	    $from = array(FROM_EMAIL => FROM_NAME);
	    // BODY RENDERING
	    $mess = query("SELECT * FROM messages WHERE id=$id");
	    $message = $mess[0];
	    $subject = $message['subject'];
	    $tid = $message['template_id'];

	    $data = query("SELECT body FROM templates WHERE id=$tid LIMIT 1");
	    $template = $data[0]['body'];

	    if($message['rightcol'] == '') {
	        $leftcol = $message['leftcol'];
	        $body = str_replace('%content%', $leftcol, $template);
	    } else {
	        $leftcol = $message['leftcol'];
	        $rightcol = $message['rightcol'];
	        $b = str_replace('%leftcol%', $leftcol, $template);
	        $body = str_replace('%rightcol%', $rightcol, $b);
	    }

	    send_email_to_mass($from, $emails, $body, $subject) or die('lol');
	    header('Location: index.php');
	}

	$newsletters = query("SELECT * FROM newsletters");
	foreach($newsletters as $nl) {
	    $nls .= '
	    <input type="hidden" name="newsletter['.$nl["id"].'][nlid]" value="'.$nl['id'].'" />
	    <input type="checkbox" name="newsletter['.$nl["id"].'][send]" value="true" '.$checked.'/>
	    <label for="newsletter['.$nl["id"].']">'.$nl['name'].'</label> - '.$nl['description'].'<br />
	    ';
	}
	$mess = query("SELECT * FROM messages WHERE id=$id");
	$message = $mess[0];
	$subject = $message['subject'];

	$content = <<<EOF
	<a href="messages_preview.php?id=$id" class="large" target="_new">preview »</a><br />
	<form action='messages_send.php?id=$id' method="POST">
	    <p>
	        Subject: $subject<br />
	    </p>
	    <p>Send to:<br />
	        $nls
	    </p>
	    <p>
	        <input type='submit' value='Send »' />
	        <input type='hidden' value='1' name='submitted' />
	    </p>
	</form>
	EOF;
	include 'layout.php'; ?>
The first part we again require our config, then make sure the user is logged in, then our title, make sure our id is an integer, and then set our tab. Next we have our complicated post block. First we set up our base query, and running just that would return 0 records, which is good because that means no users will be send the newsletter. Next we loop through every newsletter that we want to send to, and find all of the subscriptions for that newsletter. We then create a string that will be appended to our original SQL query so that we can find every subscriber. Now, we run that query and create an array where the keys are the emails and the name is the value, and this helps us use names when the user looks at the email in their mail application, showing the TO:as their name. We next find the message we are working with, and set the subject, message, and template id to variables. We then find our template and set the body to a variable. Then we use the same code from the message preview to replace the strings inside the template the the parts of the message. Then we call our yet-to-be-created-function send_email_to_mass and then redirect home.
Leaving our POST block, we create the same checkbox list of newsletters so the admin can pick which one(s) he wants to send the message to. Then we have a simple form that looks like:


Now, open up our classes.php file and add the following function:
# admin/classes.php
	// EMAIL
	function send_email_to_mass($from, $recipients, $body, $subject) {
	    require_once 'swift/lib/swift_required.php'; //require lib

	    $transport = Swift_MailTransport::newInstance();
	    $mailer = Swift_Mailer::newInstance($transport) or die('Error creating mailer.');
	    $message = Swift_Message::newInstance($subject)
	        ->setFrom($from)
	        ->setTo($recipients)
	        ->setBody($body, 'text/html') or die('error here.');
	    $result = $mailer->batchSend($message);

	    return true;
	}
So first, we have our function declaration, and it expects four variables to be passed to it, from, recipients, body, and subject. Next we require the sqift_required.php file of our Swift Mailer Library. Next we create a new Mail Transport (this uses the PHP mail function, so it would be sending from your local machine, for the documentation on the three transport types, see the documentation). Next we create a mailer using that transport. Then we create a new message from our subject, then set our from, to, and body. Then we use the batch_send function so that each recipient only sees themselves on the email, and no one else.
There is one possibly downside of doing it the way I have, and that is if you are sending many messages, the page may take forever to load. A solution to tthis would be running a Javascript AJAX request to send each and every message, but I won't cover that here. Now that we have finished working on sending messages, we are going to spice up the home page and then we will be done!
Step 11:The Homepage
When you load the admin index, the page does not really do much. I want to have some 'stats' on our homepage, and we will finally use the count_query function. Open up the admin index file and change it to look like:
# admin/index.php
	<?php
	require_once 'config.php';
	login_required();
	$users = count_query("SELECT COUNT(*) AS num FROM users");
	$emails = count_query("SELECT COUNT(*) AS num FROM subscribers");
	$subs = count_query("SELECT COUNT(*) AS num FROM subscriptions");
	$nls = count_query("SELECT COUNT(*) AS num FROM newsletters");
	$mess = count_query("SELECT COUNT(*) AS num FROM messages");
	$temps = count_query("SELECT COUNT(*) AS num FROM templates");
	$title = "Home!";
	$content = <<<EOF
	<h3>current stats</h3>
	<p>$users user registered</p>
	<p>$emails subscribers</p>
	<p>$subs newsletter subscriptions</p>
	<p>$nls newsletters</p>
	<p>$mess messages</p>
	<p>$temps templates</p>
	EOF;
	include 'layout.php'; ?>
The page is very simple. We require our config, make sure we are logged in, then we perform six count queries, one for each of our tables and then output that. This is what the final page look like: